Pioneer MVH-P8200 Owner's Manual
Pioneer MVH-P8200 Manual
 |
UPC - 012562976068
View all Pioneer MVH-P8200 manuals
Add to My Manuals
Save this manual to your list of manuals |
Pioneer MVH-P8200 manual content summary:
- Pioneer MVH-P8200 | Owner's Manual - Page 1
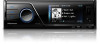
English Français Español MEDIA CENTER RECEIVER AUTORADIO MULTIMEDIA RECEPTOR Y CENTRO DE COMUNICACIONES MVH-P8200BT MVH-P8200 Operation Manual Mode d'emploi Manual de instrucciones - Pioneer MVH-P8200 | Owner's Manual - Page 2
this unit 6 Operating environment 6 After-sales service for Pioneer products 7 In case of trouble 7 Visit our website 7 Resetting the microprocessor 7 Demo mode 7 About this manual 8 Operating this unit Head unit 9 Remote control 9 Basic Operations 10 Use and care of the remote control 11 Basic menu - Pioneer MVH-P8200 | Owner's Manual - Page 3
HD Radioä tuner 40 - Basic Operations 40 - Storing and recalling stations 40 - Using iTunes Using the Instant Replay function 44 Additional Information Troubleshooting 45 Error messages 45 Understanding auto EQ error messages 48 Indicator list 48 Handling guideline 49 Compressed audio/video - Pioneer MVH-P8200 | Owner's Manual - Page 4
safety information. 3 Pay close attention to all warnings in this manual and follow the instructions carefully. 4 Do not allow other persons to use this system until they have read and understood the operating instructions. 5 Do not install the display where it may (i) obstruct the driver's vision - Pioneer MVH-P8200 | Owner's Manual - Page 5
the parking brake is set. If you attempt to use the functions described above while driving, they will become disabled until you stop the vehicle in a safe place, and (1) apply the parking brake, (2) release the parking brake, and then (3) apply the parking brake again. Please keep the brake pedal - Pioneer MVH-P8200 | Owner's Manual - Page 6
MVH-P8200BT IC: 775E-K029 This equipment complies with FCC/IC radiation exposure limits set forth for uncontrolled equipment and meets the FCC/IC radio own security and convenience, be sure to record this number on the enclosed warranty card. Operating environment This unit should be used within the - Pioneer MVH-P8200 | Owner's Manual - Page 7
Before using this unit for the first time after installation ! If the unit fails to operate properly ! When strange or incorrect messages ap- pear on the display In case of trouble Should this product fail to operate properly, please contact your dealer or nearest authorized Pioneer Service Station - Pioneer MVH-P8200 | Owner's Manual - Page 8
manual This manual describes operations of both MVH-P8200BT and MVH-P8200. Only MVHP8200BT features Bluetooth functions, so the explanations for those functions do not apply to MVH-P8200. In the following instructions devices." In this manual, iPod and iPhone will be referred to as "iPod". 8 En - Pioneer MVH-P8200 | Owner's Manual - Page 9
Operating this unit Head unit Remote control Only for MVH-P8200. Section 03 English Only for MVH-P8200BT. Part 1 HOME 2 SRC/OFF 3 MULTI-CONTROL (M.C.) 4 USB port Part AUX input jack (3.5 mm stereo/video 5 jack) Microphone input jack for auto EQ measurement 6 (back/display off) 7 Detach - Pioneer MVH-P8200 | Owner's Manual - Page 10
audio)- Video (DivX video files)-Photo (JPEG picture files) Press to return to the ordinary dis- play from the list/function menu. Press to cancel the initial setting menu. Move to perform manual seek tuning, fast forward, reverse and track search controls. Also used for controlling - Pioneer MVH-P8200 | Owner's Manual - Page 11
off. Only for MVH-P8200BT. WARNING ! Keep the battery out of the reach of children. Should the battery be swallowed, consult a doctor immediately. ! Batteries (battery pack or batteries installed) must not be exposed to excessive heat such as sunshine, fire or the like. CAUTION ! Use one CR2025 - Pioneer MVH-P8200 | Owner's Manual - Page 12
remote control fall onto the floor, where it may become jammed under the brake or accelerator pedal. Basic menu operations You can operate source selection, list function, audio adjustment, etc., using 1 Press M.C. to display the setting mode. 2 Use M.C. to select the desired source name. Turn to - Pioneer MVH-P8200 | Owner's Manual - Page 13
to cancel the registered menu. About guide information This unit displays guide information on how to use M.C. for each function. 1 Display # Press M.C. to display the next page. Using Bluetooth telephone This function is available only for MVH-P8200BT. Important ! Since this unit is on standby to - Pioneer MVH-P8200 | Owner's Manual - Page 14
the Bluetooth Radio Local A-EQ 16:54 Text Text Text FM1 P.CH 2 87.9 MHz 3 2 1 Indicator display area Refer to Indicator list on page 48. 2 Text information area ! Song title ! Artist name ! Program service name ! Band/Preset number/Frequency indica- tor 3 Source image display Manual - Pioneer MVH-P8200 | Owner's Manual - Page 15
to the iPod. ! The tagged songs and the song that you can buy from the iTunes Store may be different. Make sure to confirm the song before you make the purchase. ! If you cannot use this function normally, update your iPod firmware. ! The tag information for up to 50 songs can be stored on - Pioneer MVH-P8200 | Owner's Manual - Page 16
Section 03 Operating this unit Note Operation is complete even if the menu is cancelled before being confirmed. Playing moving images Basic Operations If an iPod with video capabilities is connected to this unit using an interface cable such as the CD-IU50V (sold separately), you can enjoy the - Pioneer MVH-P8200 | Owner's Manual - Page 17
ejected. 3 Pull out the SD memory card. 4 Re-attach the front panel. Playing videos on an iPod 1 Open the USB connector cover. 2 With an interface cable (e.g., CD-IU50V), connect the iPod to a USB cable and AUX input using the iPod Dock Connector. Selecting a folder 1 Push M.C. up or down. Selecting - Pioneer MVH-P8200 | Owner's Manual - Page 18
) system. This restricts playback of content to specific, registered devices. % If a message is displayed after inserting the external storage device containing DivX VOD content, use M.C. to select a desired mode. Turn to change the mode. Press to select. ! Play - Playback of the DivX VOD content - Pioneer MVH-P8200 | Owner's Manual - Page 19
to select the desired setting. A/V Format (switching media file types) 1 Press Music (compressed audio)-Video (DivX video files)-Photo (JPEG picture M.C. to display the setting mode. 2 Use M.C. to display the desired code. Turn audio language during playback when playing a file recorded with dialog - Pioneer MVH-P8200 | Owner's Manual - Page 20
the previous page. ABC Search (alphabet search mode setting) When this setting is on, you can switch to alphabet search mode by turning M.C. twice while using the browse function of the iPod. Refer to Searching the list by alphabet on page 18. 1 Press M.C. to turn the setting for when M.C. is turned - Pioneer MVH-P8200 | Owner's Manual - Page 21
Playing audio Basic Operations 1 2 3 2345 7890 S.Rtrv A-EQ 16:54 Text 4 Text Text 8888'88" -8888'88" 5 6 7 1 File information area for the currently playing front panel. Playing songs on an iPod 1 Open the USB connector cover. 2 Connect an iPod to the USB cable using an iPod Dock - Pioneer MVH-P8200 | Owner's Manual - Page 22
for a song on the iPod Operations are the same as those for moving images. (Refer to Browsing for a video on the iPod on page 17.) The following operation is available. Playing a song in the selected category 1 When a category is selected, press and hold M.C. However, the categories in the top - Pioneer MVH-P8200 | Owner's Manual - Page 23
- Displays a song list from the album currently being played. ! Genres - Displays an album list from the genre currently being played. 3 Use M.C. to select an album or song from the list. For more details about the selection operation, refer to Browsing for a video on the iPod on page 17. ! If no - Pioneer MVH-P8200 | Owner's Manual - Page 24
not in use. ! Incompatible text stored with the video image file may not be displayed or may be displayed incorrectly. ! When playing external storage file types when playing different files. Refer to A/V Format (switching media file types) on the next page. Selecting and playing files from the - Pioneer MVH-P8200 | Owner's Manual - Page 25
play) on page 22. Play Mode (repeat play) 1 Refer to Play Mode (repeat play) on page 18. However, the repeat range is different from that of moving images. ! All - Repeat all files ! Folder - Repeat the current folder Capture (capturing an image in JPEG files) You can capture image data and use - Pioneer MVH-P8200 | Owner's Manual - Page 26
Using Bluetooth telephone on page 13. ! PIN code is set to 0000 as the default. You can change this code. Refer to PIN Code (PIN code input) on the next page. Connection menu operation Important Be sure to park your vehicle in a safe place and apply the parking brake device name (MVH-P8200BT) and - Pioneer MVH-P8200 | Owner's Manual - Page 27
Use a cellular phone to connect to this unit. While connecting, the circular indicator flashes. To complete the connection, check the device name (MVH-P8200BT first. Auto Connect (connecting to a Bluetooth device automatically to park your vehicle in a safe place and apply the parking brake when - Pioneer MVH-P8200 | Owner's Manual - Page 28
numbers) 1 Press M.C. to display the setting mode. 2 Use M.C. to select the desired preset number. Turn to change Phone Function (phone function) 28 En You can set Auto Answer and Ring Tone from this menu. For details, (phone connection) Operate the Bluetooth telephone connection menu. Refer to - Pioneer MVH-P8200 | Owner's Manual - Page 29
Auto EQ (auto-equalizer on/off) The auto-equalizer is an equalizer curve created by auto EQ (refer to Auto EQ (auto-equalizing) on page 33). You can turn the auto-equalizer on or off. 1 Press M.C. to turn the auto-equalizer on or off. You cannot use this function if auto EQ will be updated. 1 Press - Pioneer MVH-P8200 | Owner's Manual - Page 30
when using the auto- Guide Info (guide information) 1 Press M.C. to display the guide information. Refer to About guide information on page 13. Clock ADJ (date and clock) 1 Press M.C. to display the setting mode. 2 Press M.C. to select the segment of the clock dis- play the parking brake interlock - Pioneer MVH-P8200 | Owner's Manual - Page 31
. You can turn off the warning tone. 1 Press M.C. to turn warning tone on or off. AUX Input (auxiliary input) Activate this setting when using an auxiliary device connected to this unit. 1 Press M.C. to turn AUX Input on or off. Entertainment settings 1 Display the entertainment menu. Refer to - Pioneer MVH-P8200 | Owner's Manual - Page 32
is an equalizer curve created by auto EQ (refer to Auto EQ (auto-equalizing) on the next page). You can turn the auto-equalizer on or off. Rear Speaker (rear output and subwoofer setting) This unit's rear output (rear speaker leads output and RCA rear output) can be used for full-range speaker (Full - Pioneer MVH-P8200 | Owner's Manual - Page 33
M.C. to display the setting mode. 2 Use M.C. to select Yes to show a confirmation dis- play. Turn to change the mode. Press to select. To cancel, select No. Follow the on-screen instructions to finish updating the software. Auto EQ (auto-equalizing) The auto-equalizer automatically measures the car - Pioneer MVH-P8200 | Owner's Manual - Page 34
is turned off, press SRC to turn the source on. 4 Display the initial setting menu. Refer to Initial Settings on page 32. 5 Use M.C. to enter the auto EQ measurement mode. Turn to change the menu option. Press to select. 6 Plug the microphone into the microphone input jack on this unit. Performing - Pioneer MVH-P8200 | Owner's Manual - Page 35
the CD-V150M), you can enjoy the video contents of the connected iPod. ! A portable audio/video player can be connected by using a 3.5mm plug (4 pole) with ! Audio - auxiliary device connected with a stereo mini plug cable ! Video - auxiliary video device connected with 4-pole mini plug cable (e.g., - Pioneer MVH-P8200 | Owner's Manual - Page 36
1)-Function 2 (function 2)-Function 3 (function 3)-Function 4 (function 4)-Auto/Manual (auto/manual) Using the PGM button This function is available only for MVH-P8200BT. You can operate the preprogrammed functions for each source by using PGM on the remote control. % Press PGM to turn pause on when - Pioneer MVH-P8200 | Owner's Manual - Page 37
Operating this unit % Press PGM and hold to turn BSM on when selecting tuner or HD Radio as the source. Press PGM and hold until the BSM turns on. # To cancel the storage process, press PGM again. % Press PGM to select the - Pioneer MVH-P8200 | Owner's Manual - Page 38
Section 04 Detailed instructions Changing the wide screen mode You can select a desired mode for enlarging a each video source. ! When a video is viewed in a wide screen mode that does not match its original aspect ratio, it may appear different. ! Remember that using the wide mode feature of - Pioneer MVH-P8200 | Owner's Manual - Page 39
instructions Section 04 English ! Letter Box - The picture is the shape of a letterbox with black bands on the top and bottom of the screen ! Pan Scan - The picture is cut short on the right and left sides of the screen Displaying the DivXâ VOD registration code In order to play DivX VOD (video - Pioneer MVH-P8200 | Owner's Manual - Page 40
Radioä tuner You can use this unit to control an HD Radio tuner (e.g. GEX-P20HD), which is sold separately. For details concerning operation, refer to the HD Radio tuner's operation manual. Basic Operations 1 D/Aauto HD Seek A-EQ 16:54 Radio (best stations memory) Refer to BSM (best Auto - Pioneer MVH-P8200 | Owner's Manual - Page 41
manual. ! With this unit, you can operate two addi- tional functions: XM channel direct selection and preset channel list. Basic Operations 1 Category A-EQ XM channel directly This function is available only for MVH-P8200BT. When using the remote control, you can select the channel directly by - Pioneer MVH-P8200 | Owner's Manual - Page 42
category. Displaying the Radio ID 1 Select using the SIRIUS tuner, please refer to the SIRIUS operation manual. Basic Operations 1 2 Game Category A-EQ 16:54 SIRIUS Text SIRIUS1 P.CH 1 CH 110 4 3 1 Indicator display area Refer to Indicator list on page 48. 2 Text information area ! Play - Pioneer MVH-P8200 | Owner's Manual - Page 43
for the teams in advance. ! To use this function, a Pioneer SIRIUS bus inter- face (e.g. CD-SB10) is required. ! To use this function, a SIRIUS plug-and-play unit with a Game Alert Function is required. ! For details, refer to the SIRIUS plug-and-play unit's manuals. ! You can also operate this - Pioneer MVH-P8200 | Owner's Manual - Page 44
playing The game score will be updated automatically. 3 Press M.C. to not currently playing, NO GAME on page 19. Using Instant Replay mode , instant re- play mode is canceled. use this function, a Pioneer SIRIUS bus interface (e.g. CD-SB10) is required. ! To use this function, a SIRIUS plug-and- play - Pioneer MVH-P8200 | Owner's Manual - Page 45
con- cable from the nected. iPod. Once the iPod's main menu is displayed, recon- nect the iPod and reset it. The iPod version Update the iPod is old. version. Error messages When you contact your dealer or your nearest Pioneer Service Center, be sure to note the error message. En 45 - Pioneer MVH-P8200 | Owner's Manual - Page 46
memory instructions to disable security. Sometimes there Wait until the mes- is a delay be- sage disappears tween the start of and you hear playback and sound. when you start to hear any sound. The external storage device in use contains WMA files embedded with Windows Mediaä DRM 9/10 Play - Pioneer MVH-P8200 | Owner's Manual - Page 47
Video frame rate not supported The external sto- Replace the exterrage device's nal storage device. frame rate is more than 30 fps. Audio Format This type of file is Select a file that not supported not supported on can be played The iPod firm- Update the iPod ware flash memory used as the - Pioneer MVH-P8200 | Owner's Manual - Page 48
or an authorized Pioneer Service Station. Understanding auto EQ error messages When correct measurement of the car's interior acoustic characteristics is not possible using auto EQ, an error message may appear on the display. In such cases, refer to the table below to see what the problem is and - Pioneer MVH-P8200 | Owner's Manual - Page 49
USB, SD), the following problems may occur. ! Operations may vary. ! The storage device may not be recognized. ! Files may not be played back properly. USB storage device Connections via USB hub are not supported. Do not connect anything other than a USB storage device. Firmly secure the USB storage - Pioneer MVH-P8200 | Owner's Manual - Page 50
this unit. Firmly secure the iPod when driving. Do not let the iPod fall onto the floor, where it may become jammed under the brake or accelerator pedal. For details, refer to the manuals for the iPod. About iPod settings ! When an iPod is connected, this unit changes the EQ (equalizer) setting of - Pioneer MVH-P8200 | Owner's Manual - Page 51
). ! This unit plays back files with these filename extensions (.jpg, .jpeg, .jpe or .jfif) as a JPEG image file. To prevent malfunctions, do not use these extensions for files other than JPEG image files. Compressed audio/video compatibility (USB, SD) WMA File extension: .wma Bit rate: 5 kbps to - Pioneer MVH-P8200 | Owner's Manual - Page 52
with SD-Audio/SD-Video. CAUTION Pioneer accepts no responsibility for data lost on the USB memory/USB portable audio player/SD memory card even if that data is lost while using this unit. iPod compatibility This unit supports only the following iPod models. Supported iPod software versions are shown - Pioneer MVH-P8200 | Owner's Manual - Page 53
power immediately and consult your dealer or the nearest authorized PIONEER Service Station. Using this unit in this condition may result in permanent a malfunction. ! When using a cellular phone, keep the antenna away from the display to prevent disruption of the video image by the appearance - Pioneer MVH-P8200 | Owner's Manual - Page 54
useful life, the screen will be dark and the image will no longer be projected. If this happens, consult your dealer or the nearest authorized PIONEER Service The Bluetoothâ word mark and logos are registered trademarks owned by Bluetooth SIG, Inc. and any use of such marks by Pioneer Corporation - Pioneer MVH-P8200 | Owner's Manual - Page 55
Inc., and is used under license. ABOUT DIVX VIDEO: DivXâ is a digital video format created by DivX, Inc. This is an official DivX Certified device that plays DivX video. Visit www.divx.com for more information and software tools to convert your files into DivX video. ABOUT DIVX VIDEO-ON-DEMAND: This - Pioneer MVH-P8200 | Owner's Manual - Page 56
in.× 5/8 in.) Weight 1.01 kg (2.2 lbs) (MVH-P8200BT) Weight 0.99 kg (2.2 lbs) (MVH-P8200) Display Screen size/aspect ratio ....... 3.0 inch wide/ dB USB USB standard specification USB 1.1, USB 2.0 full speed Maximum current Bluetooth (MVH-P8200BT) Version Bluetooth 2.0 certified Output power 4 dBm Max. - Pioneer MVH-P8200 | Owner's Manual - Page 57
Additional Information CEA2006 Specifications Power output 14 W RMS × 4 Channels (4 W and ≦ 1 % THD+N) S/N ratio 91 dBA (reference: 1 W into 4 W) Note Specifications and the design are subject to modifications without notice. Appendix English En 57 - Pioneer MVH-P8200 | Owner's Manual - Page 58
parking 61 Pour éviter l'épuisement de la batterie 61 Avant de commencer Pour le modèle canadien 62 Quelques mots sur cet appareil 62 Environnement d'utilisation 62 Service après-vente des produits Pioneer Bluetooth 69 - Réglage pour la téléphonie mains libres 69 - Opérations de base 69 Radio EQ auto - Pioneer MVH-P8200 | Owner's Manual - Page 59
en service ou hors service de l'indication de l'affichage 96 Instructions détaill canal 101 - Affichage du code d'identification de la radio 101 Syntoniseur radio satellite SIRIUS 101 - Opérations de base 102 - glage EQ auto 108 Liste des indicateurs 109 Conseils sur la manipulation 110 Formats audio - Pioneer MVH-P8200 | Owner's Manual - Page 60
manuel et suivez soigneusement les instructions. 4 Ne laissez pas d'autres installer votre écran ou d'en faire l'entretien vous-même. L'installation ou l'entretien de l'écran par des personnes sans formation L'ALIMENTATION DU COMMUTATEUR DU FREIN DE PARKING. UNE MAUVAISE CONNEXION OU UNE UTILISATION - Pioneer MVH-P8200 | Owner's Manual - Page 61
vidéo pendant que vous conduisez, l'avertissement Viewing of front seat video source while driving is strictly prohibited. s'affiche sur l'écran un système de blocage qui détecte la position serrée du frein de parking. Si vous essayez d'utiliser les fonctions mentionnées ci-dessus pendant que vous - Pioneer MVH-P8200 | Owner's Manual - Page 62
sans avoir pris contact au préalable. États-Unis Pioneer Electronics (USA) Inc. CUSTOMER SUPPORT DIVISION P.O. Box 1760 Long Beach, CA 90801-1760 800-421-1404 CANADA Pioneer Électroniques du Canada, Inc. Département de service aux consommateurs 300 Allstate Parkway Markham, Ontario L3R 0P2 1-877 - Pioneer MVH-P8200 | Owner's Manual - Page 63
de mise en/hors service du contact d'allumage peut MVH-P8200BT et celle du MVHP8200. Seul MVH-P8200BT dispose des fonctions Bluetooth, les explications relatives à ces fonctions ne concernent donc pas MVHP8200. Dans les instructions USB". Dans ce manuel, iPod et iPhone sont désignés par le terme - Pioneer MVH-P8200 | Owner's Manual - Page 64
commande Seulement pour le MVH-P8200. Seulement pour le MVH-P8200BT. Partie 1 HOME 2 SRC/OFF 3 MULTI-CONTROL (M.C.) 4 Port USB Partie Jack d'entrée AUX (jack stéréo/vidéo 5 3,5 mm) Jack d'entrée mi- crophone pour me- sure EQ auto 6 (retour/affichage hors service) 7 Touche de retrait de - Pioneer MVH-P8200 | Owner's Manual - Page 65
de fichiers média, ap- puyez sur cette touche pour bas- h BAND/ES- culer entre les types de fichiers CAPE média à lire. Music (audio compressé)-Video (fichiers vidéo DivX)-Photo (fi- chiers d'images JPEG) Appuyez sur cette touche pour re- venir à l'affichage standard à par- tir du menu des - Pioneer MVH-P8200 | Owner's Manual - Page 66
le MVH-P8200. 2 Radio)/ Radio (syntoniseur)-USB (périphérique de stockage USB)/iPod (iPod connecté via l'entrée USB) -SD (carte mémoire SD)-EXT1 (source extérieure 1)-EXT2 (source extérieure 2)-AUX (AUX) Réglage du volume 1 Tournez M.C. pour régler le volume. 66 Fr Seulement pour le MVH-P8200BT - Pioneer MVH-P8200 | Owner's Manual - Page 67
mise au rebut des piles usagées, respectez les règlements nationaux ou les instructions locales en vigueur dans le pays ou la région en matière de conservation (menu téléphone) # Le menu téléphone est disponible pour le MVH-P8200BT seulement. 3 Tournez M.C. pour sélectionner l'option de menu. Apr - Pioneer MVH-P8200 | Owner's Manual - Page 68
. 1 Affichez le menu système. Reportez-vous à la page précédente, Opérations des menus de base. 2 Utilisez M.C. pour sélectionner Guide Info. Tournez pour changer l'option de menu. Appuyez pour sélectionner. Les informations de guidage s'affichent. Utilisation Tournez M.C. Poussez M.C. vers le haut - Pioneer MVH-P8200 | Owner's Manual - Page 69
page suivante. Utilisation du téléphone Bluetooth Cette fonction est disponible pour le MVHP8200BT seulement. Important ! Comme cet appareil ou vers la droite pendant que vous parlez au téléphone. Mise en ou hors service du mode privé 1 Poussez et maintenez M.C. vers le haut pendant que vous parlez - Pioneer MVH-P8200 | Owner's Manual - Page 70
appareil Radio Opérations de base 1 Radio Local A-EQ 16:54 Text Text Text FM1 P.CH 2 87.9 MHz 3 2 1 Zone d'affichage des indicateurs Reportez-vous à la page 109, Liste des indica- teurs. 2 Zone d'information textuelle ! Titre de la plage musicale ! Nom de l'interprète ! Nom du service de - Pioneer MVH-P8200 | Owner's Manual - Page 71
utiliser normalement cette fonction, mettez à jour le firmware de votre iPod. ! Il est possible d'enregistrer sur M.C. pour mettre la fonction BSM en service. Pour annuler, appuyez de nouveau sur M.C. locale ne s'intéresse qu'aux stations de radio dont le signal reçu est suffisamment puissant pour - Pioneer MVH-P8200 | Owner's Manual - Page 72
profiter du contenu vidéo de l'iPod en tant que source iPod. Vous n'avez pas besoin de modifier le réglage de AUX. 1 2 3 2345 7890 A-EQ 16:54 Video Text Text 8888'88" -8888'88" 4 5 6 Vous pouvez basculer sur l'écran de base ou sur l'image. Reportez-vous à la page 74, Display (réglage - Pioneer MVH-P8200 | Owner's Manual - Page 73
pas être mis en service ou hors service à moins que le mode de commande ne soit réglé sur iPod. ! L'iPod sera mis hors service environ deux minutes après de fichiers média à lire. Reportez-vous à la page 75, A/V Format (commutation entre les types de fichiers média). Sélection et lecture de - Pioneer MVH-P8200 | Owner's Manual - Page 74
contenant un contenu VOD DivX, utilisez M.C. pour sélectionner un mode désiré. Tournez pour changer de mode. Appuyez pour sélectionner. ! Play - Lecture du contenu VOD DivX ! Next Play - Passer au fichier suivant ! Stop - Si vous ne voulez pas jouer le conte- nu VOD DivX Réglages des fonctions - Pioneer MVH-P8200 | Owner's Manual - Page 75
Appuyez sur M.C. pour choisir le mode désiré. A/V Format (commutation entre les types de fichiers média) 1 Appuyez le réglage désiré. Music (audio compressé)-Video (fichiers vidéo DivX)-Photo (fichiers d' lection. Play Mode (répétition de la lecture) ! Reportez-vous à la page précédente, Play Mode - Pioneer MVH-P8200 | Owner's Manual - Page 76
Section 03 Utilisation de l'appareil Cette fonction n'est pas compatible avec les modèles d'iPod suivants. ! iPod nano 1ère génération ! iPod 5ème génération La fonction iPod de cet appareil vous permet d'exécuter des opérations depuis votre iPod et de l'écouter sur les haut-parleurs de votre vé - Pioneer MVH-P8200 | Owner's Manual - Page 77
Utilisation de l'appareil Section 03 Français Music Lecture audio Opérations de base 1 2 3 2345 7890 S.Rtrv A-EQ 16:54 Text 4 Text Text 8888'88" -8888'88" 5 6 7 1 Zone d'information du fichier pour le fichier en cours de lecture Périphérique de stockage externe ( - Pioneer MVH-P8200 | Owner's Manual - Page 78
du niveau le plus haut sont différentes de celles des vidéos. ! Video (vidéo) 78 Fr ! Playlists (listes de lecture) ! Artists (interprètes) - métrage. 2 Tournez M.C. pour choisir le réglage désiré. Off (hors service)-1-2 1 est efficace pour les faibles taux de compression et 2 est efficace pour - Pioneer MVH-P8200 | Owner's Manual - Page 79
fichiers média) ! Reportez-vous à la page 75, A/V Format (commutation entre les types de fichiers média). iPod Pause (pause) ! Reportez-vous à la page 75, Pause (pause). Shuffle All (lecture aléatoire de toutes les plages) 1 Appuyez sur M.C. pour mettre en service la lecture aléatoire de toutes les - Pioneer MVH-P8200 | Owner's Manual - Page 80
la première image du périphérique. Le lecteur affiche les images de chaque dossier dans l'ordre alphabétique. Opérations de base 1 2 3 2345 7890 A-EQ 16:54 Photo Text Text Vous pouvez basculer sur l'écran de base ou sur l'image. Reportez-vous à la page 82, Display (réglage de l'affichage - Pioneer MVH-P8200 | Owner's Manual - Page 81
de fichiers média à lire. Reportez-vous à la page suivante, A/V Format (commutation entre les types de fichiers média). Sélection et lecture de la page 78, Random (lecture aléatoire). Play Mode (répétition de la lecture) 1 Reportez-vous à la page 74, Play Mode (répétition de la lecture). Cependant, - Pioneer MVH-P8200 | Owner's Manual - Page 82
JPEG changent avec un intervalle de 15 secondes ! Manual - Vous pouvez changer d'image JPEG manuellement 3 Appuyez ). A/V Format (commutation entre les types de fichiers média) ! Reportez-vous à la page 75, A/V Format (commutation Play Mode (répétition de la lecture) ! Reportez-vous à la page pr - Pioneer MVH-P8200 | Owner's Manual - Page 83
sur USB/SD sous forme de diaporama. Téléphone Bluetooth Cette fonction est disponible pour le MVHP8200BT seulement. Pour les détails sur les opérations clignote. Pour terminer la connexion, vérifiez le nom de l'appareil (MVH-P8200BT) et entrez le code de liaison sur votre téléphone cellulaire. Si - Pioneer MVH-P8200 | Owner's Manual - Page 84
clignote. Pour terminer la connexion, vérifiez le nom de l'appareil (MVH-P8200BT) et entrez le code de liaison sur votre téléphone cellulaire. Si ce cas, supprimez d'abord un appareil appairé. Auto Connect (connexion automatique à un appareil Bluetooth) 1 Appuyez sur M.C. pour activer ou désactiver - Pioneer MVH-P8200 | Owner's Manual - Page 85
de l'appareil Section 03 Français PIN Code (saisie du code PIN) Pour connecter votre téléphone cellulaire à cet appareil via la technologie sans fil Bluetooth, vous devez entrer un code PIN sur votre téléphone pour vérifier la connexion. Le code par défaut est 0000, mais vous pouvez le modifier - Pioneer MVH-P8200 | Owner's Manual - Page 86
connexion du téléphone) Utilisez le menu de connexion du téléphone Bluetooth. Reportez-vous à la page 83, Utilisation du menu de Auto EQ (égalisation automatique en service/hors service) L'égalisation automatique est une courbe d'égalisation créée par EQ auto (reportez-vous à la page 91, EQ auto - Pioneer MVH-P8200 | Owner's Manual - Page 87
Utilisation de l'appareil Section 03 Français Graphic EQ (réglage de l'égaliseur) Vous pouvez ajuster comme vous émis par les haut-parleurs avant ou arrière, mettez le filtre passe-haut (HPF) en service. Seules les fréquences supérieures à celles de la plage sélectionnée sont émises par les - Pioneer MVH-P8200 | Owner's Manual - Page 88
la fonction système, effectuez les procédures de paramétrage suivantes. Guide Info (informations de guidage) 1 Appuyez sur M.C. pour afficher les informations la page 68, Quelques mots sur les informations de guidage. Clock ADJ (date et horloge) 1 Appuyez sur M.C. pour afficher le mode de paramétrage - Pioneer MVH-P8200 | Owner's Manual - Page 89
langue d'affichage des avertissements concernant le système de blocage du frein de parking. 1 Appuyez sur M.C. pour afficher le mode de para- métrage. Appuyez sur M.C. pour mettre AUX Input en ser- vice ou hors service. Réglages de divertissement 1 Affichez le menu de divertissement. Reportez-vous - Pioneer MVH-P8200 | Owner's Manual - Page 90
(égalisation automatique) L'égalisation automatique est une courbe d'égalisation créée par EQ auto (reportez-vous à la page suivante, EQ auto (égalisation automatique)). Vous pouvez mettre l'égalisation automatique en service ou hors service. Rear Speaker (réglage de la sortie arrière et du - Pioneer MVH-P8200 | Owner's Manual - Page 91
BT Ver. Info. (affichage de la version Bluetooth) Cette fonction est disponible pour le MVH-P8200BT seulement. 1 Appuyez sur M.C. pour afficher la version Blue- tooth (microprocesseur) de cet appareil. Software Update les instructions à l'écran pour finir la mise à jour du logiciel. EQ auto (é - Pioneer MVH-P8200 | Owner's Manual - Page 92
. ! Quand cet appareil est connecté à un amplificateur de puissance équipé d'un filtre passe-bas, mettez le filtre passe-bas hors service avant d'effectuer le réglage EQ auto. Définissez également la fréquence de coupure pour le filtre passe-bas intégré d'un haut-parleur d'extrêmes graves actif sur - Pioneer MVH-P8200 | Owner's Manual - Page 93
03 # Appuyez sur SRC pour mettre la source en service si l'appareil est hors service. 4 Affichez le menu des réglages initiaux. Reportez-vous à la page 90, Réglages initiaux. 5 Utilisez M.C. pour passer en mode de mesure EQ auto. Tournez pour changer l'option de menu. Appuyez pour sélectionner - Pioneer MVH-P8200 | Owner's Manual - Page 94
é avant la confirmation. ! Vous pouvez sélectionner Display ou Wide Mode quand Video a été sélectionné. ! Vous pouvez sélectionner les fonctions suivantes si le extérieure Appareil extérieur fait référence à un produit Pioneer, comme les produits prochainement disponibles. Bien que les appareils - Pioneer MVH-P8200 | Owner's Manual - Page 95
(fonction 4)-Auto/Manual (auto/manuel) Utilisation de la touche PGM Cette fonction est disponible pour le MVHP8200BT seulement. Vous la pause hors service. % Appuyez sur PGM de façon prolongée pour mettre la fonction BSM en service lors de la sélection du syntoniseur ou de HD Radio comme source. - Pioneer MVH-P8200 | Owner's Manual - Page 96
de la sélection de EXT1 (appareil extérieur 1/appareil extérieur 2) comme source. Mise en service ou hors service de l'indication de l'affichage L'indication de l'affichage peut être mise en service ou hors service. % Appuyez sur de façon prolongée. # Appuyer sur une des touches permet de mettre - Pioneer MVH-P8200 | Owner's Manual - Page 97
Instructions détaillées Section 04 Français Changer le mode écran large Vous pouvez choisir le mode que vous désirez pour agrandir une image 4:3 en image - Pioneer MVH-P8200 | Owner's Manual - Page 98
Section 04 Instructions détaillées Définition du ratio d'aspect % Afficher le mode de réglage du ratio d'aspect. Reportez-vous à la page 75, TV Aspect (réglages du ratio d'aspect). ! - Pioneer MVH-P8200 | Owner's Manual - Page 99
mode de fonctionnement, reportez-vous au mode d'emploi du syntoniseur HD Radio. Opérations de base 1 D/Aauto HD Seek A-EQ 16:54 Text FM1 P.CH 1 87.9 MHz 3 2 1 de fréquence. Si cette fonction est réglée sur D/A Auto, le syntoniseur bascule automatiquement entre émission numérique et émission - Pioneer MVH-P8200 | Owner's Manual - Page 100
présélectionnés. Opérations de base 1 Category A-EQ 16:54 XM Text Text Text XM1 P.CH 1 catégorie de canal.) Mettre l'affichage hors service 1 Appuyez sur de façon prolongée. Mise canal XM Cette fonction est disponible pour le MVHP8200BT seulement. Quand vous utilisez la télécommande, vous - Pioneer MVH-P8200 | Owner's Manual - Page 101
la gauche ou vers la droite pour sélectionner le canal désiré dans la catégorie de canaux sélectionnée. Affichage du code d'identification de la radio 1 Sélectionnez les réglages de sélection des canaux pour All CH. Reportez-vous à cette page, Channel Mode (réglage du mode de sélection des canaux - Pioneer MVH-P8200 | Owner's Manual - Page 102
Section 05 Accessoires disponibles Opérations de base 1 Game Category A-EQ 2 16:54 SIRIUS Text SIRIUS1 P.CH 1 CH 110 4 lection d'un canal dans une catégorie de canal.) Affichage du code d'identification de la radio 1 Poussez M.C. vers la gauche ou vers la droite pour sélectionner CH 000. ! - Pioneer MVH-P8200 | Owner's Manual - Page 103
quipes. ! Pour utiliser cette fonction, une interface de bus SIRIUS de Pioneer (par exemple CD-SB10) est requise. ! Pour utiliser cette fonction ! Pour les détails, reportez-vous aux manuels de l'unité Plug-and-Play SIRIUS. ! Vous pouvez également utiliser cette fonction lorsque SIR-PNR2 est connect - Pioneer MVH-P8200 | Owner's Manual - Page 104
utilisées en mode relecture instantanée. ! Pour utiliser cette fonction, une interface de bus SIRIUS de Pioneer (par exemple CD-SB10) est requise. ! Pour utiliser cette fonction, l'unité Plugand-Play SIRIUS intégrant la fonction de relecture instantanée est requise. ! Pour les détails, reportez-vous - Pioneer MVH-P8200 | Owner's Manual - Page 105
ne se met pas connecteurs sont fois que toutes les en service. mal connectés. connexions sont L'appareil ne correctes. fonctionne pas. Le fusible a Rectifiez la cause sauté. et remplacez le fu- sible. Assurez-vous de bien installer un fusible de même intensité. Du bruit et/ou d'autres - Pioneer MVH-P8200 | Owner's Manual - Page 106
Service d'entretien agréé par Pioneer le plus proche, n'oubliez pas de noter le message d'erreur. Périphérique de stockage externe (USB, SD) Message Causes possi- Action corrective bles No Device Unplayable File Format érique de stockage USB Suivez les instructions de la mémoire USB pour dé - Pioneer MVH-P8200 | Owner's Manual - Page 107
auto- risé par le four- nisseur de contenu VOD DivX. Enregistrez cet appareil auprès du fournisseur de contenu VOD DivX. (Page 74) Video frame rate not supported OFF puis sur ON ou décon- nectez l'iPod et re- connectez-le. Format Read/ Ready Le début de la lecture et le début de l'émission - Pioneer MVH-P8200 | Owner's Manual - Page 108
du module Bluetooth de cet appareil. Mettez le contact sur OFF, puis sur ACC ou ON. Si le message d'erreur s'affiche encore après l'exécution de cette action, consultez votre distributeur ou un centre d'entretien agréé par Pioneer. Signification des messages d'erreur du réglage EQ auto Quand une - Pioneer MVH-P8200 | Owner's Manual - Page 109
'un téléphone Bluetooth est connecté. (MVH-P8200BT uniquement) Indique la force du signal du téléphone cellulaire. Indique quand des informations d'étiquettes sont enregistrées dans cet appareil. Clignote quand l'étiquette est en cours de transfert vers un iPod. Indique que EQ auto est activé. iPod - Pioneer MVH-P8200 | Owner's Manual - Page 110
la pédale de frein ou d'accélérateur. Selon les périphériques de stockage USB connectés, du bruit radio peut être généré par le périphérique. ! Le périphérique peut générer des parasites radio. Cet appareil peut lire des fichiers à partir d'un lecteur audio portable USB/une mémoire USB conforme à la - Pioneer MVH-P8200 | Owner's Manual - Page 111
EQ (égaliseur) de l'iPod afin d'optimiser l'acoustique. Le réglage EQ original est rétabli lorsque l'iPod est déconnecté. ! Vous ne pouvez pas mettre la fonction de répétition hors service (Le format EXIF est le plus souvent utilisé avec les appareils photo numériques.) La lecture du format de - Pioneer MVH-P8200 | Owner's Manual - Page 112
2.3 (la Version 2.x de l'étiquette ID3 a priorité sur la Version 1.x.) Liste de lecture m3u : Non MP3i (MP3 interactif), mp3 PRO : Non AAC Format compatible : AAC encodé par iTunes Extension de fichier : .m4a Débit binaire : 8 kbit/s à 320 kbit/s Fréquence d'échantillonnage : 8 kHz à 44,1 kHz Apple - Pioneer MVH-P8200 | Owner's Manual - Page 113
est pas garantie. Cet appareil n'est pas compatible avec le format SDAudio/SD-Vidéo. PRÉCAUTION Pioneer n'accepte aucune responsabilité en cas de perte de donné version logicielle 1.3.0) ! iPhone 3GS (version logicielle 3.0) ! iPhone 3G (version logicielle 3.0) ! iPhone (version logicielle 3.0) Selon - Pioneer MVH-P8200 | Owner's Manual - Page 114
ne pouvez pas spécifier la séquence de lecture. Pour les lecteurs audio portables USB, la séquence est différente et dépend du lecteur. PIONEER le plus proche. N'utilisez pas l'appareil dans cette situation parce que cela pourrait provoquer un incendie, une électrocution ou une autre panne. ! Si - Pioneer MVH-P8200 | Owner's Manual - Page 115
cran LCD, et l'air froid de la climatisation peut provoquer la formation d'humidité à l'intérieur de l'écran, pouvant entraîner cas échéant, consultez votre revendeur ou le Centre d'Entretien agréé par PIONEER le plus proche. Tube fluorescent ! Un petit tube fluorescent est utilisé Bluetooth Fr 115 - Pioneer MVH-P8200 | Owner's Manual - Page 116
et les logos Bluetoothâ sont des marques déposées appartenant à Bluetooth SIG, Inc. et toute utilisation de ces marques par Pioneer Corporation est faite de sa compatibilité avec les normes réglementaires et de sécurité. iPhone Windows Media et le logo Windows sont des marques commerciales ou des - Pioneer MVH-P8200 | Owner's Manual - Page 117
et est utilisée sous licence. À PROPOS DE LA VIDÉO DIVX : DivXâ est un format vidéo numérique créé par DivX, Inc. Ceci est un appareil certifié DivX officiel qui . La marque SAT RADIO READY indique que cet appareil peut contrôler le Syntoniseur Radio Satellite pour Pioneer (par exemple, le - Pioneer MVH-P8200 | Owner's Manual - Page 118
188 mm × 58 mm × 17 mm Poids 1,01 kg (MVH-P8200BT) Poids 0,99 kg (MVH-P8200) Affichage Taille de l'écran/ratio d'aspect 3,0 pouces de largeur/16:9 Format de décodage MP3 ... MPEG-1 & 2 Couche Audio 3 Format de décodage WMA Ver. 7, 7.1, 8, 9, 10, 11 (2 canaux audio) (Windows Media Player) Format - Pioneer MVH-P8200 | Owner's Manual - Page 119
Informations complémentaires Bluetooth (MVH-P8200BT) Version Certifié Bluetooth 2.0 Puissance de sortie 4 dBm max. (Classe de puissance 2) Caractéristiques CEA2006 Puissance de sortie 14 W RMS x 4 Canaux (4 W et ≦ 1 % DHT+B) Rapport S/B 91 dBA (référence : 1 W sur 4 W) Remarque - Pioneer MVH-P8200 | Owner's Manual - Page 120
borrar un menú registrado 130 Acerca de la información de la guía 130 Uso del teléfono Bluetooth 130 - Configuración de la función manos libres 131 - Funciones básicas 131 Radio 132 - Funciones básicas 132 - Almacenamiento y recuperación de emisoras 132 - Uso del etiquetado de iTunes 132 - Ajustes - Pioneer MVH-P8200 | Owner's Manual - Page 121
159 Cambio del ajuste de la imagen 159 Accesorios disponibles Sintonizador de HD Radioä 160 - Funciones básicas 160 - Almacenamiento y recuperación de emisoras Mensajes de error 167 Comprensión de los mensajes de error del ajuste EQ automático 169 Lista de indicadores 170 Pautas para el manejo 171 - Pioneer MVH-P8200 | Owner's Manual - Page 122
manual y siga las instrucciones con cuidado. 4 No permita que otras personas utilicen este sistema hasta que hayan leído y comprendido las instrucciones sobre el funcionamiento del aparato. 5 No instale no está debidamente abrochado. 8 Nunca use auriculares mientras conduce. 9 Para promover la - Pioneer MVH-P8200 | Owner's Manual - Page 123
mientras esté conduciendo, aparecerá el aviso Viewing of front seat video source while driving is strictly prohibited. en el display delantero. descarga de la batería Mantenga el motor del vehículo encendido mientras use esta unidad para evitar descargar la batería. ! Si se interrumpe la alimentaci - Pioneer MVH-P8200 | Owner's Manual - Page 124
causar daños en la unidad, humo y recalentamiento. ! Conserve este manual a mano para consultarlo en el futuro. ! Mantenga siempre el volumen lo UU. Pioneer Electronics (USA) Inc. CUSTOMER SUPPORT DIVISION P.O. Box 1760 Long Beach, CA 90801-1760 800-421-1404 CANADÁ Pioneer Electronics of Canada, - Pioneer MVH-P8200 | Owner's Manual - Page 125
Acerca de este manual Este manual describe el funcionamiento de MVH-P8200BT y MVH-P8200. Solamente MVHP8200BT incluye funciones de Bluetooth, por lo de almacenamiento USB". En este manual, se utiliza el término "iPod" para denominar tanto a iPod como a iPhone. Modo demo Importante Si no se - Pioneer MVH-P8200 | Owner's Manual - Page 126
MVH-P8200. Sólo para MVH-P8200BT. Parte 1 HOME 2 SRC/OFF 3 MULTI-CONTROL (M.C.) 4 Puerto USB Parte Conector de entrada AUX (conector estéreo / vídeo de 3,5 mm) 5 Conector de entrada del micrófono para el modo de medición de EQ de sintonización por búsqueda manual, avance rápido, retroceso y - Pioneer MVH-P8200 | Owner's Manual - Page 127
tipos de archivos multime- dia, pulse este botón para cam- h BAND/ES- biar entre los tipos de archivos CAPE multimedia que desee reproducir. Music (audio comprimido)- Video (archivos de vídeo DivX)- Photo (archivos de imagen JPEG) Pulse este botón para volver a la visualización normal desde - Pioneer MVH-P8200 | Owner's Manual - Page 128
vo (-) en la dirección correcta. Sólo para MVH-P8200. 2 Pulse el lado inferior del panel delantero sintonizador SIRIUS)-Digital Radio (sintonizador de HD Radio)/Radio (sintonizador)-USB de control del relé de la antena Sólo para MVH-P8200BT. ADVERTENCIA ! Mantenga la pila fuera del alcance de los - Pioneer MVH-P8200 | Owner's Manual - Page 129
produzcan fugas de la pila, limpie completamente el mando a distancia e instale una pila nueva. ! Para desechar las pilas usadas, cumpla con los (menú telefónico) # El menú telefónico está disponible sólo para MVH-P8200BT. 3 Gire M.C. para seleccionar la opción de menú. Una vez seleccionada, siga - Pioneer MVH-P8200 | Owner's Manual - Page 130
Funciones básicas del menú en la página anterior. 2 Utilice M.C. para seleccionar la Guide Info. Gire el control para cambiar la opción de menú. Pulse para seleccionar. M.C. para visualizar la página siguiente. Uso del teléfono Bluetooth Esta función está disponible sólo para MVHP8200BT. 130 Es - Pioneer MVH-P8200 | Owner's Manual - Page 131
Español Importante ! Puesto que esta unidad se encuentra en espera, si se conecta con su teléfono móvil mediante la tecnología inalámbrica Bluetooth sin encender el motor, se puede descargar la batería. ! El funcionamiento puede variar según el tipo de teléfono móvil. ! Las operaciones avanzadas - Pioneer MVH-P8200 | Owner's Manual - Page 132
de esta unidad Radio Funciones básicas 1 Radio Local A-EQ 16:54 Text Visualización de la fuente de la imagen Sintonización manual (paso a paso) 1 Pulse M.C. hacia la - iPod touch - iPod touch de 2ª generación - iPhone - iPhone 3G No obstante, la información de etiquetas se puede almacenar - Pioneer MVH-P8200 | Owner's Manual - Page 133
la compra. ! Si encuentra algún problema al usar esta función, actualice el firmware de su iPod. ! En esta unidad se puede almacenar información de etiquetas por búsqueda local le permite sintonizar sólo las emisoras de radio con señales lo suficientemente intensas como para asegurar una correcta - Pioneer MVH-P8200 | Owner's Manual - Page 134
á disfrutar de los contenidos de vídeo del iPod como una fuente iPod. No es necesario cambiar el ajuste de AUX. 1 2 3 2345 7890 A-EQ 16:54 Video Text Text 8888'88" -8888'88" 4 5 6 Puede cambiar a la pantalla básica o a la de imágenes. Consulte Display (configuración del display) en la - Pioneer MVH-P8200 | Owner's Manual - Page 135
de almacenamiento externos que contengan una combinación de varios tipos de archivos multimedia, puede cambiar entre los tipos de archivos multimedia que desee reproducir. Consulte A/V Format (cambio de tipos de archivos multimedia) en la página siguiente. Selección y reproducción de archivos de la - Pioneer MVH-P8200 | Owner's Manual - Page 136
. Gire para cambiar el modo. Pulse para seleccionarlo. ! Play - Reproducción del contenido DivX VOD ! Next Play - Salta al siguiente archivo ! Stop - Si no desea mostrar el modo de ajuste. 2 Pulse M.C. para seleccionar el ajuste deseado. A/V Format (cambio de tipos de archivos multimedia) 136 Es - Pioneer MVH-P8200 | Owner's Manual - Page 137
. 2 Gire M.C. para seleccionar el ajuste deseado. Music (audio comprimido)-Video (archivos de vídeo DivX)-Photo (archivos de imagen JPEG) 3 Pulse aleatoria. 3 Pulse M.C. para confirmar la selección. Play Mode (repetición de reproducción) ! Consulte Play Mode (repetición de reproducción) en la página - Pioneer MVH-P8200 | Owner's Manual - Page 138
ón de aspecto) - Subtitle Lang. (ajustes de idioma de los subtítulos) Reproducción de audio Funciones básicas 1 2 3 Music 2345 7890 S.Rtrv A-EQ 16:54 Text 4 Text Text 8888'88" -8888'88" 5 6 7 1 Área de información para el archivo que se está reproduciendo actualmente Dispositivo - Pioneer MVH-P8200 | Owner's Manual - Page 139
Utilización de esta unidad Sección 03 Español Reproducción de canciones de un dispositivo de almacenamiento USB 1 Abra la tapa del conector USB. 2 Conecte el dispositivo de almacenamiento USB mediante un cable USB. Detención de la reproducción de canciones en un dispositivo de almacenamiento USB - Pioneer MVH-P8200 | Owner's Manual - Page 140
las de las imágenes en movimiento. ! Video (vídeo) ! Playlists (listas de reproducción) A/V Format (cambio de tipos de archivos multimedia) ! Consulte A/V Format (cambio de tipos de archivos multimedia) la página 137. Play Mode (repetición de reproducción) ! Consulte Play Mode (repetición de - Pioneer MVH-P8200 | Owner's Manual - Page 141
Utilización de esta unidad Sección 03 Español Se pueden reproducir canciones de las siguientes listas. • Lista de álbumes del artista que se está reproduciendo • Lista de canciones del álbum que se está reproduciendo • Lista de álbumes del género que se está reproduciendo 1 Pulse M.C. para - Pioneer MVH-P8200 | Owner's Manual - Page 142
de cada carpeta por orden alfabético. Funciones básicas 1 2 3 2345 7890 A-EQ 16:54 Photo Text Text Puede cambiar a la pantalla básica o a la de multimedia, puede cambiar entre los tipos de archivos multimedia que desee reproducir. Consulte A/V Format (cambio de tipos de archivos multimedia - Pioneer MVH-P8200 | Owner's Manual - Page 143
de 15 segundos ! Manual - Las imágenes JPEG pueden cambiarse manualmente 3 Pulse M.C. para confirmar la selección. Display (configuración del display) ! Consulte Display (configuración del display) en la página 136. A/V Format (cambio de tipos de archivos multimedia) ! Consulte A/V Format (cambio de - Pioneer MVH-P8200 | Owner's Manual - Page 144
Pause (pausa) en la página 137. Random (reproducción aleatoria) ! Consulte Random (reproducción aleatoria) en la página 140. Play Mode (repetición de reproducción) ! Consulte Play Mode (repetición de reproducción) en la página anterior. Capture (captura de una imagen en archivos JPEG) ! Consulte - Pioneer MVH-P8200 | Owner's Manual - Page 145
Bluetooth Esta función está disponible sólo para MVHP8200BT. Para obtener información sobre el funcionamiento básico al conectar un teléfono móvil, consulte Uso del teléfono Bluetooth Para completar la conexión, verifique el nombre del dispositivo (MVH-P8200BT) e introduzca el código de enlace en su - Pioneer MVH-P8200 | Owner's Manual - Page 146
Use un teléfono móvil para la conexión a esta unidad. Mientras se conecta, el indicador circular parpadeará. Para completar la conexión, verifique el nombre del dispositivo (MVH-P8200BT primero un dispositivo emparejado. Auto Connect (conexión automática con un dispositivo Bluetooth) 1 Pulse M.C. - Pioneer MVH-P8200 | Owner's Manual - Page 147
hacer una llamada. Phone Function (función del teléfono) Se puede ajustar Auto Answer y Ring Tone en este menú. Para obtener más información, consulte Funci éfono) Ponga en funcionamiento el menú de conexión del teléfono Bluetooth. Consulte Funcionamiento del menú de conexión en la página 145. Funci - Pioneer MVH-P8200 | Owner's Manual - Page 148
para seleccionar una posición del oyente. Gama de ajuste: Left:7 a Right:7 Auto EQ (autoecualizador activado/desactivado) El autoecualizador memoriza la curva de ecualización creada por la función EQ automática (consulte EQ automático (ecualización automática) en la página 152). Se puede activar - Pioneer MVH-P8200 | Owner's Manual - Page 149
- biar a SLA. ! Los ajustes se basan en el nivel de volumen de FM, que se mantiene inalterado. Antes de ajustar los niveles de la fuente, compare el nivel de volumen de FM con el de la fuente que desea ajustar. ! El nivel del volumen de AM también se puede ajustar con - Pioneer MVH-P8200 | Owner's Manual - Page 150
la página 129. 2 Gire M.C. para seleccionar la función del sistema. Una vez seleccionada, siga los siguientes pasos para ajustar la función del sistema. Guide Info (información de la guía) 1 Pulse M.C. para mostrar la información de la guía. Consulte Acerca de la información de la guía en la página - Pioneer MVH-P8200 | Owner's Manual - Page 151
átula. ! Si se selecciona USB o SD como la fuente, no se podrá seleccionar Slide Show. Personalización de la iluminación en color 1 Use el M.C. para seleccionar Color Setting en Appearance (color de iluminación). Consulte Appearance (color de pantalla/iluminación) en esta página. 2 Utilice M.C. para - Pioneer MVH-P8200 | Owner's Manual - Page 152
BT Ver. Info. (visualización de la versión de Bluetooth) Esta función está disponible sólo para MVH-P8200BT. 1 Pulse M.C. para visualizar la versión de Bluetooth (microprocesador) de esta unidad. Software Update (actualización del software las instrucciones en pantalla. EQ automático (ecualización - Pioneer MVH-P8200 | Owner's Manual - Page 153
acústicas del interior del vehículo. ! Asegúrese de realizar el ajuste EQ automático con el micrófono opcional. Si se utiliza otro micrófono es filtro de paso bajo (LPF), desactive este LPF antes de realizar el ajuste EQ automático. Además, se debe ajustar en el nivel máximo la frecuencia de - Pioneer MVH-P8200 | Owner's Manual - Page 154
cambiar la opción de menú. Pulse para seleccionar. 6 Enchufe el micrófono en el conector de entrada de esta unidad. 7 Pulse M.C. para iniciar el ajuste EQ automático. 8 Cuando comience la cuenta regresiva de 10 segundos, baje del automóvil y cierre la puerta dentro de 10 segundos. Se emite un tono - Pioneer MVH-P8200 | Owner's Manual - Page 155
confirmar. ! Es posible seleccionar Display y Wide Mode si se ha seleccionado Video. ! Puede seleccionar las siguientes funciones si está desactivado el ajuste de Uso de una unidad externa Por unidad externa se entiende un producto Pioneer, como los que puedan estar disponibles en el futuro. Si bien - Pioneer MVH-P8200 | Owner's Manual - Page 156
de 1 a 6 en el mando a distancia (solo MVH-P8200BT). Utilización de las funciones asignadas a las teclas 1 a Auto/Manual (automático/manual) Uso del botón PGM Esta función está disponible sólo para MVHP8200BT BSM al seleccionar el sintonizador o HD Radio (radio en alta definición) como la fuente. - Pioneer MVH-P8200 | Owner's Manual - Page 157
Utilización de esta unidad Cambio de la indicación del display La indicación del display se puede activar o desactivar. % Mantenga pulsado . # Al pulsar uno de los botones se activa la indicación del display. Sección 03 Español Es 157 - Pioneer MVH-P8200 | Owner's Manual - Page 158
Sección 04 Instrucciones detalladas Cambio del modo panorámico Puede seleccionar el modo deseado de ampliación de una imagen de 4:3 a una de 16:9. % Visualice el modo de pantalla. Consulte Wide Mode (cambio al modo panorámico) en la página 136. Full (pantalla completa) La imagen de 4:3 se amplía en - Pioneer MVH-P8200 | Owner's Manual - Page 159
Instrucciones detalladas Sección 04 Español Ajuste de la relación de aspecto % Visualice el modo de ajuste de la relación de aspecto. Consulte TV Aspect (ajustes de la relación de aspecto) en la página 137. ! 16 : 9 - La imagen panorámica (16:9) se visualiza tal y como es (ajuste inicial) ! - Pioneer MVH-P8200 | Owner's Manual - Page 160
el funcionamiento, consulte el manual de instrucciones del sintonizador de HD Radio. Funciones básicas 1 D/Aauto HD Seek A-EQ 16:54 Radio Text FM1 P.CH 1 analógica en el mismo nivel de frecuencia. Si se selecciona D/A Auto para esta función, el sintonizador cambia entre emisión digital y analó - Pioneer MVH-P8200 | Owner's Manual - Page 161
diferentes de las que se describen en el manual de instrucciones del sintonizador XM. ! Con esta lista de canales presintonizados. Funciones básicas 1 Category A-EQ 16:54 Text Text Text XM1 P.CH 1 CH XM Esta función está disponible sólo para MVHP8200BT. Al utilizar el mando a distancia, se - Pioneer MVH-P8200 | Owner's Manual - Page 162
hacia la derecha para seleccionar RADIO ID. # Si selecciona otro canal, se cancelará la visualización del código de identificación. # RADIO ID y los códigos sintonizador SIRIUS, consulte el manual de instrucciones de SIRIUS. Funciones básicas 1 2 Game Category A-EQ 16:54 SIRIUS Text SIRIUS1 - Pioneer MVH-P8200 | Owner's Manual - Page 163
Accesorios disponibles Sección 05 Español ! Tiempo de reproducción-Número de canal-Nombre de canal-Nombre de categoría-Nombre del artista-Título de la canción/programa-Nombre del compositor ! Indicador de frecuencia/número de presintonía/banda 3 Barra de tiempo 4 Visualización de la fuente de la - Pioneer MVH-P8200 | Owner's Manual - Page 164
Pioneer SIRIUS (p.ej. CD-SB10). ! Para utilizar esta función, se requiere una unidad "plug-and-play" SIRIUS con la función de alerta de partido. ! Para obtener más detalles, consulte los manuales de la unidad "plug-and-play , aparece la alerta de partido. Use M.C. para seleccionar Jump y cambiar - Pioneer MVH-P8200 | Owner's Manual - Page 165
Accesorios disponibles ! Para utilizar esta función, se requiere una unidad "plug & play" SIRIUS con función de Repetición Instantánea. ! Para obtener más detalles, consulte los manuales de la unidad "plug-and-play" SIRIUS. Utilización de la función de Repetición Instantánea 1 Consulte Instant - Pioneer MVH-P8200 | Owner's Manual - Page 166
correctamente aunque se presionen los botones adecuados del mando a distancia. Instale una batería nueva. No se escucha el sonido. El nivel - No hay informarece cuando se ción de texto incambia un dis- corporada. play (NO TITLE, por ejemplo). Cambie la pantalla o reproduzca otra pista/archivo. - Pioneer MVH-P8200 | Owner's Manual - Page 167
Cuando contacte con su concesionario o con el servicio técnico oficial de Pioneer más cercano, asegúrese de anotar el mensaje de error. Dispositivo de (USB, SD) Mensaje Causa Resolución No Device Unplayable File Format Read Skipped Protect El dispositivo de almacenamiento USB no está conectado - Pioneer MVH-P8200 | Owner's Manual - Page 168
proveedor de contenido DivX VOD. (Página 136) Video frame rate not supported La velocidad de Reemplace el discuadro del dispo- nuevo a activación; o bien desconecte una vez el iPod y conéctelo de nuevo. Format Read/ Ready A veces se pro- Espere hasta que duce un retraso el mensaje desapaentre - Pioneer MVH-P8200 | Owner's Manual - Page 169
de datos. transfer. al iPod. Teléfono Bluetooth Mensaje Causa Resolución Error-10 Fallo de corriente Desconecte (posi- en el módulo buidor o con el servicio técnico ofi- cial de Pioneer. Comprensión de los mensajes de error del ajuste EQ automático Cuando no se puede obtener una medición - Pioneer MVH-P8200 | Owner's Manual - Page 170
Bluetooth conectado. (MVH-P8200BT solamente) Indica la intensidad de la señal del teléfono móvil. Aparece cuando se almacena la información de etiquetas en esta unidad. Parpadea cuando la etiqueta se transfiere a un iPod. Indica que el ajuste EQ la canción (etiqueta) de una emisora de radio. 170 Es - Pioneer MVH-P8200 | Owner's Manual - Page 171
atascado debajo del freno o del acelerador. Según el dispositivo de almacenamiento USB, el dispositivo puede generar ruido en la radio. ! El dispositivo puede generar ruido en la radio. La unidad puede reproducir archivos de un reproductor de audio portátil USB/memoria USB que cumpla con la clase de - Pioneer MVH-P8200 | Owner's Manual - Page 172
, ya que puede quedar atascado debajo del freno o del acelerador. Consulte los manuales del iPod para obtener más detalles. Acerca de los ajustes del iPod ! Cuando el iPod está conectado, esta unidad de- sactiva el ajuste EQ (ecualizador) del iPod para mejorar la acústica. Al desconectar el iPod - Pioneer MVH-P8200 | Owner's Manual - Page 173
unidad reproduce archivos con estas extensiones (.jpg, .jpeg, .jpe o .jfif) como un archivo de imagen JPEG. Para evitar fallos de funcionamiento, no use estas extensiones para archivos que no sean JPEG. Compatibilidad con audio/ vídeo comprimido (USB, SD) WMA Extensión de archivo: .wma Velocidad de - Pioneer MVH-P8200 | Owner's Manual - Page 174
multimedia software 2.0.1) ! iPod classic (versión del software 1.1.2) ! iPod 5ª generación (versión del software 1.3.0) ! iPhone 3GS (versión del software 3.0) ! iPhone 3G (versión del software 3.0) ! iPhone (versión del software manuales del iPod. Audiolibro, podcast: sí PRECAUCIÓN Pioneer - Pioneer MVH-P8200 | Owner's Manual - Page 175
olores extraños, o cualquier otro síntoma anormal en el display, apáguelo de inmediato y consulte a su concesionario o al servicio técnico oficial de PIONEER más próximo a su domicilio. Si se utiliza la unidad en este estado, el sistema puede sufrir daños permanentes. ! No desarme ni modifique esta - Pioneer MVH-P8200 | Owner's Manual - Page 176
deja de proyectarse. Si esto ocurre, diríjase a su distribuidor o al servicio técnico oficial de PIONEER más próximo a su domicilio. Tubo fluorescente ! Se utiliza un tubo fluorescente pequeño dentro del display lo contrario. Queda prohibido el desmontaje o la ingeniería inversa. Bluetooth 176 Es - Pioneer MVH-P8200 | Owner's Manual - Page 177
y los logotipos Bluetoothâ son marcas registradas propiedad de Bluetooth SIG, Inc., y cualquier uso de dichas marcas por Pioneer Corporation se hace o su cumplimiento de los estándares reguladores y de seguridad. iPhone Windows Media y el logotipo de Windows son marcas comerciales o marcas - Pioneer MVH-P8200 | Owner's Manual - Page 178
obtener más información y herramientas de software para convertir sus archivos a vídeo aprender más sobre DivX VOD. SAT Radio manual de instrucciones del sintonizador de radio por satélite. ! El sistema La marca SAT RADIO READY indica que el Sintonizador de Radio por Satélite para Pioneer (es decir - Pioneer MVH-P8200 | Owner's Manual - Page 179
(An. × Al. × Pr.): D Bastidor 178 mm × 50 mm × 162 mm Cara anterior .......... 188 mm × 58 mm × 17 mm Peso 1,01 kg (MVH-P8200BT) Peso 0,99 kg (MVH-P8200) Display Tamaño de la pantalla/relación de aspecto 3,0 pulgadas de ancho/16:9 (área efectiva de visualización: 66,8 × 36,7 mm) Píxeles 345 600 - Pioneer MVH-P8200 | Owner's Manual - Page 180
(señal/ruido: 20 dB) Relación de señal a ruido .... 62 dB (emisión analógica) (red IHF-A) Bluetooth (MVH-P8200BT) Versión Certificada para Bluetooth 2.0 Potencia de salida 4dBm máx. (Clase de potencia 2) Especificaciones CEA2006 Potencia de salida 14 W RMS × 4 canales (4 W y ≦ 1 % THD+N) Relaci - Pioneer MVH-P8200 | Owner's Manual - Page 181
Es 181 Español - Pioneer MVH-P8200 | Owner's Manual - Page 182
182 Es - Pioneer MVH-P8200 | Owner's Manual - Page 183
Es 183 Español - Pioneer MVH-P8200 | Owner's Manual - Page 184
. 178-184 Boundary Road, Braeside, Victoria 3195, Australia TEL: (03) 9586-6300 PIONEER ELECTRONICS OF CANADA, INC. 300 Allstate Parkway, Markham, Ontario L3R 0P2, Canada TEL: 1-877-283-5901 TEL: 905-479-4411 PIONEER ELECTRONICS DE MEXICO, S.A. de C.V. Blvd.Manuel Avila Camacho 138 10 piso Col.Lomas
-
 1
1 -
 2
2 -
 3
3 -
 4
4 -
 5
5 -
 6
6 -
 7
7 -
8
-
9
-
10
-
11
-
12
-
13
-
14
-
15
-
16
-
17
-
18
-
19
-
20
-
21
-
22
-
23
-
24
-
25
-
26
-
27
-
28
-
29
-
30
-
31
-
32
-
33
-
34
-
35
-
36
-
37
-
38
-
39
-
40
-
41
-
42
-
43
-
44
-
45
-
46
-
47
-
48
-
49
-
50
-
51
-
52
-
53
-
54
-
55
-
56
-
57
-
58
-
59
-
60
-
61
-
62
-
63
-
64
-
65
-
66
-
67
-
68
-
69
-
70
-
71
-
72
-
73
-
74
-
75
-
76
-
77
-
78
-
79
-
80
-
81
-
82
-
83
-
84
-
85
-
86
-
87
-
88
-
89
-
90
-
91
-
92
-
93
-
94
-
95
-
96
-
97
-
98
-
99
-
100
-
101
-
102
-
103
-
104
-
105
-
106
-
107
-
108
-
109
-
110
-
111
-
112
-
113
-
114
-
115
-
116
-
117
-
118
-
119
-
120
-
121
-
122
-
123
-
124
-
125
-
126
-
127
-
128
-
129
-
130
-
131
-
132
-
133
-
134
-
135
-
136
-
137
-
138
-
139
-
140
-
141
-
142
-
143
-
144
-
145
-
146
-
147
-
148
-
149
-
150
-
151
-
152
-
153
-
154
-
155
-
156
-
157
-
158
-
159
-
160
-
161
-
162
-
163
-
164
-
165
-
166
-
167
-
168
-
169
-
170
-
171
-
172
-
173
-
174
-
175
-
176
-
177
-
178
-
179
-
180
-
181
-
182
-
183
-
184
 |
 |

Operation Manual
Mode d’emploi
Manual de instrucciones
MEDIA CENTER RECEIVER
AUTORADIO MULTIMEDIA
RECEPTOR Y CENTRO DE COMUNICACIONES
MVH-P8200BT
MVH-P8200
English
Français
Español