Pioneer PD-F908 Owner's Manual - Page 9
How To Load The Discs - remote control
 |
View all Pioneer PD-F908 manuals
Add to My Manuals
Save this manual to your list of manuals |
Page 9 highlights
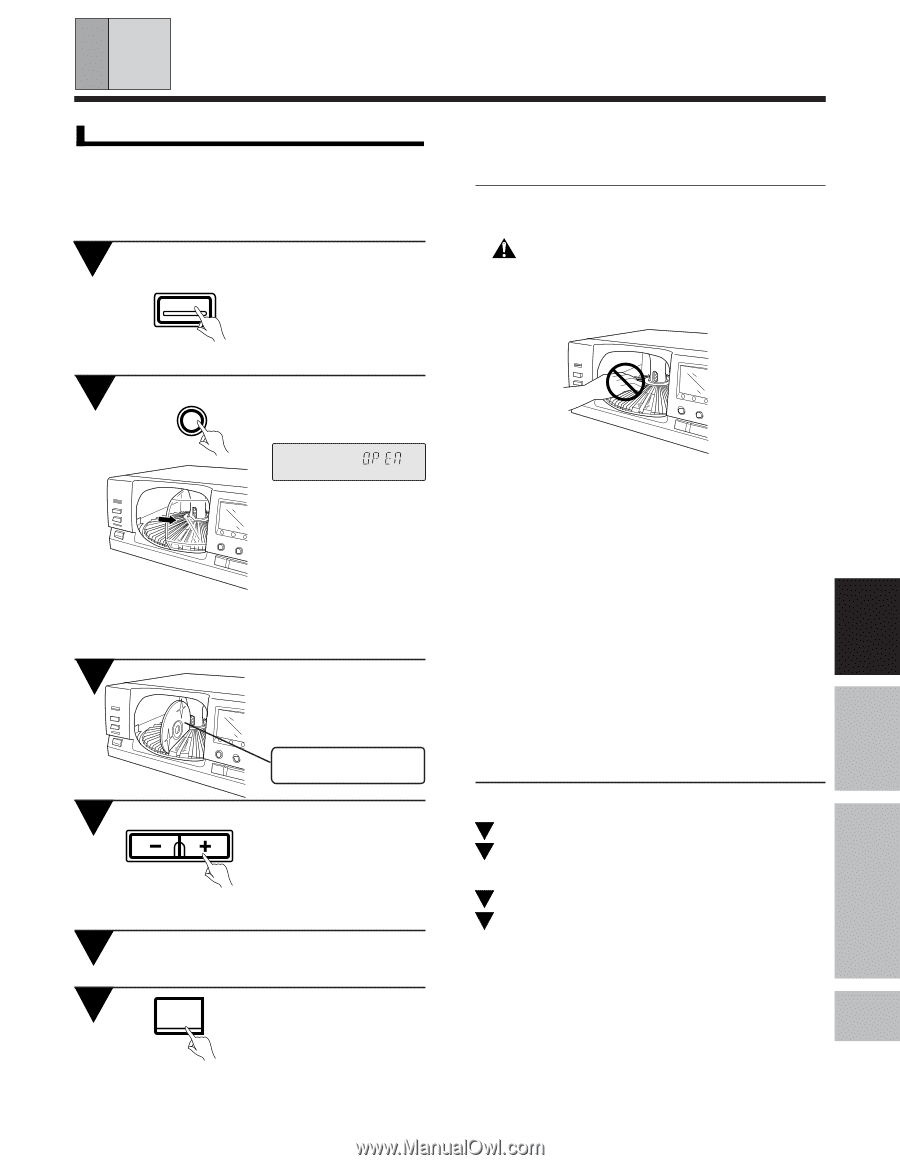
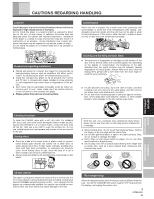
HOW TO LOAD THE DISCS (Be sure to read this before operation) BEFORE OPERATING OPERATIONS Loading discs into the rack ÷ You can load up to 100 discs in the rack. The numbers marked on the rack are used as the disc numbers. These are marked in the clockwise order from 1 to 100. ÷ The following procedure describes how to load discs from disc No. 1. 1 POWER Press POWER STANDBY/ STANDBY / ON ON switch. ÷ Ensure that the disc No. shown on the display is "1". ÷ If the displayed disc No. is not "1", press DISC(-/+) to display "1". 2 UNLOAD Press UNLOAD. « DISC TRACK MIN SEC D 3 D ALL The hood will open. When UNLOAD is pressed, the hood opens to the disc corresponding to the disc No. displayed on the front of the unit. Therefore, if you want to load discs from No. 50, use DISC (-/+) on the unit to display "50", or enter "50" using the remote control unit, before pressing UNLOAD. Load the disc into the rack with the label side (printed surface) facing to the left. Side to be played faces right (label side faces left) 4 DISC Press DISC(+) to rotate the rack. ÷ The rack rotates in the direction of 1,2,3.... Pressing DISC(-) rotates the rack in the opposite direction. 5 Load other discs into the rack by repeating steps 3 and 4 for each of them. 6 OPEN/ CLOSE Press OPEN/CLOSE. ÷ The hood will close. Tip: Difference between OPEN/CLOSE and UNLOAD OPEN/CLOSE: The hood is simply opened or closed. UNLOAD:The slot corresponding to the disc No. being displayed rotates to the center position then the hood is opened. Notes!! ÷ Do not attempt to open the hood with your hand. ÷ Be careful not to pinch your fingers when opening and closing the hood. ÷ If a disc is inserted with its label side facing to the right, it cannot be played back. Be sure to load all discs with their label sides facing to the left. WARNING: Do not put your hand or any other object inside the rack, otherwise injury or part damage may result. D ÷ Do not put anything other than CDs inside the rack. ÷ Do not use adapters for 8-cm (3-in.) CDs. ÷ Load only one disc into each disc slot. ÷ Inserting an 8-cm (3-in.) CDs in between two 12-cm (5-in.) CDs, will make it difficult to remove the 8-cm (3-in.) CD. We recommend inserting 12-cm (5-in.) CDs starting from Disc No. 1 (i.e., 1, 2, 3...) and 8-cm (3-in.) CDs starting from Disc No. 100 (i.e., 100, 99, 98...). ÷ The unit will not operate if the hood is opened during playback. Be sure to close the hood before attempting any operations. ÷ To load or remove a disc in or from the slot which is seen through the hood, press OPEN/CLOSE. The hood is opened, "HOLD" is displayed and the disc can be loaded in or ejected from the slot seen through the hood. Even while "HOLD" is being displayed, the rack can be rotated by pressing DISC (-/+). ÷ Be sure to remove all discs from the rack, set the POWER STANDBY/ON switch to off, and unplug the power cord before moving the unit. To remove the discs... 1 Press UNLOAD. 2 Select the disc No. to be removed by pressing DISC(-/+). ÷ The rack rotates until the selected disc comes in the front of the unit. 3 Remove from the rack. 4 Press OPEN/CLOSE. ÷ The hood will close. 9 En BASIC VARIOUS OPERATIONS
-
 1
1 -
2
-
3
-
 4
4 -
 5
5 -
 6
6 -
 7
7 -
 8
8 -
 9
9 -
 10
10 -
 11
11 -
 12
12 -
 13
13 -
 14
14 -
15
-
16
-
17
-
18
-
19
-
20
 |
 |