Pioneer S-DJ60X Operating Instructions - Page 7
Rear Panel Facilities - s dj50x
 |
View all Pioneer S-DJ60X manuals
Add to My Manuals
Save this manual to your list of manuals |
Page 7 highlights
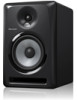
English Rear Panel Facilities * The S-DJ50X is shown in the illustration. 1 LEVEL dial Use to adjust the sound level (volume). 2 HF LEVEL ADJ dial Use to adjust high-frequency sounds. 1 You can select from -2 dB, -1 dB, 0 dB, and 1 dB. 3 AUTO STANDBY switch 2 Use to turn the auto standby function on or off. When the auto standby function is turned on, the speakers automatically enter standby mode if no input signal is 3 received for a certain period of time (approximately 25 minutes) and power consumption can be reduced. When 4 an input signal is received while the speakers are in standby 5 mode, the speakers will automatically resume from standby mode. 6 • The illumination (POWER indicator) on the front panel turns off when the speakers enter standby mode. 7 • When the input signal is weaker than a certain level, the speakers may not automatically resume from standby 8 mode. In such cases, turn off the [AUTO STANDBY] switch to use the speakers. 9 • To force the speakers to resume from standby mode, turn off the [POWER] switch on the rear panel once, and turn it back a on after a few seconds. 4 XLR INPUT connector XLR type balanced input connector. The connector's pin array is as follows: No. 1 Ground, No. 2 Hot, and No. 3 Cold. 5 TRS INPUT jack Balanced-input phone jack. CAUTION Do not connect to both the XLR INPUT connector and the TRS INPUT jack at the same time. 6 RCA INPUT jack RCA pin-type unbalanced input jacks. 7 POWER switch Use to turn the power on and off. CAUTION Before turning on the power, make sure to check that the [VOLTAGE SELECTOR] switch is set to the appropriate voltage for the country or region where the speakers will be used. If the [VOLTAGE SELECTOR] switch is not correctly set, contact a Pioneer service center and request that the set voltage be changed and the fuse be replaced. At the time of shipment, a fuse with the appropriate voltage setting is set in the product. When it becomes necessary to change the voltage setting, the fuse must be replaced. 8 VOLTAGE SELECTOR switch This switch is used to select the appropriate voltage settings for the country/region of use. It is not to be used by the customer directly. 9 AC IN Connect the accessory power cord here and to an AC power outlet. Do not plug in the power cord until all other connections have been completed. Use only the furnished accessory power cord. a Fuse holder En 7
-
 1
1 -
 2
2 -
 3
3 -
 4
4 -
 5
5 -
 6
6 -
 7
7 -
 8
8 -
 9
9 -
 10
10 -
 11
11 -
 12
12 -
13
-
14
-
15
-
16
-
17
-
18
-
19
-
20
-
21
-
22
-
23
-
24
-
25
-
26
-
27
-
28
 |
 |
