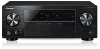
Pioneer VSX-523-K Owner's Manual
Pioneer VSX-523-K Manual
 |
View all Pioneer VSX-523-K manuals
Add to My Manuals
Save this manual to your list of manuals |
Pioneer VSX-523-K manual content summary:
- Pioneer VSX-523-K | Owner's Manual - Page 1
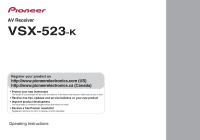
AV Receiver VSX-523-K Register your product on http://www.pioneerelectronics.com (US) http://www.pioneerelectronics.ca (Canada) • Protect your new investment The details of your purchase will be on file for reference in the event of an insurance claim such as loss or theft. • Receive free tips, - Pioneer VSX-523-K | Owner's Manual - Page 2
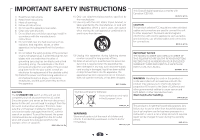
NOT OPEN The lightning flash with arrowhead symbol, of important operating and maintenance (servicing) instructions in the literature accompanying the appliance - Reorient or relocate the receiving antenna. - Increase the separation between the equipment and receiver. - Connect the equipment into - Pioneer VSX-523-K | Owner's Manual - Page 3
Install in accordance with the manufacturer's instructions. 8) Do not install near any time. 14) Refer all servicing to qualified service personnel. Servicing is required when the apparatus valid in the European Union. IMPORTANT NOTICE THE MODEL NUMBER AND SERIAL NUMBER OF THIS EQUIPMENT ARE ON - Pioneer VSX-523-K | Owner's Manual - Page 4
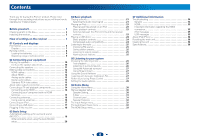
options 28 06 Home Menu Using the Home Menu 30 Manual speaker setup 30 Speaker Setting 30 X.Over 31 Channel Level 31 Speaker Distance 32 The Input Assign menu 32 The Auto Power Down menu 32 The HDMI Setup menu 33 07 Additional information Troubleshooting 34 General 34 HDMI 35 Important - Pioneer VSX-523-K | Owner's Manual - Page 5
other than the recommended connections.) The HDMI Setup menu (page 33) (When the connected TV supports the HDMI Audio Return Channel function.) 5 Use the on-screen automatic MCACC setup to set up your system • Automatically setting up for surround sound (MCACC) (page 19) 6 Basic playback (page - Pioneer VSX-523-K | Owner's Manual - Page 6
set to on after the Auto MCACC setup (page 19)). 3 Receiver HDMI-equipped component; lights when the component is connected (page 14). 7 iPod iPhone indicator Lights when an iPod/iPhone is connected and iPod/USB input is selected (page 23). 8 Remote sensor Receives the signals from the remote - Pioneer VSX-523-K | Owner's Manual - Page 7
is being received in auto stereo mode (page 25). TUNE - Lights when a normal broadcast channel. PRESET - Pro Logic II decoding (see Listening in surround sound on page 26 for more on this). 26 ADV HDMI - Lights when an HDMI signal is selected. Blinks when an HDMI signal is selected and selected HDMI - Pioneer VSX-523-K | Owner's Manual - Page 8
PRESET PRESET 10 HOME MENU PTY iPod CTRL ENTER TUNE BAND RETURN MUTE 11 15 16 12 1 2 3 DISP 4 5 6 CH 7 8 9 CH CLR 0 ENTER 17 RECEIVER Controls and displays As for operating other devices, the remote control codes for the Pioneer products are preset. The settings cannot be - Pioneer VSX-523-K | Owner's Manual - Page 9
be used with Pioneer TVs. - Use to turn on/off the power of the TV. INPUT - Use to select the TV input signal. CH +/- - Use to select channels. VOL +/- - Use to adjust the volume on your TV. 15 VOLUME +/- Use to set the listening volume. 16 MUTE Mutes/unmutes the sound. 17 DISP Switches - Pioneer VSX-523-K | Owner's Manual - Page 10
Place the center speaker above or below the TV so that the sound of the center channel is localized at the TV screen. Also, make sure the center speaker , the speakers should be more directly behind the listener than for home theater playback. • Try not to place the surround speakers farther away - Pioneer VSX-523-K | Owner's Manual - Page 11
2 Connecting the speakers The receiver will work with just two stereo speakers (the front speakers in the diagram) but using at least three speakers is recommended, and a complete setup is best for surround sound. Make sure you connect the speaker on the right to the right (R) terminal and the - Pioneer VSX-523-K | Owner's Manual - Page 12
receiver supports the functions described below through HDMI connections. • Digital transfer of uncompressed video (contents protected by HDCP (1080p/24, 1080p/60, etc.)) • 3D signal transfer • Deep Color signal transfer • x.v.Color signal transfer • Audio Return Channel (see The HDMI Setup menu - Pioneer VSX-523-K | Owner's Manual - Page 13
video terminals. The yellow plugs distinguish them from cables for audio. Yellow VIDEO About video outputs connection This receiver is not loaded with a video converter. When you use HDMI cables for connecting to the input device, the same cables should be used for connecting to the TV. The - Pioneer VSX-523-K | Owner's Manual - Page 14
audio cables (as shown). - If the TV supports the HDMI Audio Return Channel function, the sound of the TV is input to the receiver via the HDMI terminal, so there is no need to connect an audio cable. In this case, set ARC at HDMI Setup to ON (see The HDMI Setup menu on page 33). Important • If the - Pioneer VSX-523-K | Owner's Manual - Page 15
shows connections of a TV and DVD player (or other playback component) with no HDMI terminal to the receiver. Note • In order to listen to the audio from the TV that is connected to this receiver using a analog audio cables, set-up for analog audio input is required (see The Input Assign menu on - Pioneer VSX-523-K | Owner's Manual - Page 16
2 Connecting your equipment Connecting antennas Connect the AM loop antenna and the FM wire antenna as shown below. To improve reception and sound quality, connect external antennas (see Using external antennas below). fig. a fig. b 3 Place the AM antenna on a flat surface and in a direction - Pioneer VSX-523-K | Owner's Manual - Page 17
to listen to two-channel audio using the USB interface on the front of this receiver. Switch the receiver into standby then connect your USB device to the iPod/iPhone terminal on the front panel of this receiver. • This receiver does not support a USB hub. • For instructions on playing the USB - Pioneer VSX-523-K | Owner's Manual - Page 18
damaged, ask your nearest PIONEER authorized service center or your dealer for a replacement. • The receiver should be disconnected by HDMI indicator in the front panel display blinks during this process, and you can turn on this receiver once it has stopped blinking. When you set ARC at HDMI setup - Pioneer VSX-523-K | Owner's Manual - Page 19
the receiver automatically exits and no settings will be made. • The screensaver automatically starts after three minutes of inactivity. 5 Select 'Auto MCACC' from the Home Menu, then press ENTER. 4 6 34 Home Menu 1.Auto MCACC 2.Manual SP Setup 3.Input Assign 4.Auto Power Down 5.HDMI Setup Return - Pioneer VSX-523-K | Owner's Manual - Page 20
to 3 minutes. 10 The Auto MCACC setup has finished! You return to the Home Menu. The settings made in the Auto MCACC setup should give you excellent surround sound from your system, but it is also possible to adjust these settings manually using the Home Menu (starting on page 30). Note • Depending - Pioneer VSX-523-K | Owner's Manual - Page 21
instructions for playing a source (such as a DVD disc) with your home theater system. 1 Switch on your system components and receiver be selected. However, if the ARC at HDMI Setup is set to ON, the input is fixed to H (HDMI) and cannot be changed. • When set to H (HDMI) or C1/O1 (digital), 2 lights - Pioneer VSX-523-K | Owner's Manual - Page 22
instruction manual supplied with your DVD player. Tip • In order to enjoy the picture and/or sound from devices connected to each terminal, select the input by doing the following. Video/Audio (HDMI) is assigned to CD under factory settings. If you want to change this to TV input, please change the - Pioneer VSX-523-K | Owner's Manual - Page 23
models. • This receiver has been developed and tested for the software version of iPod/iPhone indicated on the website of Pioneer (http://pioneer.jp/homeav/support a particular artist. 4 Basic playback controls This receiver's remote control buttons can be used for basic playback of files stored on - Pioneer VSX-523-K | Owner's Manual - Page 24
channel audio using the USB interface on the front of this receiver. Important • Pioneer flash memory (particularly keydrives) and digital audio players (MP3 players) of format FAT16/32. It is not possible to connect this receiver receiver's remote (MPEG-4 Advanced Audio Coding) - Sampling rates: 32 - Pioneer VSX-523-K | Owner's Manual - Page 25
Manual tuning To change the frequency one step at a time, press TUNE High speed tuning Press and hold TUNE / for high speed tuning. Improving FM sound If the TUNE or ST indicators don't light when tuning to an FM station because the signal is weak, set the receiver on the remote control to - Pioneer VSX-523-K | Owner's Manual - Page 26
be available depending on the current source, settings and status of the receiver. Auto playback AUTO/ DIRECT AUTO SURROUND sound ALC/ STANDARD ALC/ STANDARD SURR Using this receiver, you can listen to any source in surround sound. However, the options available will depend on your speaker setup - Pioneer VSX-523-K | Owner's Manual - Page 27
are heard according to the settings made in the Manual SP Setup (speaker setting, channel level, speaker distance), as well as with dual mono settings. You will hear sources according to the number of channels in the signal. Phase Control, Acoustic Calibration EQ, Sound Delay, Auto Delay, LFE - Pioneer VSX-523-K | Owner's Manual - Page 28
PARAMETER menu, it is unavailable due to the current source, settings and status of the receiver. Press PHASE to switch the P.CTL (Phase Control) ON or OFF. Note • Phase matching is a very important factor in achieving proper sound reproduction. If two waveforms are 'in phase', they crest and - Pioneer VSX-523-K | Owner's Manual - Page 29
You shouldn't have any problems using this with most SACD discs, but if the sound distorts, it is best to switch the gain setting back to 0 dB. g. This feature is only available when the connected display supports the automatic audio/video synchronizing capability ('lip-sync') for HDMI. If you find - Pioneer VSX-523-K | Owner's Manual - Page 30
page 32). • HDMI Setup - Set the audio return channel function and set the HDMI input signal to Standby Through output or not during standby (see The HDMI Setup menu on page 33). Manual speaker setup This receiver allows you to make detailed settings to optimize the surround sound performance. You - Pioneer VSX-523-K | Owner's Manual - Page 31
factor when setting up a home theater system. CAUTION • The test tones used in the Channel Level settings are output at high volume. 1 Select 'Manual SP Setup' from the Home Menu. 2 Select 'Channel Level' from the Manual SP Setup menu. 2.Manual SP Setup a.Speaker Setting b.X.Over c.Channel Level - Pioneer VSX-523-K | Owner's Manual - Page 32
surround sound. • For the assignment of the digital signal inputs, see Selecting the audio input signal on page 21. 1 Select 'Manual SP Setup' from the Home Menu. 2 Select 'Speaker Distance' from the Manual SP Setup menu. 2.Manual SP Setup a.Speaker Setting b.X.Over c.Channel Level d.Speaker - Pioneer VSX-523-K | Owner's Manual - Page 33
Menu. Home Menu 1.Auto MCACC 2.Manual SP Setup 3.Input Assign 4.Auto Power Down 5.HDMI Setup 5.HDMI Setup ARC OFF Standby Through [ OFF ] Return Return 2 Choose the 'ARC' setting you want. When a TV supporting the HDMI Audio Return Channel function is connected to the receiver, the sound of - Pioneer VSX-523-K | Owner's Manual - Page 34
the cassette deck away from your receiver, until the noise disappears. No sound is output or a noise is output when software with DTS is played back. Make sure the player's settings are correct and/or the DTS signal out is on. Refer to the instruction manual supplied with the DVD player. There - Pioneer VSX-523-K | Owner's Manual - Page 35
the iPod touch/iPhone to the receiver. Display flashes and cannot be operated. Depending on the input signal or listening mode, there may be functions that cannot be selected. HDMI No picture or sound. If the problem still persists when connecting your HDMI component directly to your monitor - Pioneer VSX-523-K | Owner's Manual - Page 36
receiver has been reset to the factory default settings per channel, min setup 1 Remote control 1 Dry cell batteries (AAA size IEC R03 2 AM loop antenna 1 FM wire antenna 1 Warranty card 1 Quick start guide 1 Safety Brochure 1 SPEAKER CAUTION Sheet (English only 1 These operating instructions - Pioneer VSX-523-K | Owner's Manual - Page 37
safe level BEFORE your hearing adapts. ESTABLISH A SAFE LEVEL: • Set your volume control at a low setting. • Slowly increase the sound until you can hear it comfortably and clearly, without distortion. • Once you have established a comfortable sound level, set the dial and leave it there. BE SURE TO - Pioneer VSX-523-K | Owner's Manual - Page 38
To register your product, find the nearest authorized service location, to purchase replacement parts, operating instructions, or accessories, please go to one of following URLs : Pour enregistrer votre produit, trouver le service après-vente agréé le plus proche et pour acheter des pièces de
-
 1
1 -
 2
2 -
 3
3 -
 4
4 -
 5
5 -
 6
6 -
 7
7 -
8
-
9
-
10
-
11
-
12
-
13
-
14
-
15
-
16
-
17
-
18
-
19
-
20
-
21
-
22
-
23
-
24
-
25
-
26
-
27
-
28
-
29
-
30
-
31
-
32
-
33
-
34
-
35
-
36
-
37
-
38
 |
 |

Register your product on
http://www.pioneerelectronics.ca (Canada)
•
Protect your new investment
The details of your purchase will be on file for reference in the event of an insurance claim such as loss or theft.
•
Improve product development
Your input helps us continue to design products that meet your needs.
•
Receive a free Pioneer newsletter
Registered customers can opt in to receive a monthly newsletter.
•
Receive free tips, updates and service bulletins on your new product
AV Receiver
VSX-523
-K
Operating Instructions