Pioneer VSX-534 Instruction Manual English - Page 29
Connecting Playback Devices, Connecting an AV Component with HDMI Jack Mounted
 |
View all Pioneer VSX-534 manuals
Add to My Manuals
Save this manual to your list of manuals |
Page 29 highlights
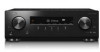
Contents ≫ Connections ≫ Playback ≫ Setup ≫ Connecting Playback Devices Connecting an AV Component with HDMI Jack Mounted This is a connection example of an AV component equipped with an HDMI jack. When connecting with an AV component that conforms to the CEC (Consumer Electronics Control) standard, you can use the HDMI CEC function (*) that enables linking with input selectors, etc. and the HDMI Standby Through function that can transmit video and audio signals of the AV component to the TV even if this unit is in standby mode. Also, the POWER OUT port on the rear panel can supply power (5 V/1 A) to a streaming media player, etc. using a USB cable. To supply power even when this unit is in standby mode, change the setting value of "USB Power Out at Standby" ( p79) to "On". • To play 4K or 1080p video, use a high speed HDMI cable. a BD/DVD a HDMI cable GAME Streaming media player Cable/Satellite set-top box Setup • The HDMI CEC function and HDMI Standby Through function are automatically enabled if you select "Yes" for "3. ARC Setup" in Initial Setup ( p83). If "No, Skip" is selected, settings are required in the Setup menu after Initial Setup is completed. Press on the remote controller, and select "6. Hardware" - "HDMI" to make the settings. ( p77) • To enjoy digital surround sound including Dolby Digital, set the audio output of the connected Blu-ray Disc player etc. to the Bitstream output. (*)The HDMI CEC function: This function enables various linking operations with CEC-compliant devices, such as switching input selectors interlocking with a CEC-compliant player, switching audio output between TV and this unit or adjusting the volume using the remote controller of a CEC-compliant TV, and automatically switching this unit to standby when the TV is turned off. 29 Front Panel≫ Rear Panel≫ Remote≫
-
 1
1 -
2
-
3
-
4
-
5
-
6
-
7
-
8
-
9
-
10
-
11
-
12
-
13
-
14
-
15
-
16
-
17
-
18
-
19
-
20
-
21
-
22
-
23
-
 24
24 -
 25
25 -
 26
26 -
 27
27 -
 28
28 -
 29
29 -
 30
30 -
 31
31 -
 32
32 -
 33
33 -
 34
34 -
35
-
36
-
37
-
38
-
39
-
40
-
41
-
42
-
43
-
44
-
45
-
46
-
47
-
48
-
49
-
50
-
51
-
52
-
53
-
54
-
55
-
56
-
57
-
58
-
59
-
60
-
61
-
62
-
63
-
64
-
65
-
66
-
67
-
68
-
69
-
70
-
71
-
72
-
73
-
74
-
75
-
76
-
77
-
78
-
79
-
80
-
81
-
82
-
83
-
84
-
85
-
86
-
87
-
88
-
89
-
90
-
91
-
92
-
93
-
94
-
95
-
96
-
97
-
98
-
99
 |
 |
