Pioneer VSX-74TXVi Owner's Manual - Page 59
Control In, Control, Receiver, Sr+ On, Sr+ Off
 |
View all Pioneer VSX-74TXVi manuals
Add to My Manuals
Save this manual to your list of manuals |
Page 59 highlights
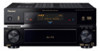
Other connections 08 • Use a 3-ringed miniplug SR+ cable to connect the CONTROL IN jack of this receiver with the CONTROL OUT jack of your plasma display. VIDEO INPUT 1 Pioneer plasma display VIDEO INPUT 2 DVD player Satellite receiver, etc DVD/LD AUDIO IN STANDBY/ON PHASE CONTROL INPUT SELECTOR MCACC AUTO SURR/ POSITION STREAM DIRECT SAT AUDIO IN AUDIO/VIDEO MULTI-CHANNEL RECEIVER VSX-74TXVi PHASE CONTROL DIGITAL PRECISION PROCESSING SPEAKERS PHONES (TUNE +) AV PARAMETER (ST -) SETUP ENTER TUNER EDIT (ST +) RETURN (TUNE -) BAND MULTI - ROOM & SOURCE/REC SEL CONTROL ON/OFF VIDEO SELECT SIGNAL EXTENDED SELECT MODE STEREO MCACC SETUP MIC VIDEO/GAME 2 INPUT DIGITAL IN S-VIDEO VIDEO L AUDIO R HOME THX STANDARD SURROUND ADVANCED SURROUND MASTER VOLUME This receiver To make the most of the SR+ features, you should connect your source components (DVD player, etc.) in a slightly different way to that described in this chapter. For each component, connect the video output directly to the plasma display, and just connect the audio (analog and/ or digital) to this receiver. Using the SR+ mode with a Pioneer plasma display When connected using an SR+ cable, a number of features become available to make using this receiver with your Pioneer plasma display even easier. These features include: • On-screen displays when making receiver settings, such as speaker setup, MCACC setup, and so on. • On-screen volume display. • On-screen display of listening mode. • Automatic video input switching on the plasma display. • Automatic volume muting on the plasma display. See also SR+ Setup for Pioneer plasma displays on page 63 for more on setting up the receiver. Important • The additional SR+ features do not work when the iPod or XM Radio functions are selected. RECEIVER INPUT SELECT SYSTEM OFF SOURCE SLEEP SR+ VIDEO SEL DIMMER ANALOG ATT CD DVD DVR2 DVR1 TV SAT CD-R i Pod VIDEO 2 VIDEO1 TVCONT XM RADIO TUNER ROOM2/3 RECEIVER SLEEP VIDEO ANALOG D.ACCESS +10 AV PARAMETER TOP MENU ì TUNE DTVMENU ST SETUP ENTER CLASS DISC ENTER CH LEVEL MENU ST T.EDIT RETURN CATEGORY TUNE GUIDE TV CONTROL BAND 1 Make sure that the plasma display and this receiver are switched on and that they are connected with the SR+ cable. See Using this receiver with a Pioneer plasma display above for more on connecting these components. • Make sure you have also selected the display input to which you've connected the receiver in The Input Setup menu on page 61. 2 To switch SR+ mode on/off, press RECEIVER, then the SR+ button. The front panel display shows SR+ ON or SR+ OFF. • The automatic volume muting feature is enabled separately; see SR+ Setup for Pioneer plasma displays on page 63. 59 En
-
 1
1 -
2
-
3
-
4
-
5
-
6
-
7
-
8
-
9
-
10
-
11
-
12
-
13
-
14
-
15
-
16
-
17
-
18
-
19
-
20
-
21
-
22
-
23
-
24
-
25
-
26
-
27
-
28
-
29
-
30
-
31
-
32
-
33
-
34
-
35
-
36
-
37
-
38
-
39
-
40
-
41
-
42
-
43
-
44
-
45
-
46
-
47
-
48
-
49
-
50
-
51
-
52
-
53
-
 54
54 -
 55
55 -
 56
56 -
 57
57 -
 58
58 -
 59
59 -
 60
60 -
 61
61 -
 62
62 -
 63
63 -
 64
64 -
65
-
66
-
67
-
68
-
69
-
70
-
71
-
72
-
73
-
74
-
75
-
76
-
77
-
78
-
79
-
80
-
81
-
82
-
83
-
84
-
85
-
86
-
87
-
88
 |
 |
