Polaroid CZA-05300B User Manual - Page 30
Removing Red-eye Effects, Adding Data Imprint
 |
UPC - 074100754002
View all Polaroid CZA-05300B manuals
Add to My Manuals
Save this manual to your list of manuals |
Page 30 highlights
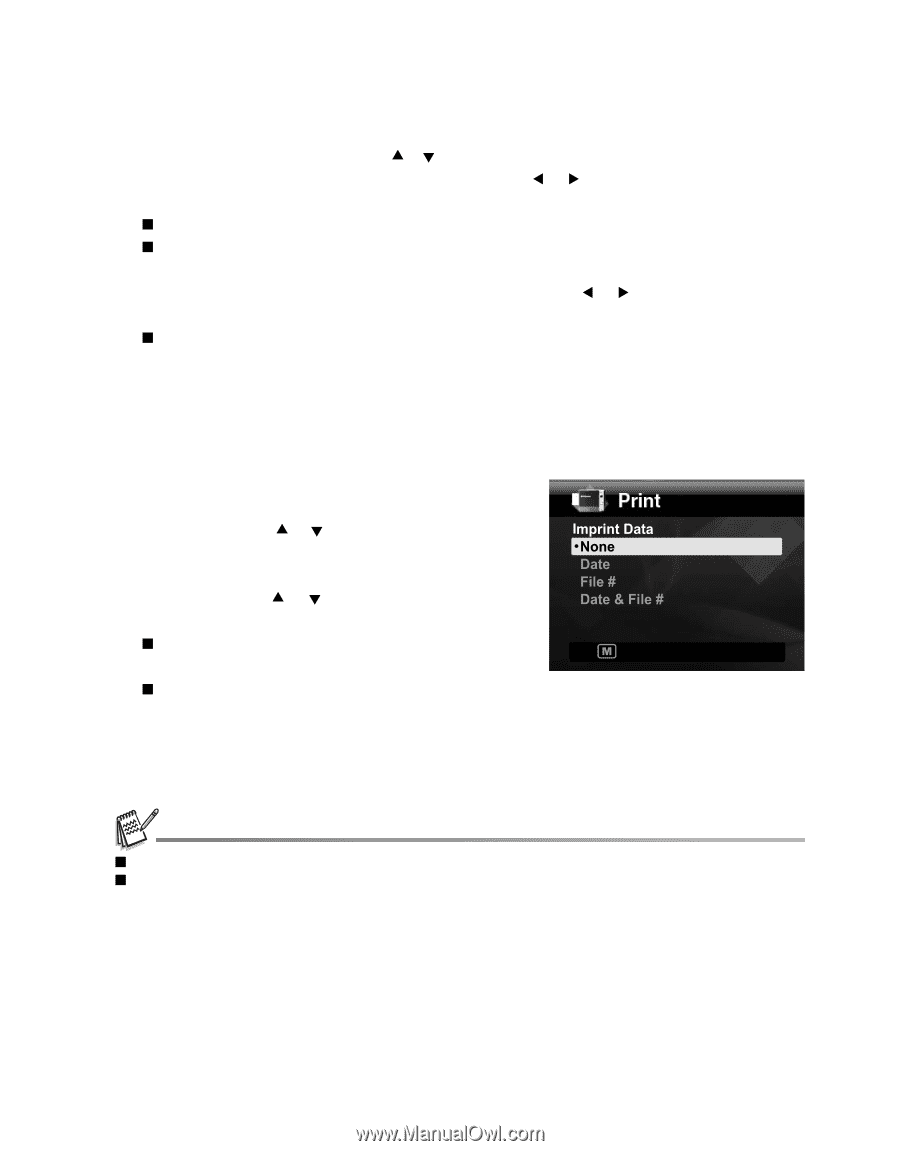
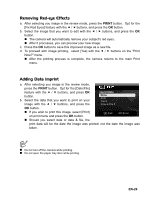
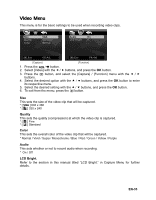
Removing Red-eye Effects a. After selecting you image in the review mode, press the PRINT button. Opt for the [Fix Red Eyes] feature with the c / d buttons, and press the OK button. b. Select the image that you want to edit with the e / f buttons, and press the OK button. „ The camera will automatically remove your subject's red eyes. „ After it processes, you can preview your new image. c. Press the OK button to save this improved image as a new file. d. To proceed with image printing, select [Yes] with the e / f buttons on the "Print Now?" menu. „ After the printing process is complete, the camera returns to the main Print menu. Adding Data Imprint a. After selecting you image in the review mode, press the PRINT button. Opt for the [Date/File] feature with the c / d buttons, and press OK button. b. Select the data that you want to print on your image with the c / d buttons, and press the OK button. „ If you wish to print this image, select [Print] on print menu and press the OK button. :Exit OK:Enter „ Should you select date or date & file, the print data will be the date the image was printed; not the date the image was taken. „ Do not turn off the camera while printing. „ Do not open the paper tray door while printing. EN-29
-
 1
1 -
2
-
3
-
4
-
5
-
6
-
7
-
8
-
9
-
10
-
11
-
12
-
13
-
14
-
15
-
16
-
17
-
18
-
19
-
20
-
21
-
22
-
23
-
24
-
 25
25 -
 26
26 -
 27
27 -
 28
28 -
 29
29 -
 30
30 -
 31
31 -
 32
32 -
 33
33 -
 34
34 -
 35
35 -
36
-
37
-
38
-
39
-
40
-
41
-
42
-
43
-
44
-
45
-
46
-
47
 |
 |