Polaroid WL2650U User Manual - Page 8
Bottom side, Remote control
 |
UPC - 082400027566
View all Polaroid WL2650U manuals
Add to My Manuals
Save this manual to your list of manuals |
Page 8 highlights
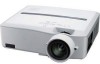
Preparating your projector (continued) Bottom side 1 1 Adjustment foot (for vertical position) 2 Adjustment foot (for horizontal position) 2 Remote control 28 or 1 Laser aperture 2 Transmission window 3 Indicator 4 POWER button 1 5 VIDEO button 6 DVI-D (HDCP) button 7 HOME button 2 8 END button 9 Mouse pointer 10 MENU button 3 11 + , - (VOLUME) buttons 12 WALL SCREEN button 4 13 CE (Color Enhancer) button 5 COMPUTER 1 2 27 14 MUTE button (Audio/Video) 6 7 DVI-D(HDCP) VIDEO S-VIDEO HOME PageUP AUTO POSITION END PageDOWN LASER 26 15 EXPAND button 25 16 STILL button 17 PinP button 8 24 18 ASPECT button 23 19 KEYSTONE button 20 ENTER button 9 22 21 R-CLICK button 22 Direction buttons 10 21 23 LASER button 11 MENU R-CLICK ENTER 20 24 AUTO POSITION button KEYSTONE 19 25 PageUP and PageDOWN buttons VOLUME ASPECT 18 26 S-VIDEO button 12 WALL SCREEN EXPAND PinP 17 27 COMPUTER 1, 2 buttons 13 CE MUTE STILL 16 28 L-CLICK button • The + and - buttons are used in the KEYSTONE 15 adjustment and the EXPAND mode in addition to the volume control. 14 • The direction buttons are used for the keystone adjustment and fine adjustment (W and X buttons only). • Pressing the LASER button emits a laser beam. Even when you keep holding down the LASER but- ton, it is emitted only one minute. To keep emitting it longer, press the LASER button again. • You can disable the LASER button to prevent laser radiation due to misuse of the button. How to disable the LASER button While holding the LASER button down, press the T button 3 times. There are 2 types of labels placed on the back of the remote control and either of them is placed on it. How to enable the LASER button While holding the LASER button down, press the S button 3 times. • Whenever the batteries are replaced, the LASER button is enabled. About the laser beam This remote control is a Class 2 laser product. (Max. output: 1 mW, Wavelength: 620-640 nm) Beam Divergence: 6 m distance about 10.0 mm x 10.0 mm (±6.0 mm) Caution: • Pressing the LASER button on the remote control emits a laser beam. Do not look into the laser beam directly. Do not point the laser beam at anyone. Looking at the laser beam directly may damage eyesight. • Use of controls or adjustments or procedures other than those specified herein may result in hazardous radiation exposure. • This remote controller cannot be repaired. EN-8
-
 1
1 -
2
-
 3
3 -
 4
4 -
 5
5 -
 6
6 -
 7
7 -
 8
8 -
 9
9 -
 10
10 -
 11
11 -
 12
12 -
 13
13 -
14
-
15
-
16
-
17
-
18
-
19
-
20
-
21
-
22
-
23
-
24
-
25
-
26
-
27
-
28
-
29
-
30
-
31
-
32
-
33
-
34
-
35
-
36
-
37
-
38
-
39
-
40
-
41
-
42
-
43
-
44
-
45
-
46
-
47
 |
 |
