Polaroid iS827 Quick Start Guide - Page 2
What's Included, Parts Of The Camera, Initial Setup, Main Camera Modes - user manual
 |
View all Polaroid iS827 manuals
Add to My Manuals
Save this manual to your list of manuals |
Page 2 highlights
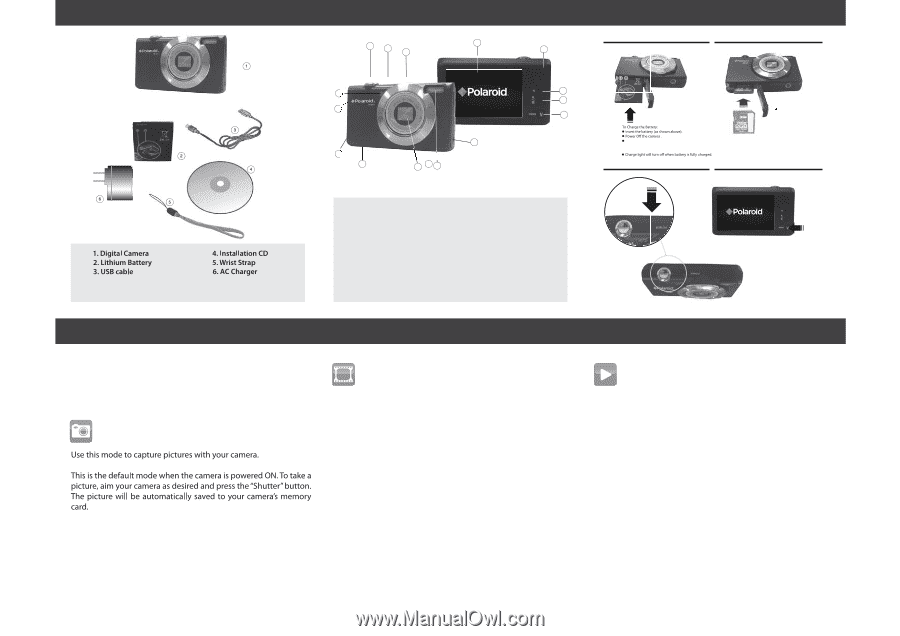
1 WHAT'S INCLUDED 2 PARTS OF THE CAMERA 2 1 13 3 4 3 INITIAL SETUP Installing the batteries Installing memory card 6 8 14 11 12 10 9 7 15 16 SD Memory card 5 (up to 32GB) needed for normal use Connect the camera using the USB cable to the computer's USB port or to the AC Adapter (which is then connected to a standard wall socket). Turning On the camera Using the camera Micro SD Memory Card not included 1.Power button 2.Shutter button 3.LCD Screen 4.LED 5.Home 6.Self-Timer LED 7.Flash Light 8.USB Slot 9.Tripod Socket 10.Lens 11.Battery Compartment (inner Memory Card Slot) 12.Speaker 13.Microphone 14.Wrist Strap Connector 15.Zoom In 16.Zoom out Accessing the menu 4 MAIN CAMERA MODES Your camera has different modes for the various camera functions. You can switch modes by pressing the MODE button on your camera after the camera has been powered ON. Photo Capture Mode To access the various menus for the Photo Capture mode, press the Menu icon while in the Photo Capture mode. For more information, please refer to your camera's user manual. Video Capture Mode Playback Mode (Photos & Videos) Use this mode to capture videos with your digital camera. After turning on your camera, press the HOME Button to enter the main menu. Tap the Video icon on the touch screen to enter the Video Capture Mode . To take a video , aim your camera as desired and press the "Shutter" button to start the recording. A red indicator will appear on the LCD screen while the recording is in progress. To stop the recording, press the "Shutter" button again. The video will be automatically saved to your camera's memory card. To access the various menus for the Video Capture mode, press the Menu icon while in the Video Capture mode. For more information, please refer to your camera's user manual. Use this mode to view and manage the photos and videos on your camera. After turning on your camera, press the HOME Button to enter the main menu. Tap the Playback icon on the touch screen to enter the Playback Mode. You can scroll through the photos and videos that you've previously taken to view, edit or delete them as desired. To access the various menus for the Playback mode for photos and videos, press the Menu icon while in the Playback mode. For more information, please refer to your camera's user manual. AM-iS827-CEG-USA-1
-
 1
1 -
 2
2
 |
 |