Poulan 2050WT User Manual - Page 7
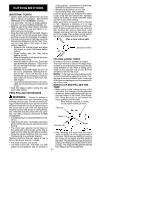
Disengaged, Engaged
 |
View all Poulan 2050WT manuals
Add to My Manuals
Save this manual to your list of manuals |
Page 7 highlights
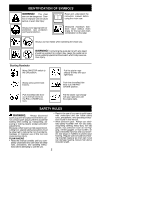
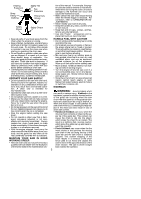
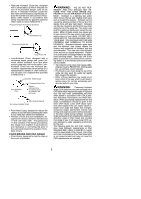
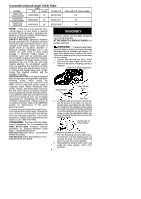
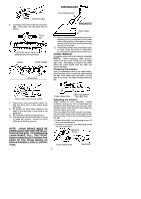
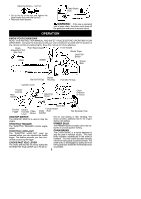
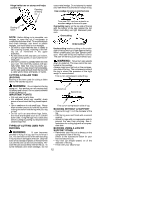
Mount the Bar 6. Carefully remove the chain from the package. Hold chain with the drive links as shown. Tip of Bar CUTTERS MUST FACE IN DIIRECTION OF ROTATION Cutters Depth Gauge Drive Links DISENGAGED Front Hand Guard ENGAGED Chain Brake 11. Now, install chain brake making sure the adjusting pin is positioned in the lower hole in the guide bar. Remember this pin moves the bar forward and backward as the screw is turned. 12. Install chain brake nuts and finger tighten only. Once the chain is tensioned, you will need to tighten chain brake nuts. CHAIN TENSION (Including units with chain already installed) NOTE: When adjusting chain tension, make sure the chain brake nuts are finger tight only. Attempting to tension the chain when the chain brake nuts are tight can cause damage. Checking the tension: Use the screwdriver end of the chain adjustment tool (bar tool) to move the chain around the bar. If the chain does not rotate, it is too tight. If too loose, the chain will sag below the bar. Place chain onto the sprocket 7. Place chain over and behind clutch, fitting the drive links in the clutch drum sprocket. 8. Fit bottom of drive links between the teeth in the sprocket in the nose of the guide bar. 9. Fit chain drive links into bar groove. 10. Pull guide bar forward until chain is snug in guide bar groove. Ensure all drive links are in the bar groove. NOTE: CHAIN BRAKE MUST BE DISENGAGED BEFORE INSTALLATION ON THE SAW. TO DISENGAGE CHAIN BRAKE, PULL THE FRONT HAND GUARD BACK TOWARD THE REAR OF THE CHAIN BRAKE AS FAR AS POSSIBLE (SEE ILLUSTRATION). Chain Adjustment Chain Brake Nuts Tool (Bar Tool) Adjusting the tension: Chain tension is very important. Chain stretches during use. This is especially true during the first few times you use your saw. Always check chain tension each time you use and refuel your saw. You can adjust the chain tension by loosening the chain brake nuts and turning the ad- justing screw 1/4 of a turn while lifting up on the bar. S If chain is too tight, turn adjusting screw 1/4 turn counterclockwise. S If chain is too loose, turn adjusting screw 1/4 turn clockwise. Adjusting Screw Chain Brake Nuts 7 Guide Bar
-
 1
1 -
 2
2 -
 3
3 -
 4
4 -
 5
5 -
 6
6 -
 7
7 -
 8
8 -
 9
9 -
 10
10 -
 11
11 -
 12
12 -
13
-
14
-
15
-
16
-
17
-
18
 |
 |
