Poulan 271150 User Manual - Page 19
Muffler, Spark Plugs, Engine Cooling Fins, In-line Fuel Filter, Important - leaf blower
 |
View all Poulan 271150 manuals
Add to My Manuals
Save this manual to your list of manuals |
Page 19 highlights
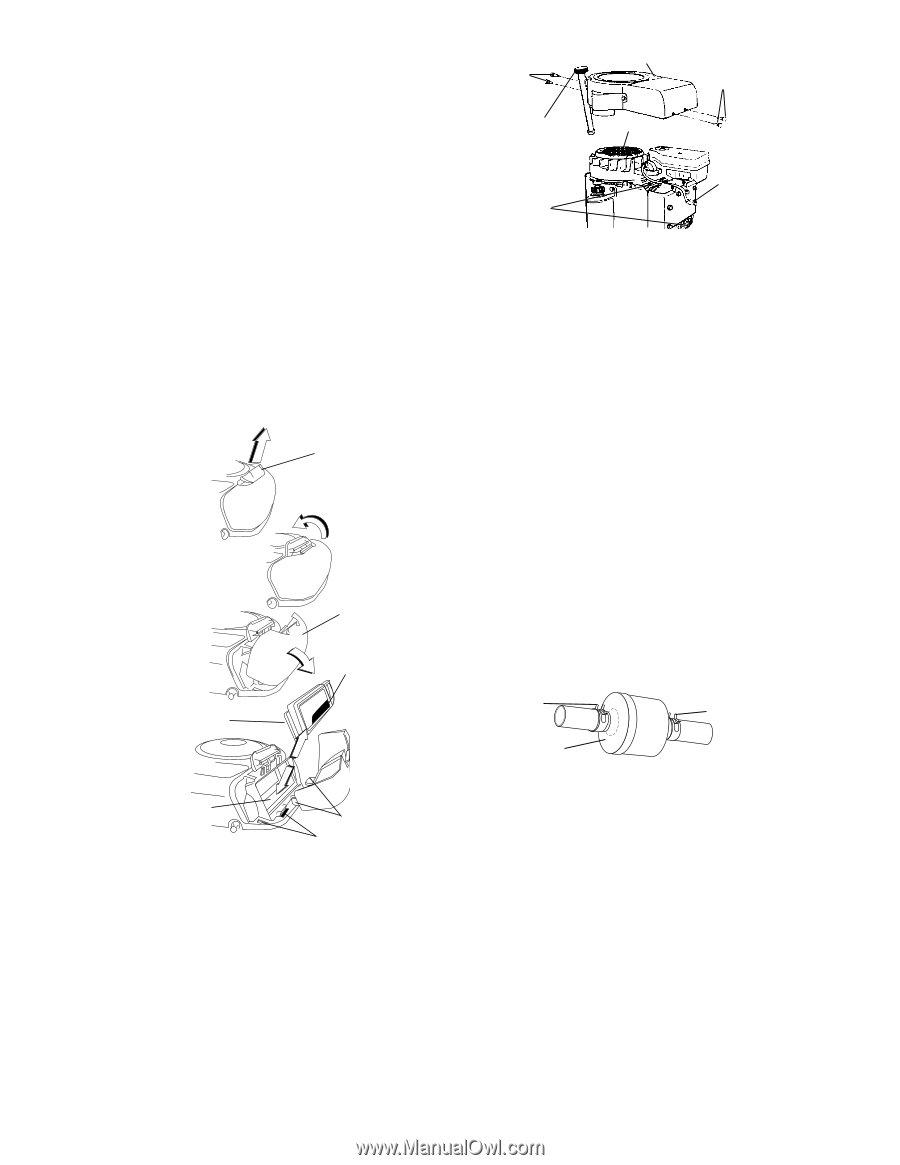
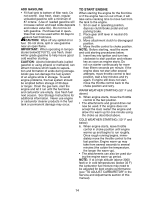
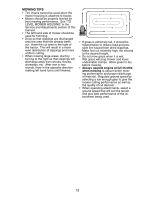
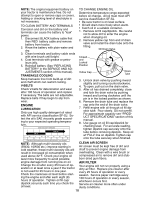
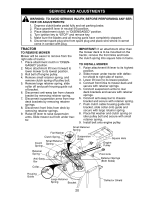
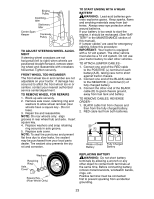
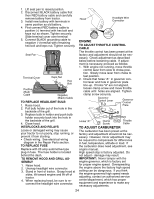
1. Pull up on air filter cover handle and rotate towards engine. 2. Remove cover. 3. Carefully remove air filter cartridge and pre-cleaner from base. 4. Clean base carefully to prevent debris from falling into carburetor. NOTE: If very dirty or damaged, replace cartridge. 5. Place new pre-cleaner and cartridge firmly in base. 6. Align tabs on cover with slots in blower housing and replace cover. 7. Hook handle on cover and push down on handle to close. IMPORTANT: Petroleum solvents, such as kerosene, are not to be used to clean the cartridge. They may cause deterioration of the cartridge. Do not oil cartridge. Do not use pressurized air to clean cartridge. Handle Pre-cleaner Cover Cartridge Screws Blower Housing Screws Dipstick Tube Assembly Air Screen Engine Cooling Fins Spark Plug MUFFLER Inspect and replace corroded muffler and spark arrester (if equipped) as it could create a fire hazard and/or damage. SPARK PLUG(S) Replace spark plug(s) at the beginning of each mowing season or after every 100 hours of operation, whichever occurs first. Spark plug type and gap setting are shown in "PRODUCT SPECIFICATIONS" section of this manual. IN-LINE FUEL FILTER The fuel filter should be replaced once each season. If fuel filter becomes clogged, obstructing fuel flow to carburetor, replacement is required. 1. With engine cool, remove filter and plug fuel line sections. 2. Place new fuel filter in position in fuel line with arrow pointing towards carburetor. 3. Be sure there are no fuel line leaks and clamps are properly positioned. 4. Immediately wipe up any spilled gasoline. Clamp Clamp Fuel Filter CLEANING Base • Clean engine, battery, seat, finish, etc. Tabs of all foreign matter. Slots ENGINE COOLING FINS Remove any dust, dirt or oil from engine cooling fins to prevent engine damage from overheating. 1. Remove screws from blower housing and lift housing and dipstick tube assembly off engine. 2. Cover oil fill opening to prevent entry of dirt. 3. Use compressed air or stiff bristle brush to thoroughly clean engine cooling fins. 4. To reassemble, reverse above procedure. • Keep finished surfaces and wheels free of all gasoline, oil, etc. • Protect painted surfaces with automotive type wax. We do not recommend using a garden hose or pressure washer to clean your tractor unless the engine and transmission are covered to keep water out. Water in engine or transmission will shorten the useful life of your tractor. Use compressed air or a leaf blower to remove grass, leaves and trash from tractor and mower. 19
-
 1
1 -
2
-
3
-
4
-
5
-
6
-
7
-
8
-
9
-
10
-
11
-
12
-
13
-
 14
14 -
 15
15 -
 16
16 -
 17
17 -
 18
18 -
 19
19 -
 20
20 -
 21
21 -
 22
22 -
 23
23 -
 24
24 -
25
-
26
-
27
-
28
-
29
-
30
-
31
-
32
-
33
-
34
-
35
-
36
-
37
-
38
-
39
-
40
-
41
-
42
-
43
-
44
-
45
-
46
-
47
-
48
 |
 |