Poulan 810EPT User Manual - Page 18
STORAGE, CHAIN ADJUSTMENT, REPLACING THE LINE, for line trimmer attachment
 |
View all Poulan 810EPT manuals
Add to My Manuals
Save this manual to your list of manuals |
Page 18 highlights
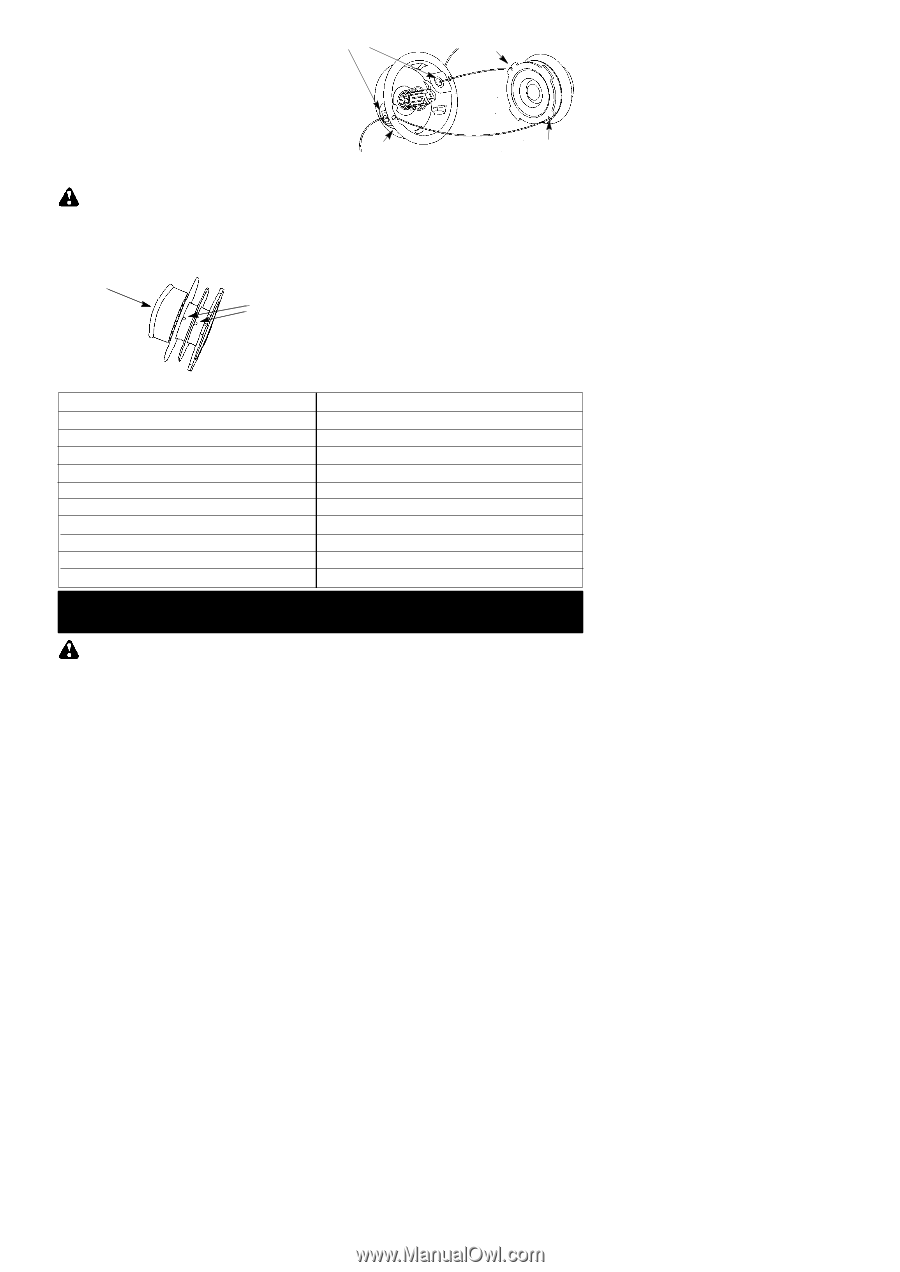
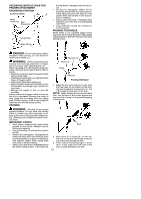
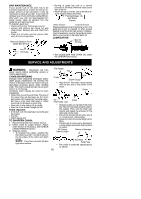
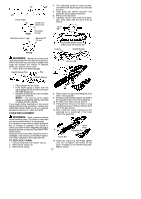
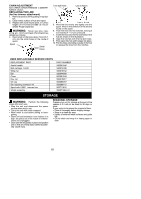
CHAIN ADJUSTMENT See CHECK CHAIN TENSION in MAINTENANCE section. REPLACING THE LINE (for line trimmer attachment) 1. Remove spool by firmly pulling on tap button. 2. Clean entire surface of hub and spool. 3. Replace with a pre-wound spool, or cut two lengths of 12-1/2 feet of 0.080″ (2 mm) diameter Poulan brand line. WARNING: Never use wire, rope, string, etc., which can break off and become a dangerous missile. 4. Insert ends of the lines about 1/2 inch (1 cm) into the small holes on the inside of spool. Spool Small Holes Line exit holes Line in Notch Hub Line in Notch 5. Wind the line evenly and tightly onto the spool. Wind in the direction of the arrows found on the spool. 6. Push the lines into the notches, leaving 3 to 5 inches (7 -- 12 cm) unwound. 7. Insert the lines into the the exit holes in the hub as shown in the illustration. 8. Align the notches with the line exit holes. 9. Push spool into hub until it snaps into place. 10. Pull the lines extending outside of the hub to release the lines from the notches. USER REPLACEABLE SERVICE PARTS REPLACEMENT PART Assist handle Bolt carriage, 1/4-20 Wing nut Bar Chain Hex nut Oil cap Bar adjusting screw/pin kit Spool with 0.080″ trimmer line Shield assembly PART NUMBER 530057546 530015786 530016152 530044908 952051549 530015917 530053072 530069110 952711616 530071964--01 STORAGE WARNING: Perform the following steps after each use. S Stop the unit and disconnect the power source when not in use. S Carry the unit with motor stopped. S Allow motor to cool before storing or trans- porting. S Store unit and extension cord indoors in a high, dry place out of the reach of children. Store unit unplugged. S Store unit with all guards in place and position unit so that any sharp object cannot acciden- tally cause injury. SEASONAL STORAGE Prepare your unit for storage at the end of the season or if it will not be used for 30 days or more. If your unit is to be stored for a period of time: S Clean it thoroughly before lengthy storage. S Store in a clean dry area. S Lightly oil external metal surfaces and guide bar. S Oil the chain and wrap it in heavy paper or cloth. 18
-
 1
1 -
2
-
3
-
4
-
5
-
6
-
7
-
8
-
9
-
10
-
11
-
12
-
 13
13 -
 14
14 -
 15
15 -
 16
16 -
 17
17 -
 18
18 -
 19
19 -
 20
20
 |
 |