Poulan P4018 User Manual - Page 16
Cleaning The Spark Arrest, Ing Screen, Replace Spark Plug, Replace Fuel Filter, Chain Adjustment,
 |
View all Poulan P4018 manuals
Add to My Manuals
Save this manual to your list of manuals |
Page 16 highlights
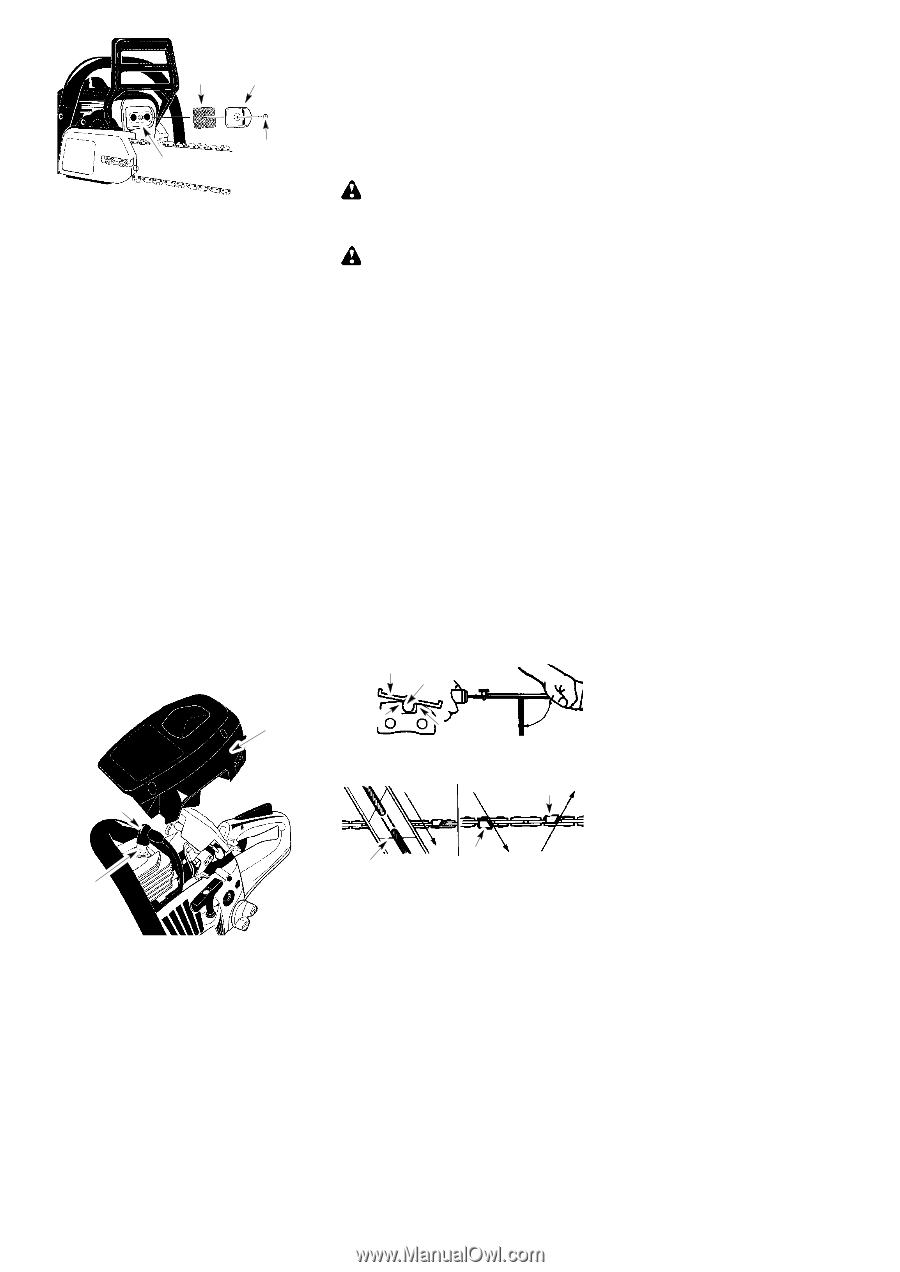
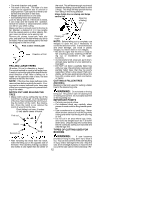
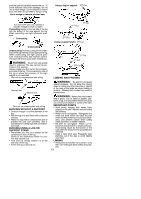
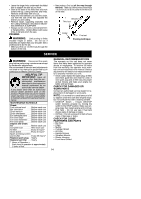
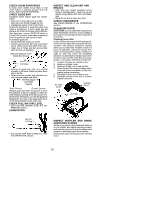
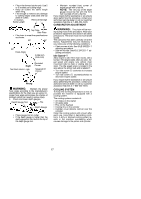
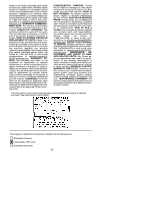
Spark Exhaust Arresting Outlet Screen Cover Nut Muffler CLEANING THE SPARK ARRESTING SCREEN Cleaning is required every 25 hours of operation or annually, whichever comes first. 1. Loosen and remove the nut from the ex- haust outlet cover. 2. Remove the exhaust oulet cover. 3. Remove spark arresting screen. Handle screen carefully to prevent damage. 4. Clean the spark arresting screen gently with a wire brush. Replace screen if breaks are found. 5. Replace any broken or cracked muffler parts. 6. Reinstall spark arresting screen, exhaust outlet cover, and nut. Tighten nut securely. REPLACE SPARK PLUG The spark plug should be replaced each year to ensure the engine starts easier and runs better. Ignition timing is fixed and nonadjustable. NOTE: This spark ignition system complies with the Canadian standard ICES--002. 1. Loosen 3 screws on cylinder cover. 2. Remove the cylinder cover. 3. Pull off the spark plug boot. 4. Remove spark plug from cylinder and discard. 5. Replace with Champion RCJ--7Y spark plug and tighten securely with a 3/4 inch (19 mm) socket wrench. Spark plug gap should be 0.025 inch (0,6 mm). 6. Reinstall the spark plug boot. 7. Reinstall the cylinder cover and 3 screws. Tighten securely. Cylinder Cover Spark Plug Boot REPLACE FUEL FILTER To replace fuel filter, drain your unit by running it dry of fuel. Remove fuel cap and its connected retainer from tank. Pull filter from tank and remove from line. Replace and reassemble. CHAIN ADJUSTMENT See CHAIN TENSION in ASSEMBLY section. CHAIN SHARPENING WARNING: Improper chain sharp- ening techniques and/or depth gauge maintenance will increase the chance of kickback which can result in serious injury. WARNING: Wear protective gloves when handling chain. The chain is sharp and can cut you even when it is not moving. Conditions which indicate the need for chain sharpening: S Reduction in size of wood chips. The size of the wood chip will decrease as the chain gets duller until it becomes more like a powder than a chip. Note that dead or rotted wood will not produce a good chip. S Saw cuts to one side or at an angle. S Saw has to be forced through the cut. Tools required: S 5/32 inch (4 mm) diameter round file and file holder S Flat file S Depth gauge tool TO SHARPEN CHAIN: 1. Move ON/STOP switch to the STOP position. 2. Check chain for proper tension. Adjust chain tension if necessary. See CHAIN TENSION section. 3. Sharpen cutters. S To sharpen the cutters, position the file holder level (90˚) so that it rests on the top edges of the cutter and depth gauge. NOTE: The chain has both left and right hand cutters. File Holder File Cutter 90˚ Depth Gauge Align the 30˚ file holder marks parallel with the bar and to the center of the chain. Cutter Spark Plug 30˚ Cutter File Holder Line S Sharpen cutters on one side of the chain first. File from the inside of each cutter to the outside. Then, turn the chain saw around and repeat the process for the other side of the chain. 16
-
 1
1 -
2
-
3
-
4
-
5
-
6
-
7
-
8
-
9
-
10
-
 11
11 -
 12
12 -
 13
13 -
 14
14 -
 15
15 -
 16
16 -
 17
17 -
 18
18 -
 19
19 -
 20
20 -
 21
21
 |
 |