Poulan PPB150E User Manual - Page 11
Maintenance - pro parts
 |
View all Poulan PPB150E manuals
Add to My Manuals
Save this manual to your list of manuals |
Page 11 highlights
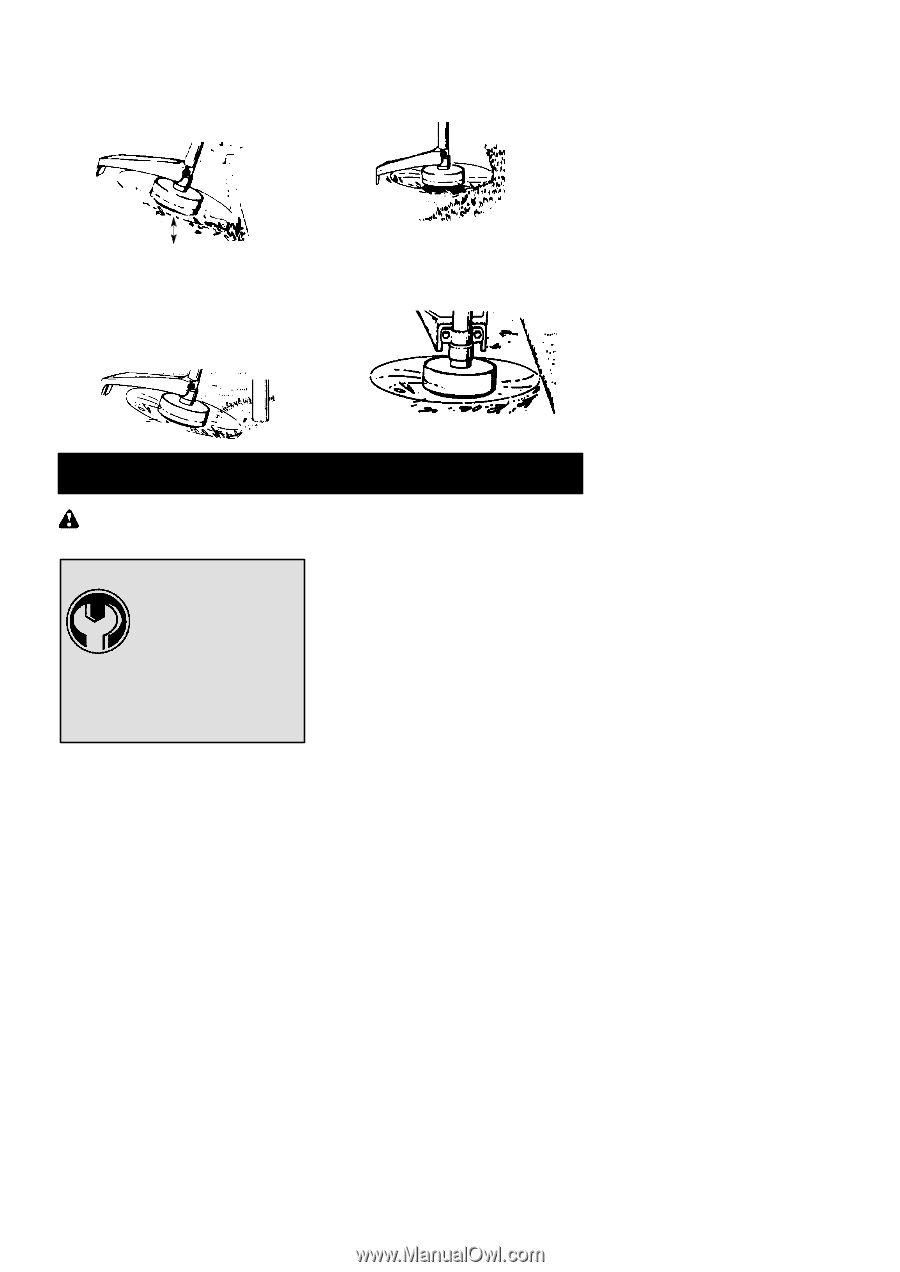
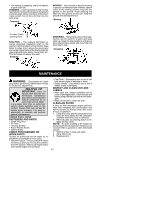
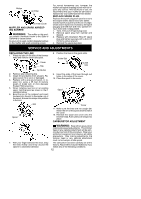
S For mowing or sweeping, use full throttle for a good clean job. TRIMMING -- Hold the bottom of the trimmer head about 3 inches (8 cm) above the ground and at an angle. Allow only the tip of the line to make contact. Do not force trimmer line into work area. Trimming MOWING -- Your trimmer is ideal for mowing in places conventional lawn mowers cannot reach. In the mowing position, keep the line parallel to the ground. Avoid pressing the head into the ground as this can scalp the ground and damage the tool. Mowing 3 inches (8 cm) above ground SCALPING -- The scalping technique removes unwanted vegetation down to the ground. Hold the bottom of the trimmer head about 3 inches (8 cm) above the ground and at an angle. Allow the tip of the line to strike the ground around trees, posts, monuments, etc. This technique increases line wear. Scalping SWEEPING -- The fanning action of the rotating line can be used for a quick and easy clean up. Keep the line parallel to and above the surfaces being swept and move the tool from side to side. Sweeping MAINTENANCE WARNING: Disconnect the spark plug before performing maintenance except for carburetor adjustments. HELPFUL TIP IMPORTANT: Have all repairs other than the recommended maintenance described in the instruction manual performed by an authorized service dealer. If any dealer other than an authorized service dealer performs work on the product, Poulan PRO may not pay for repairs under warranty. It is your responsibility to maintain and perform general maintenance. CHECK FOR LOOSE FASTENERS AND PARTS S Spark Plug Boot S Air Filter S Housing Screws S Assist Handle Screw S Debris Shield CHECK FOR DAMAGED OR WORN PARTS Contact an authorized service dealer for replacement of damaged or worn parts. S ON/OFF Switch -- Ensure ON/OFF switch functions properly by moving the switch to the OFF position. Make sure engine stops; then restart engine and continue. S Fuel Tank -- Discontinue use of unit if fuel tank shows signs of damage or leaks. S Debris Shield -- Discontinue use of unit if debris shield is damaged. INSPECT AND CLEAN UNIT AND LABELS S After each use, inspect complete unit for loose or damaged parts. Clean the unit and labels using a damp cloth with a mild detergent. S Wipe off unit with a clean dry cloth. CLEAN AIR FILTER A dirty air filter decreases engine performance and increases fuel consumption and harmful emissions. Always clean after every 5 hours of operation. 1. Clean the cover and the area around it to keep dirt from falling into the carburetor chamber when the cover is removed. 2. Remove parts by pressing button to release air filter cover. NOTE: To avoid creating a fire hazard or producing harmful evaporative emissions, do not clean filter in gasoline or other flammable solvent. 3. Wash the filter in soap and water. 4. Allow filter to dry. 5. Replace parts. 11
-
 1
1 -
2
-
3
-
4
-
5
-
 6
6 -
 7
7 -
 8
8 -
 9
9 -
 10
10 -
 11
11 -
 12
12 -
 13
13 -
 14
14 -
 15
15 -
 16
16
 |
 |