ProForm 435ex Treadmill English Manual - Page 6
treadmill.
 |
View all ProForm 435ex Treadmill manuals
Add to My Manuals
Save this manual to your list of manuals |
Page 6 highlights
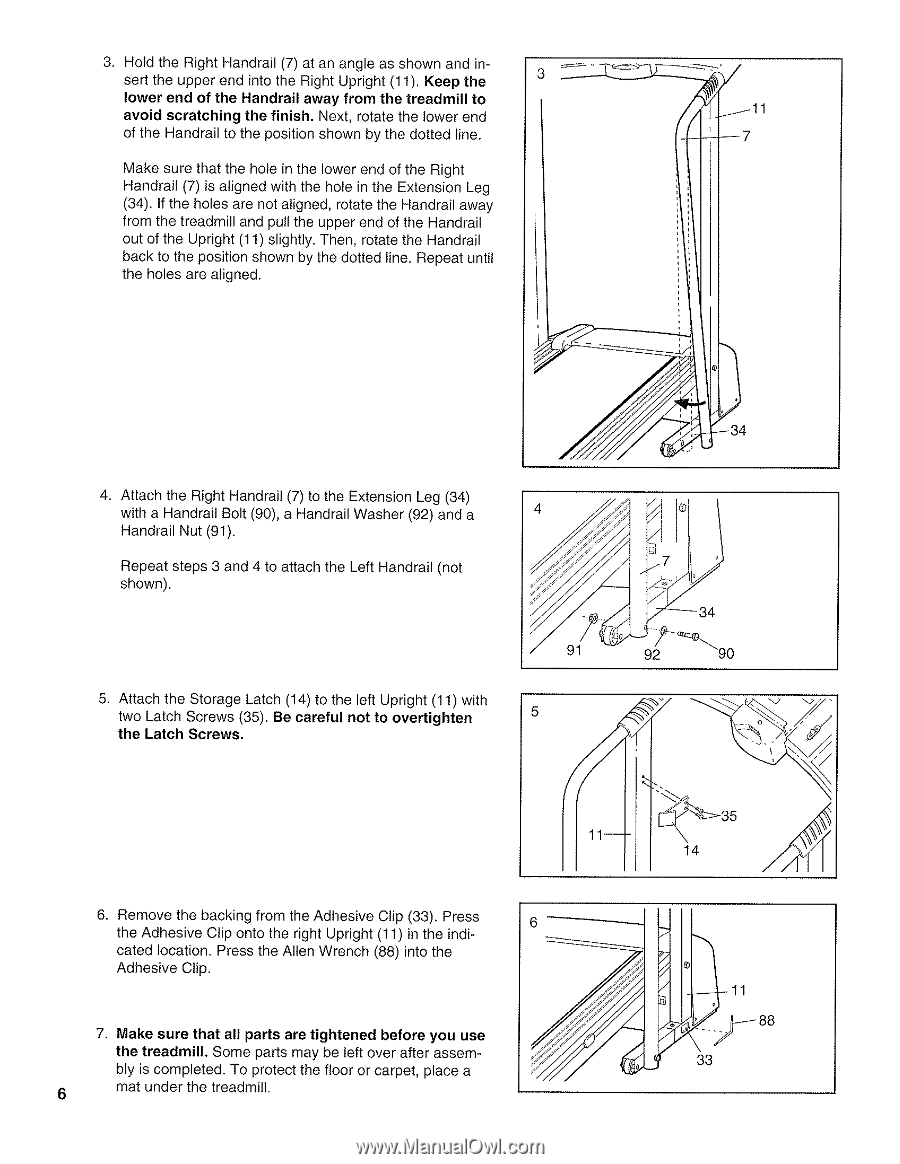
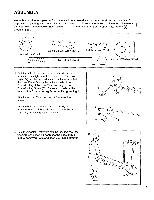
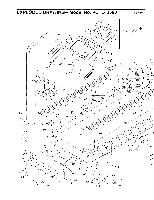
3. Hold the Right Handrail (7) at an angle as shown and insert the upper end into the Right Upright (11). Keep the 3 lower end of the Handrail away from the treadmill to 11 avoid scratching the finish. Next, rotate the lower end of the Handrail to the position shown by the dotted line. 7 Make sure that the hole in the lower end of the Right Handrail (7) is aligned with the hole in the Extension Leg (34). If the holes are not aligned, rotate the Handrail away from the treadmill and pull the upper end of the Handrail out of the Upright (11) slightly. Then, rotate the Handrail back to the position shown by the dotted line. Repeat until the holes are aligned. 34 4. Attach the Right Handrail (7) to the Extension Leg (34) with a Handrail Bolt (90), a Handrail Washer (92) and a 4 Handrail Nut (91). Repeat steps 3 and 4 to attach the Left Handrail (not shown). 5. Attach the Storage Latch (14) to the left Upright (11) with two Latch Screws (35). Be careful not to overtighten the Latch Screws. 91 5 r 34 92 ezig3 90 N 35 11 14 6. Remove the backing from the Adhesive Clip (33). Press 6 the Adhesive Clip onto the right Upright (11) in the indi- cated location. Press the Allen Wrench (88) into the Adhesive Clip. 7. Make sure that all parts are tightened before you use the treadmill. Some parts may be left over after assem- bly is completed. To protect the floor or carpet, place a 6 mat under the treadmill. 11 88 33
-
 1
1 -
 2
2 -
 3
3 -
 4
4 -
 5
5 -
 6
6 -
 7
7 -
 8
8 -
 9
9 -
 10
10 -
 11
11 -
 12
12 -
13
-
14
-
15
-
16
-
17
-
18
-
19
-
20
 |
 |