ProForm 515 Uk Manual - Page 10
How To Fold And Move The Treadmill
 |
View all ProForm 515 manuals
Add to My Manuals
Save this manual to your list of manuals |
Page 10 highlights
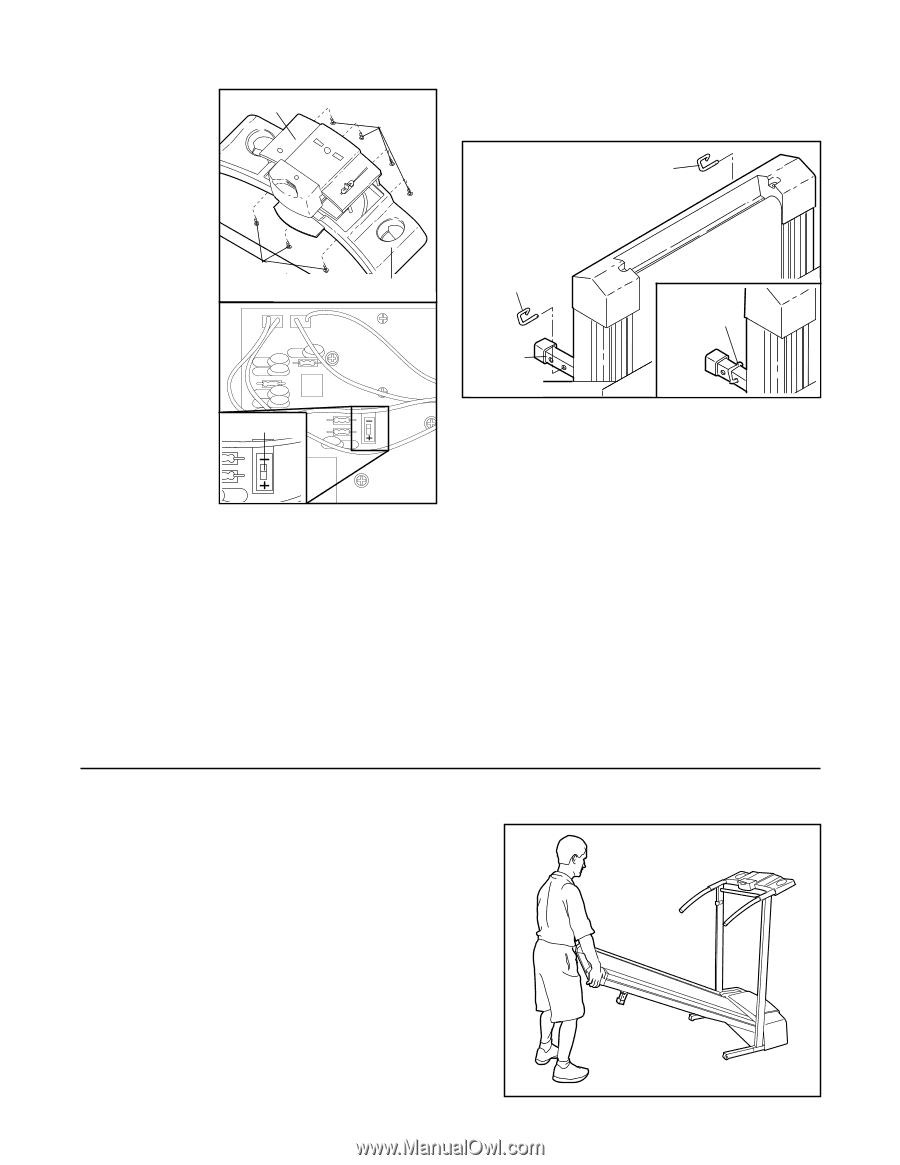
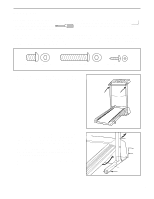
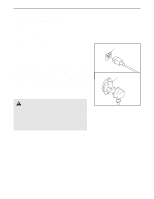
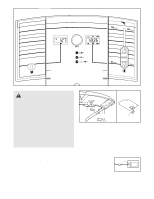
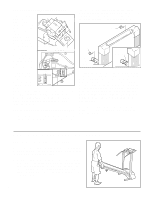
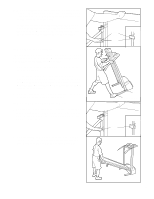
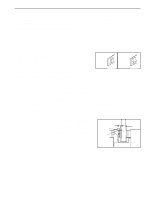
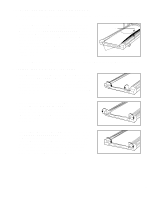
HOW TO SELECT KILOMETRES AND MILES The console can display distance and speed in ei- Console Screws ther kilometres or miles. To change the unit of mea- surement, first UNPLUG THE POWER CORD. Next, remove the screws attaching the console to Screws Console Base the console base. Lift the con- sole a few inches, being careful not to pull on the wires, and turn the console over. Locate the small Switch switch on the back of the console. Move the switch upward or down- ward to select kilo- metres or miles. Re-attach the console to the console base. After changing the unit of measurement, re- move one of the batteries from the console for about five seconds and then reinsert it. This will reset the console. HOW TO CHANGE THE INCLINE OF THE TREADMILL To vary the intensity of your exercise, the incline of the treadmill can be changed. There are three different in- cline levels. Before changing the incline, first remove the key and unplug the power cord. Next, fold the treadmill to the storage position (see HOW TO FOLD THE TREADMILL FOR STORAGE below). Incline Pin Incline Pin Right Incline Leg Incline Pin To change the incline, remove the incline pins from the incline legs as shown above. Adjust the incline legs to the desired height and fully reinsert the incline pins. Make sure that the incline pins are in the "locked" position shown in the inset drawing. Make sure that both incline pins are inserted from the direction shown. Important: Before using the treadmill, make sure that both incline pins are fully inserted at the same height. Do not use the treadmill with the incline pins removed. After you have adjusted the incline legs, lower the treadmill (see HOW TO LOWER THE TREADMILL FOR USE on page 11). HOW TO FOLD AND MOVE THE TREADMILL HOW TO FOLD THE TREADMILL FOR STORAGE Before folding the treadmill, unplug the power cord. Caution: You must be able to safely lift 45 pounds (20 kg) in order to raise, lower, or move the treadmill. 1. Hold the treadmill with your hands in the locations shown at the right. To decrease the possibility of injury, bend your legs and keep your back straight. As you raise the treadmill, make sure to lift with your legs rather than your back. Raise the treadmill about halfway to the vertical position. 10
-
 1
1 -
2
-
3
-
4
-
 5
5 -
 6
6 -
 7
7 -
 8
8 -
 9
9 -
 10
10 -
 11
11 -
 12
12 -
 13
13 -
 14
14 -
 15
15 -
16
-
17
-
18
-
19
 |
 |