ProForm 6.0 Zt Treadmill User Manual - Page 10
View from Above
 |
View all ProForm 6.0 Zt Treadmill manuals
Add to My Manuals
Save this manual to your list of manuals |
Page 10 highlights
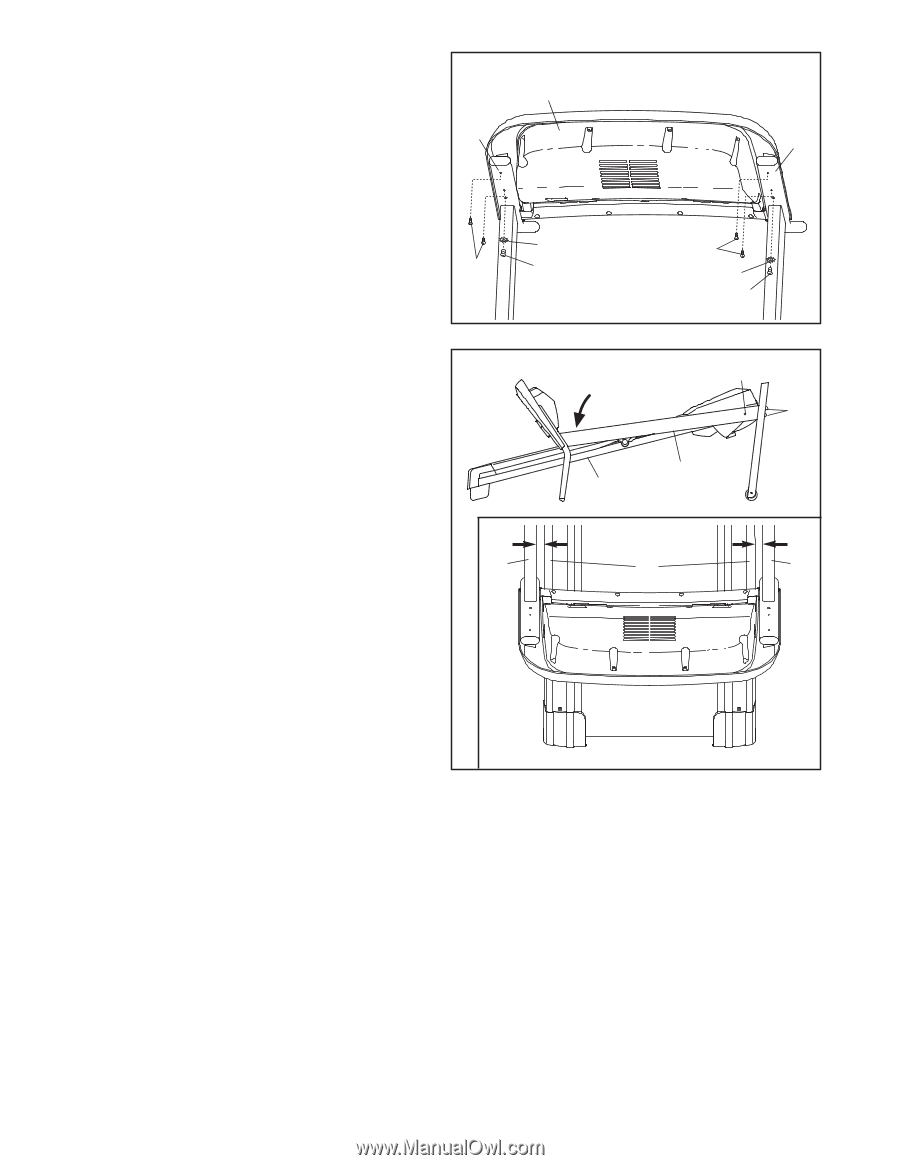
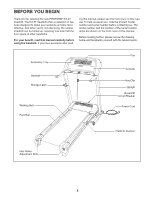
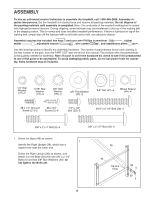
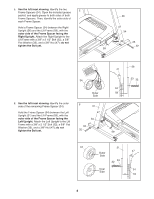
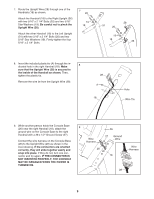
10. Insert the wires into the Console Base (26) as you set the Console Base on the Handrails (18). 10 Be careful not to pinch the wires. Next, thread two 1/4" x 1/2" Bolts (22) with 1/4" Star Washers (21) into the Handrails and the Console Base; 18 do not tighten the Bolts yet. Attach the Console Base (26) to the Handrails (18) with four #8 x 3/4" Screws (2). Then, tighten the two 1/4" x 1/2" Bolts (22). Remove the plastic tie from the right Handrail (18). 2 26 Front View 18 21 2 22 21 22 11. Lower the Uprights (31, 36) as shown. See the inset drawing. Position the Uprights (31, 36) so that the treadmill Frame (74) is centered between the Uprights. Firmly tighten the 3/8" x 2 1/2" Bolts (32) and then the 3/8" x 2 1/4" Bolts (5) on each side of the treadmill. Do not overtighten the 3/8" x 2 1/2" Bolts. 11 31 Side View 32 5 31, 36 74 View from Above 74 36 10
-
 1
1 -
2
-
3
-
4
-
 5
5 -
 6
6 -
 7
7 -
 8
8 -
 9
9 -
 10
10 -
 11
11 -
 12
12 -
 13
13 -
 14
14 -
 15
15 -
16
-
17
-
18
-
19
-
20
-
21
-
22
-
23
-
24
-
25
-
26
-
27
-
28
 |
 |