ProForm Cx8i English Manual - Page 12
HEART RATE display
 |
View all ProForm Cx8i manuals
Add to My Manuals
Save this manual to your list of manuals |
Page 12 highlights
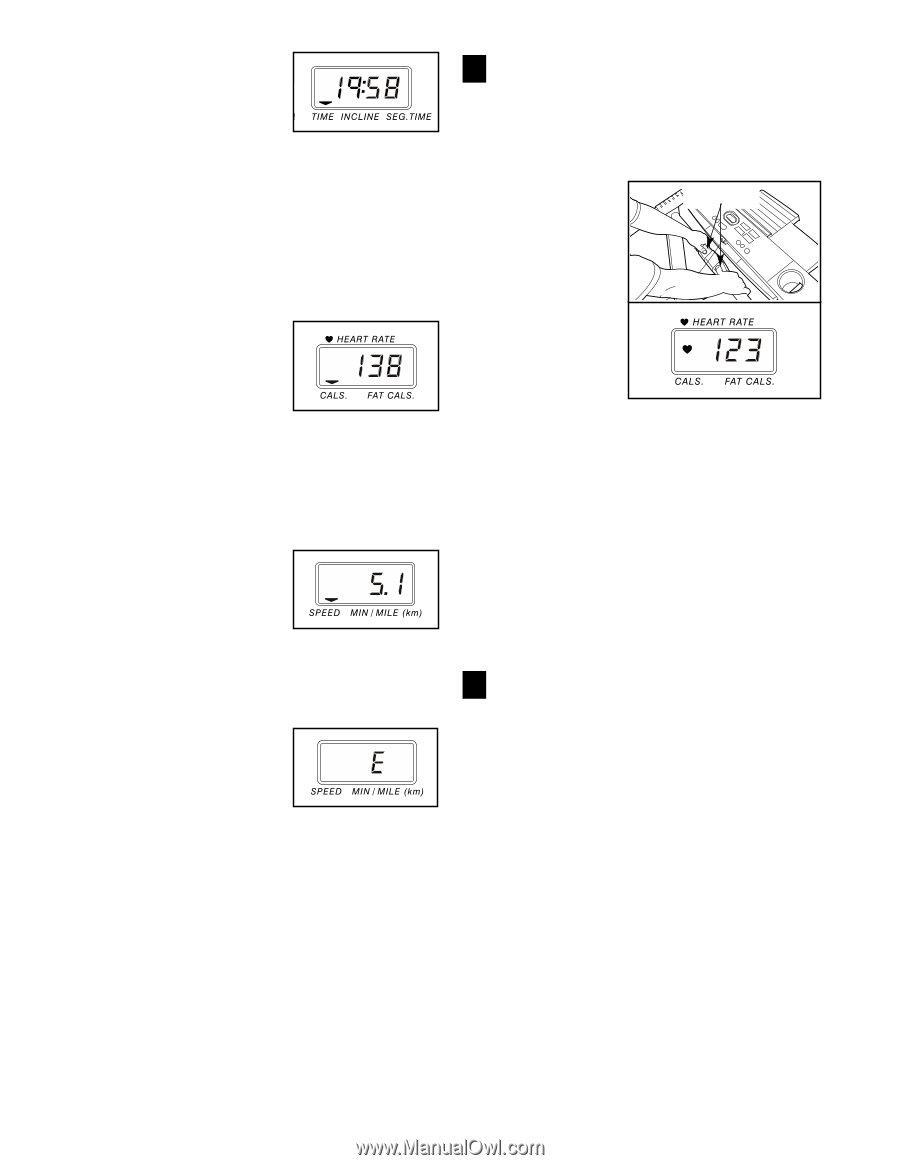
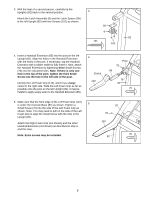
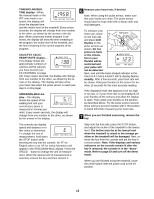
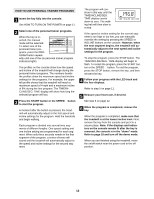
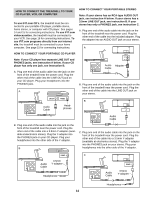
TIME/INCLINE/SEG. TIME display-When the manual mode or the iFIT.com mode is selected, this display will show the elapsed time and the incline level of the treadmill. Every seven seconds, the display will change from one number to the other, as shown by the arrows in the display. When a personal trainer program is selected, the display will show the time remaining in the program, the incline level of the treadmill, and the time remaining in the current segment of the program. CALS./FAT CALS./ HEART RATE display- This display shows the approximate numbers of calories and fat calories you have burned (see FAT BURNING on page 24). Every seven seconds, the display will change from one number to the other, as shown by the arrows in the display. The display will also show your heart rate when the pulse sensor is used (see step 6 on this page). SPEED/MIN-MILE display-This display shows the speed of the walking belt and your current pace (pace is measured in minutes per mile). Every seven seconds, the display will change from one number to the other, as shown by the arrows in the display. The console can display speed and distance in either miles or kilometers. To change the unit of measurement, hold down the STOP button while inserting the key into the console. An "E" for English miles or an "M" for metric kilometers will appear in the SPEED/MIN-MILE display. Press the SPEED v button to change the unit of measurement. When the desired unit of measurement is selected, remove the key and then reinsert it. 6 Measure your heart rate, if desired. Note: When using the pulse sensor, make sure that your hands are clean. The pulse sensor should also be kept clean with a damp cloth and mild detergent. To measure your heart rate, stand Sensors on the foot rails and place both thumbs on the pulse sensors as shown. Do not press too hard, or the circula- tion in your thumbs will be restricted and your pulse will not be detected. Next, wait until the heart-shaped indicator in the CALS./FAT CALS./HEART RATE display flashes steadily. After a few seconds, your heart rate will be shown. Hold your thumbs on the sensor for an- other 15 seconds for the most accurate reading. If the displayed heart rate appears to be too high or too low, or if your heart rate is not displayed, lift your thumbs off the sensors and allow the display to reset. Then, place your thumbs on the sensors as described above. Try the pulse sensor several times until you become familiar with it. Remember to stand still while measuring your heart rate. 7 When you are finished exercising, remove the key. Step onto the foot rails, press the STOP button, and adjust the incline of the treadmill to the lowest level. The incline must be at the lowest level when the treadmill is raised to the storage position or the treadmill will be damaged. Next, remove the key from the console and put the key in a secure place. Note: If the displays and various indicators on the console remain lit after the key is removed, the console is in the "demo" mode. Refer to page 19 and turn off the demo mode. When you are finished using the treadmill, move the on/off switch near the power cord to the off position. 12
-
 1
1 -
2
-
3
-
4
-
5
-
6
-
 7
7 -
 8
8 -
 9
9 -
 10
10 -
 11
11 -
 12
12 -
 13
13 -
 14
14 -
 15
15 -
 16
16 -
 17
17 -
18
-
19
-
20
-
21
-
22
-
23
-
24
-
25
-
26
-
27
-
28
-
29
-
30
 |
 |