ProForm Gl105 Bike English Manual - Page 8
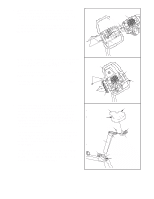
on the Left Pedal 22. Adjust the Right Pedal Strap
 |
View all ProForm Gl105 Bike manuals
Add to My Manuals
Save this manual to your list of manuals |
Page 8 highlights
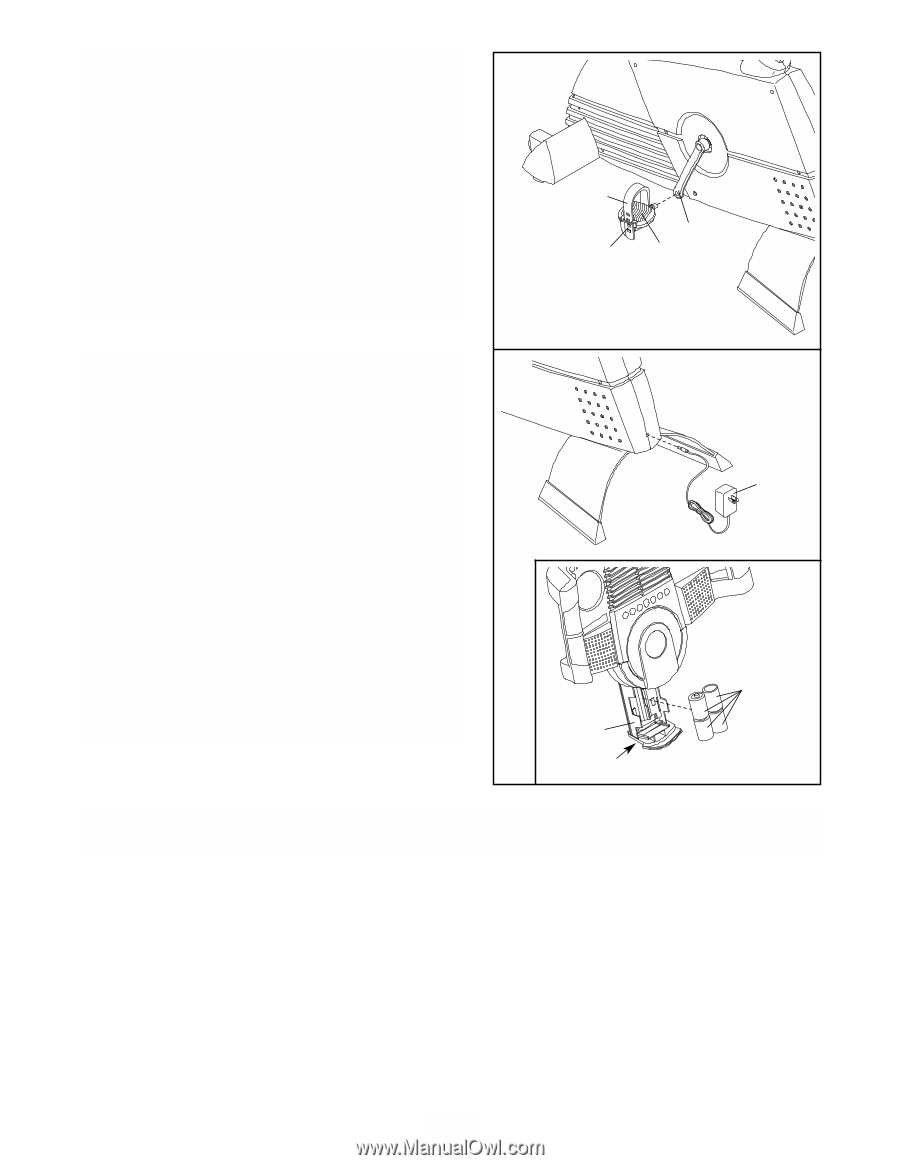
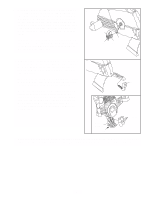
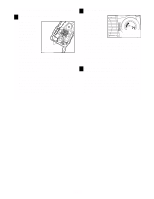
9. Identify the Left Pedal (22), which is marked with an "L." Using an adjustable wrench, firmly tighten the 9 Left Pedal counterclockwise into the Left Crank Arm (24). Tighten the Right Pedal (not shown) clockwise into the Right Crank Arm. Important: Tighten both Pedals as firmly as possible. After using the exer- cise cycle for one week, retighten the Pedals. For best performance, the Pedals must be kept tight- ened. Adjust the Left Pedal Strap (25) to the desired position, and press the end of the Pedal Strap onto the tab on the Left Pedal (22). Adjust the Right Pedal Strap (not shown) in the same way. 25 24 Tab 22 10. Plug one end of the Power Supply (52) into the jack at 10 the rear of the exercise cycle. Plug the other end of the Power Supply into an appropriate outlet that is properly installed in accordance with all local codes and ordinances. Note: The console can be operated with batteries (not included) instead of the Power Supply (52) if desired. To install batteries, follow the instructions below. See the inset drawing. Press the indicated tab on the battery drawer and pull the battery drawer down. Press four "D" batteries into the battery clips; make sure that the batteries are oriented as shown by the markings inside of the battery clips. Then, close the battery drawer. Note: Alkaline batteries are recommended. Battery Drawer Tab 52 Batteries 11. Make sure that all parts are properly tightened before you use the exercise cycle. Note: After assembly is completed, some extra parts may be left over. Place a mat beneath the exercise cycle to protect the floor. 8
-
 1
1 -
2
-
 3
3 -
 4
4 -
 5
5 -
 6
6 -
 7
7 -
 8
8 -
 9
9 -
 10
10 -
 11
11 -
 12
12 -
 13
13 -
14
-
15
-
16
-
17
-
18
-
19
-
20
-
21
-
22
-
23
-
24
 |
 |