ProForm Pft70 Treadmill English Manual - Page 6
Maintenance, Storage
 |
View all ProForm Pft70 Treadmill manuals
Add to My Manuals
Save this manual to your list of manuals |
Page 6 highlights
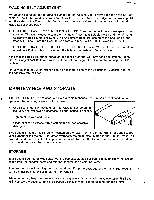
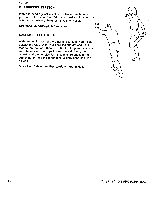
WALKING BELT ADJUSTMENT REV. 8/88 For smooth operation, and to prevent damage to the Walking Belt, always keep the Walking Belt centered. While the treadmill is running, check the spaces between the edges of the Walking Belt and the sides of the Frame. If the Belt is closer to one side than to the other, it should be adjusted as described below. 1. IF THE BELT HAS SHIFTED TO THE RIGHT SIDE: Turn the treadmill on at slow speed. Use the Allen Wrench included to turn the right-hand Adjustment Bolt clockwise and the left-hand Adjustment Bolt counterclockwise. (The Adjustment Bolts are located at the back end of the treadmill Frame.) Turn the Bolts 1/3 of a turn at a time until the Belt moves to the center. 2. IF THE BELT HAS SHIFTED TO THE LEFT SIDE: Use the Allen Wrench to turn the right-hand Adjustment Bolt counterclockwise and the left-hand Adjustment Bolt clockwise. If the Walking Belt slips during operation, the tension on the Belt may need adjustment. Simply turn both Adjustment Bolts clockwise until the Belt no longer slips. Be careful to keep the Belt centered. For convenience, the Allen Wrench can be attached to one of the Adjustment Brackets with the self-adhesive tab included. MAINTENANCE AND STORAGE The PRO FORM T70 is designed to be virtually maintenance-free. To insure continued smooth operation the following steps should be taken. 1. Use silicone lubricant spray under the Walking Belt before initial use, and whenever a decrease in performance is noticed. 2. Tighten all screws and bolts. 3. Clean exposed surfaces with a soft cloth and non-abrasive detergent. This treadmill has a Circuit Breaker, located on the lower front end of the Frame, designed to prevent burnout of the Motor. If the Motor overheats, the small black button in the Circuit Breaker will protrude, and the treadmill will stop or will not start. To reset the Circuit Breaker, allow the Motor to cool and then push the button back in. STORAGE Your treadmill can be quickly converted to a compact storage position. Simply unscrew the locking knobs from the handrail posts and fold the handrail down onto the frame. To move the treadmill, unplug the power cord and lift up the back end of the frame. The treadmill can be either pushed or pulled on the front wheels. When not in use, keep the treadmill in a cool, dry place. Do not stack heavy objects on the tread- mill. Remove the batteries from the electronic console when storing for long periods of time. 7
-
 1
1 -
 2
2 -
 3
3 -
 4
4 -
 5
5 -
 6
6 -
 7
7 -
 8
8 -
 9
9 -
 10
10
 |
 |
