ProForm Sport 1000 Treadmill English Manual - Page 6
Assembly
 |
View all ProForm Sport 1000 Treadmill manuals
Add to My Manuals
Save this manual to your list of manuals |
Page 6 highlights
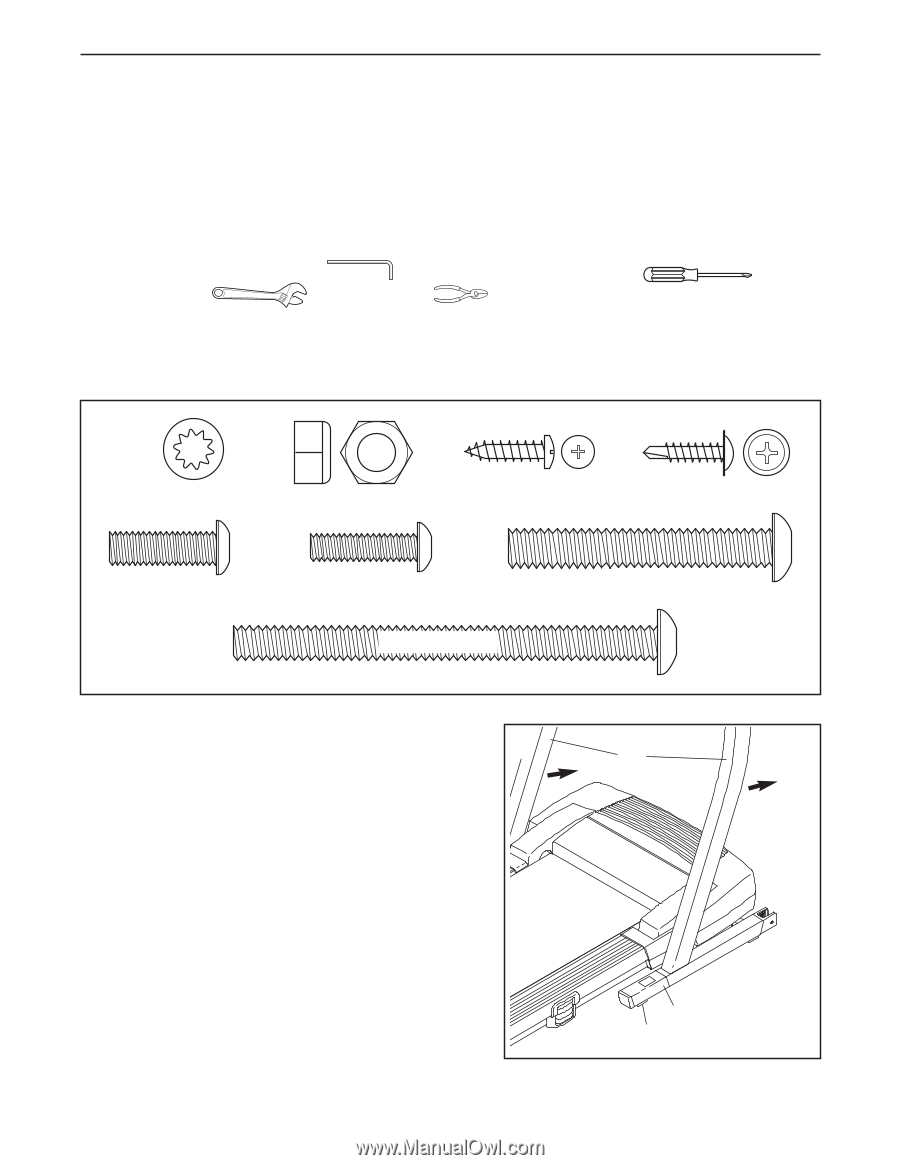
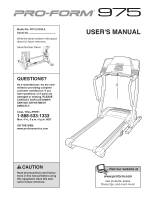
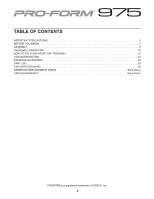
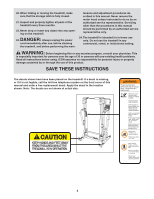
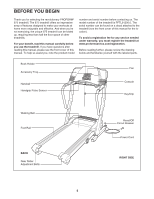
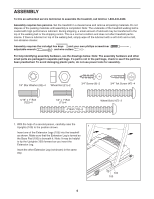
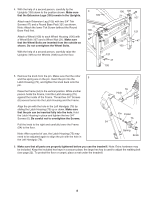
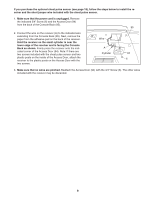
ASSEMBLY To hire an authorized service technician to assemble the treadmill, call toll-free 1-800-445-2480. Assembly requires two persons. Set the treadmill in a cleared area and remove all packing materials. Do not dispose of the packing materials until assembly is completed. Note: The underside of the treadmill walking belt is coated with high-performance lubricant. During shipping, a small amount of lubricant may be transferred to the top of the walking belt or the shipping carton. This is a normal condition and does not affect treadmill performance. If there is lubricant on top of the walking belt, simply wipe off the lubricant with a soft cloth and a mild, non-abrasive cleaner. Assembly requires the included hex keys and your own phillips screwdriver , adjustable wrench and wire cutters . For help identifying assembly hardware, see the drawings below. Note: The assembly hardware and other small parts are packaged in separate part bags. If a part is not in the part bags, check to see if the part has been preattached. To avoid damaging plastic parts, do not use power tools for assembly. 1/4" Star Washer (92)-4 Wheel Nut (21)-2 3/4" Screw (6)-2 3/4" Tek Screw (47)-4 5/16" x 1" Bolt (122)-4 1/4" x 1" Bolt (71)-4 4" Bolt (112)-2 Wheel Bolt (107)-2 1. With the help of a second person, carefully raise the Uprights (109) to the position shown. 1 109 Insert one of the Extension Legs (105) into the treadmill as shown. Make sure that the Extension Leg is turned so the Base Pad (100) is beneath it. Note: It may be helpful to tip the Uprights (109) forward as you insert the Extension Leg. Insert the other Extension Leg (not shown) in the same way. 105 100 6
-
 1
1 -
 2
2 -
 3
3 -
 4
4 -
 5
5 -
 6
6 -
 7
7 -
 8
8 -
 9
9 -
 10
10 -
 11
11 -
 12
12 -
13
-
14
-
15
-
16
-
17
-
18
-
19
-
20
-
21
-
22
-
23
-
24
-
25
-
26
-
27
-
28
-
29
-
30
-
31
-
32
 |
 |