ProForm Style 6500 Treadmill Uk Manual - Page 7
Orient the Right Upright 39 and the Base 37
 |
View all ProForm Style 6500 Treadmill manuals
Add to My Manuals
Save this manual to your list of manuals |
Page 7 highlights
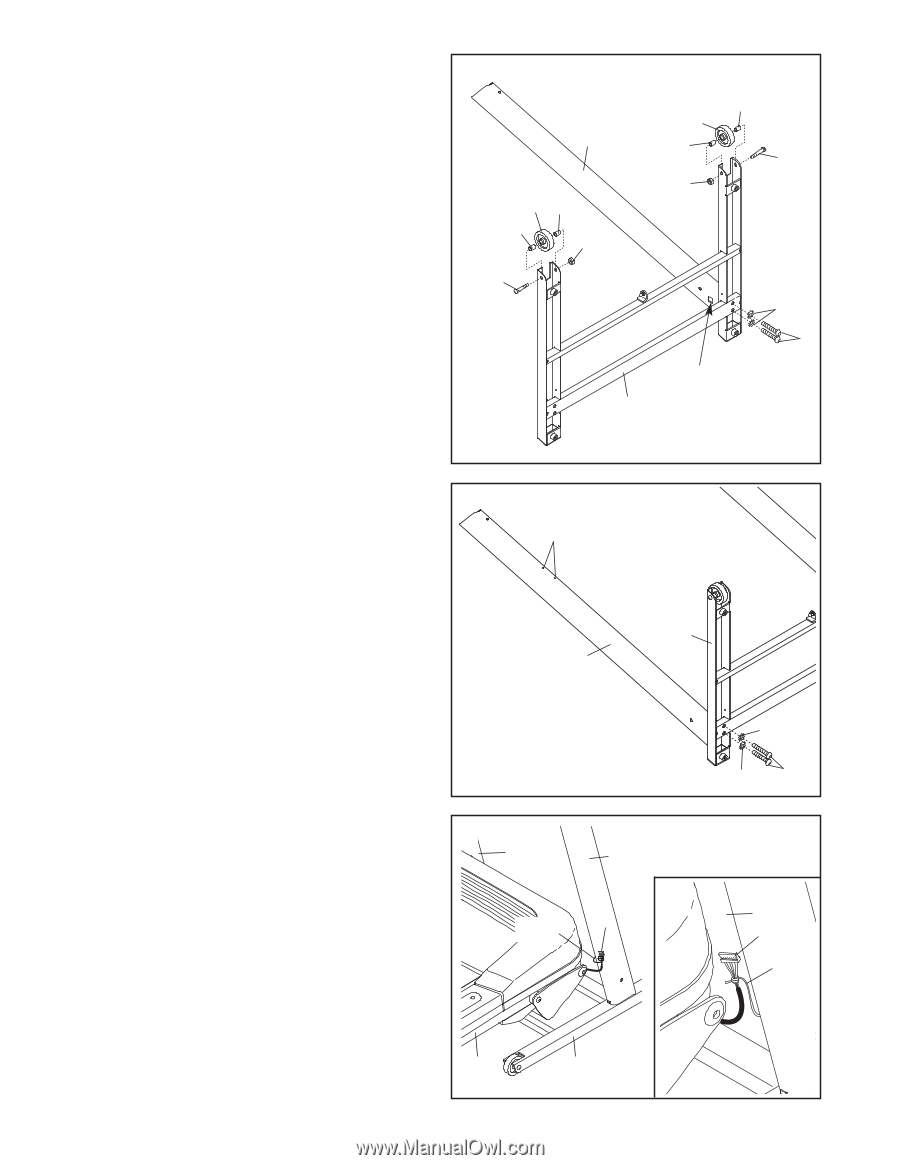
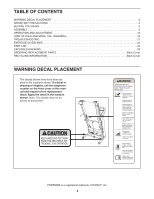
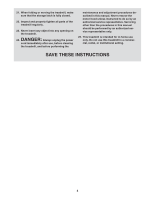
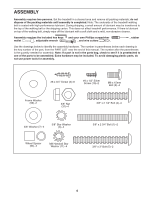
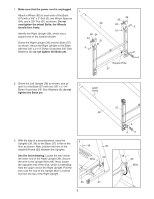
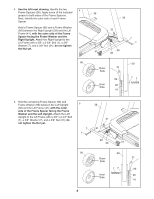
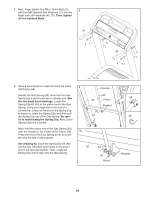
1. Make sure that the power cord is unplugged. Attach a Wheel (95) to each side of the Base (37) with a 3/8" x 3" Bolt (5), two Wheel Spacers (94), and a 3/8" Nut (31) as shown. Do not overtighten the wheel Bolts; the Wheels should turn freely. Identify the Right Upright (39), which has a square hole in the location shown. Orient the Right Upright (39) and the Base (37) as shown. Attach the Right Upright to the Base with two 3/8" x 2 1/4" Bolts (4) and two 3/8" Star Washers (6); do not tighten the Bolts yet. 1 39 95 94 94 31 94 95 94 5 31 5 6 4 Square Hole 37 2. Orient the Left Upright (38) as shown, and at- 2 tach it to the Base (37) with two 3/8" x 2 1/4" Bolts (4) and two 3/8" Star Washers (6); do not tighten the Bolts yet. Latch Holes 37 38 3. With the help of a second person, raise the Uprights (38, 39) so the Base (37) is flat on the floor as shown. Next, position the front of the treadmill Frame (36) between the Uprights. 3 38 See the inset drawing. Locate the wire inside the lower end of the Right Upright (39). Secure the wire to the Upright Wire (69). Next, locate the opposite end of the wire, which is extending from the upper end of the Right Upright. Pull the wire until the end of the Upright Wire is extending from the top of the Right Upright. Wire 39 69 36 37 7 6 64 39 69 Wire
-
 1
1 -
 2
2 -
 3
3 -
 4
4 -
 5
5 -
 6
6 -
 7
7 -
 8
8 -
 9
9 -
 10
10 -
 11
11 -
 12
12 -
13
-
14
-
15
-
16
-
17
-
18
-
19
-
20
-
21
-
22
-
23
-
24
-
25
-
26
-
27
-
28
 |
 |