Pyle HTG447 Instruction Manual - Page 8
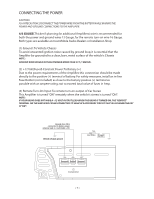
Remote Turn
 |
View all Pyle HTG447 manuals
Add to My Manuals
Save this manual to your list of manuals |
Page 8 highlights
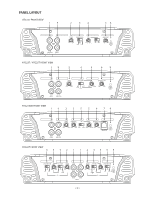
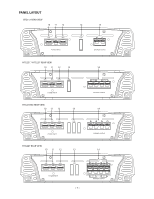
CONTROL FUNCTIONS 8. LED Will illuminate GREEN to indicate the amplifier is on and operating normally, and will be illuminated RED if the amplifier shuts down due to short circuit, DC offset, or overheating detected by on board protection circuitry 9. Auxiliary outputs The Auxiliary outputs offer HERTIAGE amplifiers easy, unlimited system expansion. Route RCA's from the line out of the first amplifier to the line input of a second amplifier when using a single source output. 10. GND Connect this terminal directly to the sheet metal chassis of the vehicle, using the shortest wire necessary to make this connection. Always use wire of the same gauge or larger than the (+)12 volt power wire. The chassis connection point should be scraped free of paint and dirt. Use only quality crimped and/or soldered connectors at both ends of this wire. Warning : Do not connect this terminal directly to the vehicle battery ground terminal or any other factory ground points. 11. Remote Turn On This terminal turns on the amplifier when (+)12 volt is applied to it. Connect it to the remote turn on lead of the head unit or signal source. 12 . (+)12 Volt Power Connect this terminal through a FUSE or CIRCUIT BREAKER to the positive terminal of the vehicle battery or the positive terminal of an isolated audio system battery. Warning: Always protect this power wire by installing a fuse or circuit breaker of the appropriate size within 12 inches of the battery terminal connection. 13. FUSE These fuses protect the amplifier against internal electrical damage and are meant to protect the amplifier only. All other power connections should be fused at the source. 14. SPEAKERS Connect subwoofers to these terminals. < 9 >
-
 1
1 -
2
-
 3
3 -
 4
4 -
 5
5 -
 6
6 -
 7
7 -
 8
8 -
 9
9 -
 10
10 -
 11
11 -
 12
12 -
 13
13 -
14
-
15
-
16
-
17
-
18
-
19
-
20
-
21
-
22
-
23
 |
 |
