Pyle PDKWM802BU Instruction Manual - Page 3
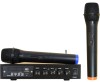
Handheld Microphone, Parts Description, Operation
 |
View all Pyle PDKWM802BU manuals
Add to My Manuals
Save this manual to your list of manuals |
Page 3 highlights
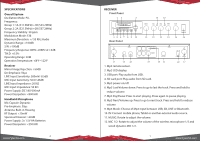
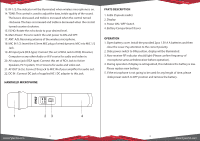
13. RF 1/2: The indicator will be illuminated when wireless microphone is on. 14. TONE: This control is used to adjust the bass, treble quality of the sound. The bass is decreased and treble is increased when the control turned clockwise. The bass is increased and treble is decreased when the control turned counter clockwise. 15. ECHO: Rotate the echo knob to your desired level. 16. Main Power: Press to switch the unit power to ON and OFF. 17. ANT. A/B: Receiving antenna of the wireless microphone. 18. MIC IN 1/2: Insert the 6.3mm MIC plug of wired dynamic MIC into MIC 1/2 Jack. 19. AV input jack (RCA type): Connect this set of RCA Jack to DVD, Streamer, Computer or any other Audio or A/V source for audio and video in. 20. AV output jack (RCA type): Connect this set of RCA Jack to Active Speakers, Hi Fi system, TV or Screens for audio and video out. 21. AF OUT (6.35): Connect this jack to MIC IN of your ampli er for audio out. 22. DC IN : Connect DC jack of supplied AC / DC adapter to this jack. HANDHELD MICROPHONE PARTS DESCRIPTION 1. Grille (Capsule inside) 2. Display 3. Power ON / OFF Switch 4. Battery Compartment/Cover OPERATION 1. Open battery cover. Install the provided 2pcs 1.5V A A batteries and then close the cover. Pay attention to the correct polarity. 2. Slide power switch to ON position, display will be illuminated. 3. Now receiver RF indicator should light (Please con rm frequency of microphone same as thebreceiver before operation). 4. During operation if display is extinguished, this indicates the battery is Iow. Please replace new battery. 5. If the microphone is not going to be used for any length of time, please slide power switch to OFF position and remove the battery. 2 www.PyleUSA.com 3 www.PyleUSA.com
-
 1
1 -
 2
2 -
 3
3
 |
 |
