Pyle PLCD15MR PLCD15MR Manual 1 - Page 8
Set The Clock
 |
View all Pyle PLCD15MR manuals
Add to My Manuals
Save this manual to your list of manuals |
Page 8 highlights
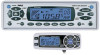
OPERATION display. If you select beep sound on, whenever press any button, beep sound output. • LOUDNESS Press LOUD (DIM) button (15) shortly to reinforce the bass output and display will show "LOUD". Press it again to release this function. • ILLUMINATION Press LOUD (DIM) button (15) for more than 2 seconds to adjust the brightness of the LCD display backlight. • MUTE In radio/AUX IN mode, press /MUTE button (3) to mute audio level. Press the button again to release mute function. • SELECT MODE Press MODE button (6) to choose desired listening mode. (e.g. radio mode to CD mode to CDC mode to AUX IN mode. • SET THE CLOCK Press DISP button (1) for more than 2 seconds until the clock is shown on the display and flashes. Then press the button (17) to change minutes or button (16) to change hours. pressing button (17) to select Frequency Priority. Pressing DISP button (1) while in Frequency Priority will temporarily display clock. • SELECTABLE CLOCK DISPLAY Programs the unit to display the clock (selectable on/off) when the unit is turned off. While the unit is turned on, pressing and holding MODE button (6) and then pressing M2 button (20) toggles the selectable clock display. • LIQUID CRYSTAL DISPLAY Exhibit current frequency and activated functions on the display (8). • RESET Reset button (25) must be activated with either a ballpoint pen or thin metal object. The reset button is to be activated for the following reasons: - Initial installation of the unit when all wiring is completed. - All the function buttons do not operate. - Error symbol on the display. Note: If press reset button (25), the unit can't work yet, please use a cotton swab soaked in isopropyl alcohol to clean the socket on the front panel. • DISPLAY PRIORITY Clock Priority Press and hold DISP button (1) while pressing button (16) to select Clock Priority. Pressing DISP button (1) while in Clock Priority will temporarily display selected station frequency (in RADIO mode) or track number (in CD/CDC mode) or state information (in AUX IN mode). Frequency Priority Press and hold DISP button (1) while 8
-
 1
1 -
2
-
 3
3 -
 4
4 -
 5
5 -
 6
6 -
 7
7 -
 8
8 -
 9
9 -
 10
10 -
 11
11 -
 12
12 -
 13
13 -
14
 |
 |
