Pyle PLMRKT4A PLMRMP3A Manual 1 - Page 4
Installation precautions, Controls, Input and Output Cables - instructions
 |
View all Pyle PLMRKT4A manuals
Add to My Manuals
Save this manual to your list of manuals |
Page 4 highlights
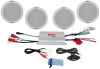
Installation precautions Before you drill or cut any holes, investigate your vessel's layout very carefully. Take special care when you work near the gas tank, fuel lines, hydraulic lines and electrical wiring. Never operate the amplifier when it is unmounted. Attach all audio system components securely within the amplifier to prevent damage, especially in an accident. Do not mount this amplifier so that wire connections are unprotected. in a pinched condition, in contact with any metal surfaces in your marine vessel, or likely to be damaged by nearby objects. Before making or breaking power connections in your system, disconnect the marine vessel battery. Confirm that your head unit or other equipment is turned off while connecting the input jacks and speaker terminals. If you need to replace the power fuse, replace it only with a fuse idenetical to that supplied with the amplifier, Using a fuse of a different type or rating may result in damage to your audio system or your amplifier which is not covered by the manufacturer's warranty. Don't misuse the level control! Do not mistake the input level control for a volume control! It is designed ONLY to match the output level of your audio source to the input level of your amplifier. Do not adjust this input level to maximum unless your input level requires it. Ignoring these instructions will result in an input overload to the amplifier, and excessive audio distortion. It can also cause the protection circuit to engage. Controls, Input and Output Cables: 2 1 3 dB GAIN + MIN MAX 4 5 The switches and gain settings are located behind a watertight plug, which also lights up when the amplifier is on. Be sure to replace the plug when finished with adjustments 1 The INPUT LEVEL switch selects the input sensitivity of the amplifier. If you are connecting to a LINE level source (typically any RCA type connection) then the switch should be in the LINE (out) position. When connecting to loudspeaker outputs or headphone or high level sources then set the switch to the SPEAKER (in) position. 2 The POLARITY switch allows the user to optimize bass performance in the case that there are more than 1 set of loudspeakers producing bass in the system. Play some music with strong bass content and listen with the switch alternately in the NORMAL and REVERSE position until it can be determined which setting results in more pleasing bass response. If in doubt, or if any interaction with other speakers is unlikely, then leave the switch in the NORMAL position. 3 The GAIN control adjusts the overall level of the amplifier. When using the amplifier without volume control the level should beset to achieve a balance with other loudspeakers in the system. As arule, keep the gain setting as low as possible while still insuring that the system will reach full output power. When using the system with external volume control, set the external Volume Control to FULL (clockwise) and adjust the gain on the amplifier until full output power is reached. Full output power level can be determined by turning the gain control clockwise until the apparent loudness does not appear to increase any more. Leave the control at the setting where this begins to become apparent. 3 4
-
 1
1 -
 2
2 -
 3
3 -
 4
4
 |
 |
