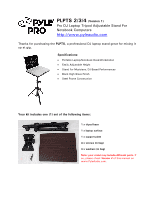
Pyle PLPTS3 PLPTS3 Manual 1 - Page 2
knob a, knob b - from
 |
View all Pyle PLPTS3 manuals
Add to My Manuals
Save this manual to your list of manuals |
Page 2 highlights
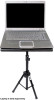
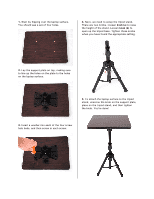
1. Start by flipping over the laptop surface. You should see a set of four holes. 4. Next, we need to setup the tripod stand. There are two knobs. Loosen knob (a) to raise the height of the stand. Loosen knob (b) to open up the tripod base. Tighten these knobs when you have found the appropriate setting. 2. Lay the support plate on top, making sure to line up the holes on the plate to the holes on the laptop surface. 5. To attach the laptop surface to the tripod stand, unscrew the knob on the support plate, place on the tripod stand, and then tighten the knob. You're done! 3. Insert a washer into each of the four screw hole beds, and then screw in each screw.
-
 1
1 -
 2
2
 |
 |

1.
Start by flipping over the laptop surface.
You should see a set of four holes.
2.
Lay the support plate on top, making sure
to line up the holes on the plate to the holes
on the laptop surface.
3.
Insert a washer into each of the four screw
hole beds, and then screw in each screw.
4.
Next, we need to setup the tripod stand.
There are two knobs. Loosen
knob (a)
to raise
the height of the stand. Loosen
knob (b)
to
open up the tripod base. Tighten these knobs
when you have found the appropriate setting.
5.
To attach the laptop surface to the tripod
stand, unscrew the knob on the support plate,
place on the tripod stand, and then tighten
the knob. You’re done!