Pyle PLVW125U User Guide - Page 2
Model
 |
View all Pyle PLVW125U manuals
Add to My Manuals
Save this manual to your list of manuals |
Page 2 highlights
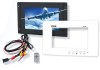
Installation & Mounting Model: PLVW125U 1. Drive mounting holes According to the following size to draw a cutting line on the wall, installed by digging out a hole. The depth of the hole is larger than 36MM. Note: open hole, the level of attention, so cannot be installed horizontally, and watch If wires need to be placed in the hole, increasing the depth of the hole. 14.016 inch (356mm) 14.016 inch (356mm) 9.331inch (237mm) 8.976 inch (228mm) 9.527 inch (242mm) 1 2 11.225 inch(285mm) 12.205 inch(310mm) 2. Install the main Connect the lines, place the subjects in mounting hole, upper and lower case-preserving Gap, then with 4 screws. Screw specifications: 4mm X 12mm or 4mm X (12+☆)mm Note: the main level. MATS(D 8mm) push down push down Hang buckle 3. Panel mounting The display area is aligned with the position of the panel in the frame body, a little hard pressed to hang buckle at the surface of the panel and the body fit. Note: the frame display area entirely within the neat, well hang buckle clasp firmly. push down push down 4 2 3 1 4. Panel removal Use a screwdriver or other flat tool, slightly hard to pry the bottom right corner(part 1), bottom right hang buckle will depart from the main body of the Panel; Then use the same method to open the panels hang buckle 2,3,4, you can remove the Panel. Note: when the top or bottom to pry, bigger also can make up button broke off. Warning: This product is a liquid crystal display, install and watch the position of the horizontal line around, watch so as not to affect the image quality. visit www.PyleAudio.com for more information
-
 1
1 -
 2
2
 |
 |
