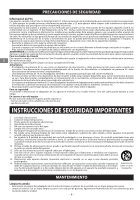
RCA RPD160A RPD160A Product Manual - Page 4
Listening To Your Ipod / Iphone / Ipad, Power Supply, Installation - manual
 |
View all RCA RPD160A manuals
Add to My Manuals
Save this manual to your list of manuals |
Page 4 highlights
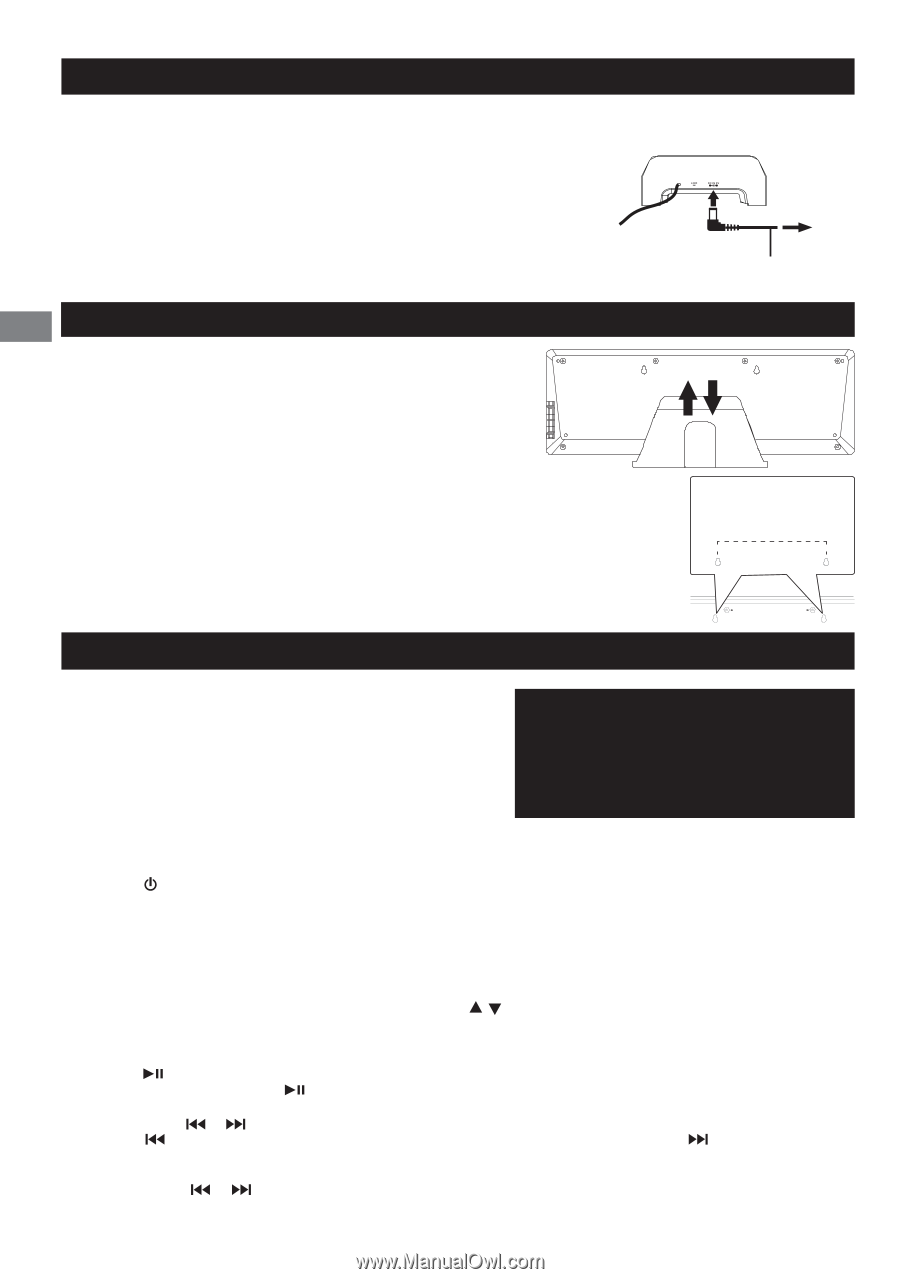
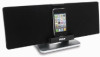
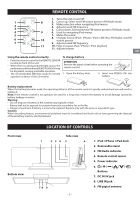
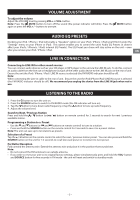
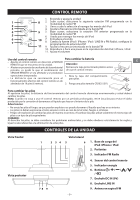
power supply Using the AC adapter Using an AC adapter other than the one supplied with the unit may damage the unit. Caution: Back view • Before use, ensure the rated voltage of the adapter matches your local voltage. • The included AC adapter is for use with this unit only. Do not use it with other equipment. • If you are not going to use the unit for a long time, disconnect the AC adapter To AC outlet from the wall outlet. • Whenever the AC adapter is plugged in to a wall outlet, electricity is running To "DC IN 9V" jack through the unit, even when the power switch is turned off. AC adapter EN INSTALLATION Removing the base stand Hold the unit and slide down the stand (as shown). Installing the base stand Hold the unit and push the stand upward the rear of unit (as shown). Caution: Before removing or installing the base stand, ensure you disconnect all cables (AC adaptor and Line -in cable). Mounting on a wall The unit can be mounted on a wall by the mounting holes on the rear of the unit. Caution: • Mounting the unit requires special skills that should be only performed by qualified personnel. • Make sure that the wall mount is fixed securely enough so that it meets safety standards. Two mounting holes [Use #4 (Imperial) or M3 (Metric) pan head screws - not supplied] 6.5" LISTENING TO YOUR iPod / iPhone / iPad Compatible iPod, iPhone and iPad models • iPod touch (1st, 2nd, 3rd and 4th generation) • iPod nano (1st, 2nd, 3rd, 4th, 5th and 6th generation) • iPhone 4 WARNING: • NEVER pull iPod / iPhone / iPad forward or push backward. This can damage the unit and your • iPhone 3GS • iPhone 3G • iPad 2 • iPad iPod / iPhone / iPad. • If using an iPod / iPhone / iPad with a cover or "skin", please remove it before docking. Note: If your iPhone is called while it is docked, playback will be paused. Inserting your iPod / iPhone / iPad 1. Insert your iPod / iPhone / iPad into the connector in the dock. 2. Press the ON/OFF button to turn on the unit. Ensure the iPod / iPhone/ iPad / LINE IN source is selected (the FM RADIO indicator should be off) - to select a source, tap the SOURCE button. Ensure you do NOT have a device plugged in to the LINE IN jack. Note: • The iPod / iPhone / iPad will charge automatically (until fully charged) once it is docked in the cradle (except if the unit is in Radio mode). iPod Classic (1G and 2G) will not charge. • Note that not all functions of some iPod / iPhone / iPad models can be controlled via the remote control of this unit. If necessary, operate your iPod / iPhone / iPad directly by using its screen. • When playing iPod / iPhone / iPad, you can use the MENU, , or SELECT button on the remote control to enter the menu of iPod / iPhone / iPad to select. • Disconnect the Line-in cable when playing iPod / iPhone / iPad. Pausing playback • Press the button. • To resume playback, press the button again. Skipping to another track • Press either the or button according to the desired direction. • Press the button to skip to the beginning of the current track or previous track. Press button to skip to the beginning of the next track. Locating a particular point on a track • Keep either the or button pressed during playback and release at the desired point in the track. Note: Please refer to the user's manual that was included with your iPod / iPhone / iPad for more details. - 4 -
-
 1
1 -
 2
2 -
 3
3 -
 4
4 -
 5
5 -
 6
6 -
 7
7 -
 8
8 -
 9
9 -
 10
10 -
11
-
12
-
13
-
14
-
15
-
16
-
17
-
18
-
19
-
20
 |
 |