RCA VR5320R Owner/User Manual - Page 1
RCA VR5320R Manual
 |
UPC - 044476072260
View all RCA VR5320R manuals
Add to My Manuals
Save this manual to your list of manuals |
Page 1 highlights
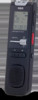
v2.0 (EN/E) user manual manual de usuario VR5320R VR5330R EN/E It is important to read this instruction prior to using your new product for the first time. Es importante leer este manual antes de usar por vez primera su equipo. Some of the following information may not apply to your particular product; however, as with any electronic product, precautions should be observed during handling and use. • Read these instructions. • Keep these instructions. • Heed all warnings. • Follow all instructions. • Do not use this apparatus near water. • Clean only with dry cloth. • Do not install near any heat sources such as radiators, heat registers, stoves, or other apparatus (including amplifiers) that produce heat. • Only use attachments/ accessories specified by the manufacturer. • Refer all servicing to qualified Before you begin General controls Unpacking your player You should have the following: • One voice recorder • One user manual • One quick start guide • One carrying case (For VR5330R only) • Two AAA size batteries (For VR5330R only) Installing batteries This player can be operated by 2 "AAA" batteries (included). 1. Slide the battery compartment door to open. 2. Insert the two supplied "AAA" batteries with polarities matching indications. 3. Replace the battery compartment door. Refer to the battery level indicator on display for battery's level. Replace with new batteries when the indicator is empty. Turn off the player first before replacing batteries. If power interruption exceeds 20 seconds, date and time have to be set again. Auto power shut down The player will be automatically turned off if left idle for three minutes. Using earphones and external microphone • When earphones are connected, sound output from speaker will be muted. • When external microphone is connected, no recording can be made from built-in microphone. Player on/off Press on to turn on the player. Press off to turn off the player. Keys lock To avoid accidental key selection, slide the key lock selector toward the lock icon ( ) to lock the keys. Reverse the step to unlock them. Player controls 1 4 5 2 6 3 7 1. USB connector - Press the button on the back and then slide to extend or retreat the connector. 2. info/menu - Press and hold to access the player menu. Press repeatedly to show information of current file. 3. on - Press the button to turn player on, start/pause playback. 4. Recording indicator 5. Built-in microphone 6. + / - - Skips / searches backward or forward, selects / service personnel. Servicing is required when the apparatus has been damaged in any way, such as power-supply cord or plug is damaged, liquid has been spilled or objects have fallen into the apparatus, the apparatus has been exposed to rain or moisture, does not operate normally, or has been dropped. ADDITIONAL SAFETY INFORMATION • Apparatus shall not be exposed to dripping or splashing and no objects filled with liquids, such as vases, shall be placed on the apparatus. • Do not attempt to disassemble the cabinet. This product does not contain customer serviceable components. • The marking information is located at the bottom of apparatus. 11 8 9 12 10 13 14 browses in the player menu. 7. off - Turns off player, stops playback or recording. 8. Key lock selector 9. External microphone jack 10. External earphones jack 11. + Vol - - Adjusts volume, selects / browses in the player menu. 12. , rec/bookmark - Starts and pauses recording, inserts bookmarks. 13. x, erase - Erases files, bookmarks or format memory. 14. Battery compartment door IMPORTANT SAFETY INSTRUCTIONS PLEASE READ AND SAVE THIS FOR FUTURE REFERENCE Important battery precautions • Any battery may present a risk of fire, explosion, or chemical burn if abused. Do not try to charge a battery that is not intended to be recharged, do not incinerate, and do not puncture. • Non-rechargeable batteries, such as alkaline batteries, may leak if left in your product for a long period of time. Remove the batteries from the product if you are not going to use it for a month or more. • If your product uses more than one battery, do not mix types and make sure they are inserted correctly. Mixing types or inserting incorrectly may cause them to leak. • Discard any leaky or deformed battery immediately. They may cause skin burns or other personal injury. • Please help to protect the environment by recycling or disposing of batteries according to federal, state, and local regulations. WARNING: The battery (battery or batteries or battery pack) shall not be exposed to excessive heat such as sunshine, fire or the like. Ecology Help protect the environment we recommend that you dispose of used batteries by putting them into specially designed receptacles. Precautions for the unit • Do not use the unit immediately after transportation from a cold place to a warm place; condensation problems may result. • Do not store the unit near fire, places with high temperature or in direct sunlight. Exposure to direct sunlight or extreme heat (such as inside a parked car) may cause damage or malfunction. • Do not expose to rain or moisture. • Clean the unit with a soft cloth or a damp chamois leather. Never use solvents. • The unit must only be opened by qualified personnel. Headset safety To use a headset safely, please keep the following in mind: • Do not play your headset at a high volume. Hearing experts advise against continuous extended play. • If you experience ringing in your ears, turn down the volume or stop using the headset. • Do not use a headset while driving a motorized vehicle or riding a bike. It may cause a traffic hazard and is illegal in many areas. • Even if your headset is an open-air type designed to let you hear outside sounds, don't turn up the volume so high that can't hear sounds around you. FCC Information Note: This equipment has been tested and found to comply with the limits for a Class B digital device, pursuant to Part 15 of FCC Rules. These limits are designed to provide reasonable protection against harmful interference in a residential installation. This equipment generates, uses, and can radiate radio frequency energy and, if not installed and used in accordance with the instructions, may cause harmful interference to radio communications. However, there is no guarantee that interference will not occur in a particular installation. If this equipment does cause harmful interference to radio or television reception, which can be determined by turning the equipment off and on, the user is encouraged to try to correct the interference by one or more of the following measures: • Reorient or relocate the receiving antenna. • Increase the separation between the equipment and receiver. • Connect the equipment into an outlet on a circuit different from that to which the receiver is connected. • Consult the dealer or an experienced radio/TV technician for help. Changes or modifications not expressly approved by Audiovox could void the user's authority to operate the equipment. Manufacturer/Responsible Party Audiovox Accessories Corporation 111 Congressional Blvd., Suite 350 Carmel, IN 46032 1-317-810-4880 ( No technical / product support is available via this number. This phone number is for regulatory matters only.) Visit www.rcaaudiovideo.com for technical support RCA VR5320R RCA VR5330R This Class B digital apparatus complies with Canadian ICES-003. Cet appareil numérique de la classe B est conforme à la norme NMB-003 du Canada. Service information This product should be serviced only by those specially trained in appropriate servicing techniques. For instructions on how to obtain service, refer to the warranty included in this user manual. For your records In the event that service should be required, you may need the model number and the serial number. In the space below, record the date and place of purchase and the serial number: Model No.: Date of Purchase: Place of Purchase: Serial No.: Power Supply • (battery power) 2 x "AAA" ESD Remark: In case of misfunction due to electrostatic discharge just reset the product (disconnect and reconnect of the power source may be required) to resume normal operation. Setting day and time Display 9 1 2 10 11 3 12 4 13 5 6 14 15 7 16 17 8 1. Folder (A/B/C/D) 2. Recording in progress 3. File selected 4. Total number of files in a folder 5. Playback in progress 6. Remaining time for recording 7. Recording date 8. Area for displaying messages (refer to the next section) 9. Battery level indicator 10. Key lock function activated 11. Bookmark 12. Recording conditions 13. Playback speed 14. Playback mode: play one or play all 15. Automatic voice recording activated 16. Recording quality 17. Month (MM), Day (DD) and Year (YY) Display messages The messages show at the bottom of the display during operation. Refer to the below for their meanings: 12 HOUR 12 hour time display mode 24 HOUR 24 hour time display mode ADD BK Insert bookmark APPEND Appendix (Adding Appendix) BATTLO Batteries are weak CUT-E Cut End (Cutting) CUT-S Cut Start (Cutting) DEL 01 Delete the current file DEL AL Delete all files in a folder DEL BK Delete all bookmarks in the current file FORMAT Format the memory FULL Memory full INSERT Insertion (Inserting New Segments) LOCKED Key locked NO BK MK No bookmark created in the current file NO TONE No beeping sound (Setting Beep Sound) OFF Off (Automatic Voice Recording) ON On (Automatic Voice Recording) PAUSE Playback or recording is paused PCLINK Player is connected to the computer SEN MI Sensitivity Level (AVR) SPEED Speed of playback TONE Beeping sound on (Setting Beep Sound) VOL 15 Volume (Setting Volume) WAIT Memory rearrangement/System is busy With day and time set, you can always read on the display the recording date and time of your recorded messages. Normal recording is still possible without setting. However, no correct recording date and time can be referenced in your recorded messages. To set the date and time: 1. Press on to turn on the player. 2. In stop mode, press and hold info/menu for about 2 seconds and then release the button. The first menu item FOLDER flashes on the display. 3. Press info/menu repeatedly until YY flashes on the display. 4. Press / or Vol +/- to adjust the value (default year: 2009) and then press info/ menu to confirm. • If day and time have not been set previously, the player goes to step 4 automatically after turn on. 5. After year is set, you will then be guided to set month, day, 12/24 hour display, hour and minute. Follow the operations in step 4 for settings. / or Vol +/- Press info/menu / or Vol +/- Press info/menu / or Vol +/- Press info/menu / or Vol +/- Press info/menu to confirm and exit settings. Basic operations Player menu Recording Selecting folders and files To select folders: 1. Press and hold info/menu for about 2 seconds and then release the button. The first menu item FOLDER flashes on the display. 2. Press / or VOL +/- to select a specific folder (A/B/C/D). 3. Press . To select files: 1. Select the folder you need. 2. Press / to select the file you want. • If the file you want is in the current folder, you can press / to select it directly in both stop and play modes. Basic playback To play back recorded files: 1. Select a folder and a file. 2. Press to start playback. 3. Press to pause playback, press again to resume. 4. You can press Vol +/- to adjust listening volume. 5. Press and hold or to make quick search within a file. • Quick search skips by second within the first minute of a recording. After that, the search skips by minute. To resume searching by second, release the button once and then press and hold or again. 6. Press or once to skip one file forward or backward. 7. Press to stop playback. To display file Information: Press info/menu repeatedly to show various information of the current file: • Current clock time • Record date of current file • Record time of current file • Bookmark (if available) of current location • Remaining record time • Elapsed play time (during playback) To access the player menu: Press and hold info/menu for about 2 seconds and then release the button. The first menu item FOLDER flashes on the display. To change settings in the menu: 1. In the player menu, press info/menu repeatedly to view the following menu items: Folder (A/B/C/D) Record conditions (DICT/CONF) Record quality (LP/SP/HQ) AVR (on/off) Playback speed (FAST/SLOW) Playback mode (one/all) Tone (on/off) Year Day (month/day) 12/24 hour time Time (hour/minute) Exit player menu 2. Press / or VOL +/- to make selections or adjust values. 3. Press to confirm your selection and exit setting. Erasing files and bookmarks Editing Setting recording mode Manual Recording 1. While playback is stopped, select a destination folder (A/B/C/D) (refer to "Basic operations"). 2. Press to start recording. (recording time will be displayed once you press the button) 3. To pause recording, press once, press again to resume recording. 4. To stop recording, press . AVR (Automatic Voice Recording) This feature allows the player to sense sound and to record only when you are speaking into the microphone. When dictation stops for about three seconds, recording will pause and then start again automatically when you resume dictation. 1. While playback is stopped, select a destination folder (A/B/C/D) (refer to "Basic operations"). 2. Press and hold info/menu for about 2 seconds and then release the button. The first menu item FOLDER flashes on the display. 3. Press info/menu repeatedly until AVR flashes on the display. 4. Press / or VOL +/- to select between AVR ON and AVR OFF. 5. Press to exit the player menu. 6. Press to enter AVR mode. 7. Start dictation. Recording starts automatically. 8. During AVR recording, adjust the sensitivity of the microphone by pressing Vol +/-, SEN with sensitivity level will show on display (e.g. increase sensitivity level when recording source is far from the player or the recording environment is quiet). 9. Press to end AVR recording. • Repeat step 2-5 and select AVR OFF for de-selection. • During recording, the recording indicator stays on. When in AVR standby mode or when recording is paused, the recording indicator flashes. • You can record up to 99 files in one folder, not exceeding 396 files in total. When the maximum limit is reached, FULL will be shown. • The first syllable or two may be lost when you start recording because this 'sound' is used to turn on the AVR feature. It is a good practice to make some 'sounds' or say a short word to activate the AVR before you begin actual dictation. • To view the remaining time and other recording information, press info/ menu repeatedly during recording. Setting recording quality To select among three recording qualities (default is SP): Definition: • LP (Long Play) - allows about 400 (VR5320R) / 800 (VR5330R) hours recording. Recording format: .voc • SP (Standard Play) - allows about 70 (VR5320R) / 140 (VR5330R) hours recording. Recording format: .voc • HQ (High Quality) - allows about 34 (VR5320R) / 70 (VR5330R) hours recording. Recording format: .wav 1. Press and hold info/menu for about 2 seconds and then release the button. The first menu item FOLDER flashes on the display. 2. Press info/menu repeatedly until LP, SP or HQ shows on the display. 3. Press / or VOL +/- to select among LP, SP and HQ. 4. Press to exit the player menu. Setting recording condition To select between two recording conditions (default is DICT): Definition: • CONF (Conference) - in a more open area and recording source is far from the player. • DICT (Dictation) - in a more enclosed area and recording source is close to the player. 1. Press and hold info/menu for about 2 seconds and then release the button. The first menu item FOLDER flashes on the display. 2. Press info/menu repeatedly until DICT or CONF flashes on the display. 3. Press / or VOL +/- to select between DICT and CONF. 4. Press to exit the player menu. • For conferences, to obtain optimum recording quality, place the recorder with the microphone freely exposed to the sound source as close as convenient. A built-in automatic recording level control will set the optimum record level during manual recording. Avoid recording near unwanted noise sources, such as air conditioners or fans. • If power supplied from the battery fails suddenly (e.g. batteries are removed accidentally) during recording, the recoding in progress will be interrupted. The recorded file may also be corrupted and cannot be played back. Advanced operations Erasing mode To erase files or bookmarks, while playback is stopped: 1. Press x once. 2. Press / to select one of the erasing options: • Delete the current file (DEL 01) • Delete all files in the current folder (DEL AL) • Format the memory of the player (FORMAT) (Caution! All data inside the memory will be erased) • Delete all bookmarks in the current file (DEL BK) 3. With one of the above options selected, press and hold x for about 3 seconds to confirm your selection and start the deletion. • File numbers that come after erased one will be moved forward by one automatically. • Press to cancel erasing all files. The undeleted files are saved automatically. • Formatting the internal memory may be required when: 1. The flash memory becomes unstable after performing many times on file creation and deletion; 2. To ensure the file system compatibility (i.e. file system FAT32 for application). • You may also format the player when connected to a PC by right-clicking on the player's drive name or letter and select "Format" from the menu. Make sure you select FAT or FAT32 as the file system. CAUTION • The edit function does not operate when battery power is too low. • Make sure PLAY ALL files is not selected. Inserting new segments, adding appendix and cutting cannot be performed when PLAY ALL files is selected. • After editing a message, WAIT may be displayed. Do not power off the player until WAIT disappears. Otherwise, the memory which is rearranging could not be read or released until the player is formatted. Editing mode To insert bookmarks, new segments or appendix to a recorded file: 1. Select the desired file and start playback. 2. Press during playback to enter editing mode. Playback is paused. 3. Press / to select one of the editing options: • Insert an interception point (bookmark) into the current file for quick reference (ADD BK) • Insert a new segment into the current file (INSERT) • Insert an appendix at the end of the current file (APPEND) 4. With one of the above options selected, press again to confirm your selection and start the editing. • Refer to the following sections for details. Bookmark To create bookmarks: • Once is pressed (refer to step 4 in the section "Editing mode"), the bookmark icon flashes and a newly created bookmark number shows on the display. bookmark icon new bookmark number • You can create up to 29 bookmarks in a file. When the maximum limit is reached, FULL will be shown. • The minimum interval between bookmarks is 3 seconds. To skip to a bookmark anytime during playback: 1. During playback, press to go to the bookmark (if available). 2. Press again to go to the next bookmark. To delete all bookmarks created in the current file: Refer to section "Erasing files and bookmarks". Insert To insert a new segment into the current file: 1. Once is pressed (refer to step 4 in the section "Editing mode"), pause mode is released and the REC icon shows. The recording of a new segment is started from where the pause mode is released. 2. Press to stop the recording of new segment. • Do not power off the player if WAIT appears on the display. Append To insert an appendix at the end of the current file: 1. Once is pressed (refer to step 4 in the section "Editing mode"), the REC icon shows and the recording of appendix is started. 2. Press to stop the recording of the appendix. • Do not power off the player if WAIT appears on the display. Cut To erase unwanted parts from the current file: 1. Start playback of the desired file. 2. Press x to mark the start of the unwanted part, CUT-S shows on display. 3. Press x to mark the end of the unwanted part, CUT-E shows on display. 4. Press x again to confirm cutting within 3 seconds. Otherwise, the cutting operation will be canceled. • You may also press to cancel the cutting operation. • Do not power off the player if WAIT appears on the display. • Insert, Append and Cut will only update the recorded time length, without changing recording time and date. • All bookmarks will be deleted after Insert, Append or Cut is performed. Play one/all To play a specific file or all files in a folder: 1. Press and hold info/menu for about 2 seconds and then release the button. The first menu item FOLDER flashes on the display. 2. Press info/menu repeatedly until ONE or ALL flashes on display. 3. Press / or VOL +/- to select between ONE and ALL. 4. Press to exit the player menu. • If ONE is selected, the player will stop after the selected file is played. If ALL is selected, the player will stop after all files in a folder are played. Advanced operations Connecting to computer Using Digital Voice Manager Tones To activate or deactivate the beep sound when any key is pressed (except during playback and recording): 1. Press and hold info/menu for about 2 seconds and then release the button. The first menu item FOLDER flashes on the display. 2. Press info/ menu repeatedly until TONE or NOTONE shows on display. 3. Press / or VOL +/- to set beep sound ON/OFF. 4. Press to exit the player menu. Speed To adjust the playback speed: 1. Press and hold info/menu for about 2 seconds and then release the button. The first menu item FOLDER flashes on the display. 2. Press info/menu repeatedly until SPEED shows on display. 3. Press / or VOL +/- to select among FAST, SLOW and no speed indication (normal speed). 4. Press to exit the player menu. • The above operations can also be done during playback. Computer system requirements • PC with Windows® 7, Windows VistaTM or Windows® XP (Service Pack 1 or higher) or Windows® 2000 (Service Pack 3 or higher). Mac OS is NOT supported. • 20MB free hard disk space for software • USB port 1.1 or 2.0 • Installed sound card Mac OS version (i.e. Mac OS X version 10.4.11 or later) can support the mass storage mode only for listening audio files (recorded in HQ mode --- "WAV" format) through the Mac audio program (eg. Quicktime). Connecting to computer Connect the player before launching the Digital Voice Manager. 1. Extend the USB connector on the player and connect it to your computer's USB port. 2. PCLINK shows on the player's display. The player appears as a removable drive in your computer. Installing Digital Voice Manager 1. Connect the player with the computer as instructed in the previous section. 2. Open My Computer and double-click the player's drive icon. Double-click rcaDVM_setup.exe to start the Digital Voice Manager installation. • The RCA Detective application is installed with the Digital Voice Manager application and will open the Digital Voice Manager application automatically when you connect the player to your computer. • When the player is in Menu mode, during playback or recording, a connection between the player and the computer will not be established. Quit the above modes before connecting to the computer. • Data transfer is possible even if no batteries are installed in the player. • Do not disconnect the USB connection during files transfer. • The Digital Voice Manager software can also be downloaded from www.rcaaudiovideo.com. The RCA Digital Voice Manager can perform playback, organize your bookmarks of the recorded files and create self-executable voice file from the recorded files. Launching the software 1. To launch the software, click Start, select All Programs, select RCA Digital Voice Recorder, then select RCA Digital Voice Manager. • If RCA Detective feature is selected during installation of Digital Voice Manager, the application will open automatically once you connect the player to your computer. 2. All the drives in the computer except the removable Digital Voice Recorder are shown in the top while the removable Digital Voice Recorder is shown in the bottom. 3. Adjust the volume on the right of the toolbar. All drives in the computer Removable Digital Voice Recorder Playback and editing operations 1. To organize your files, click the corresponding buttons to cut, delete, copy and paste a file (or by drag and drop). cut paste copy delete 2. To play the recorded files, highlight the file and click the PLAY/PAUSE button on the left of the toolbar. play/pause skip forward stop clear bookmark adjust volume • Click the corresponding buttons in the toolbar to fast backward/forward, skip to a specific time in the file and stop playback of a recorded file. • To adjust the playback speed, click Normal Speed and select desired speed from the pull down menu. 4. To skip to a bookmark, select Play from the menu at the top, then select Goto Bookmark and select your desired bookmark. • To edit bookmarks, click the corresponding buttons to add or clear the bookmarks. skip backward skip to a add bookmark specific time Using Digital Voice Manager Disconnecting from computer Troubleshooting tips Transfer files with Digital Voice Manager Your player is associated with a drive letter. You can drag the voice files you want to transfer to your player to the A/B/C/D folder in the drive. Your files can be found in these folders in the player once it is disconnected from the computer. You can also drag the voice files you want to transfer from the A/B/C/D folder in the drive to your computer. All drives in the computer Removable Digital Voice Recorder Using your player as a file storage device The player can function as a detachable data storage device. You can take along your favorite pictures and documents wherever you go. Simply cut-and-paste or drag-and-drop files to or from it via USB connection, the player will appear as a removable drive in Windows After you have copied files to or from the player, you can disconnect the player from the computer. 1. Click the icon from the System Tray and select Unplug or Eject hardware. Select the drive corresponding to your player. 3. Now you can disconnect the player from the computer. If you want to go back to USB mode for file transfer at this stage, you need to unplug and connect the player to the PC again. Do not rename, delete and transfer (drag-anddrop) voice files to your player directly in Windows Explorer. Use the Digital Voice Manager to rename, delete and transfer voice files. Help - For detailed explanation on using Digital Voice Manager, click the Help icon on the toolbar 2. The Stop a Hardware player screen will appear. Select the player to be stopped again for confirmation and click OK. Warranty information Player doesn't turn on • Check that batteries are properly inserted and not exhausted. • Make sure battery compartment door is properly closed. • Make sure LOCK function is not activated. Display keeps flashing when player is off • You may not have set the time. Refer to section "Setting date and time". Cannot record • This player does not record mp3 format. • Make sure LOCK function is not activated. • Make sure memory is not full. • You have recorded 99 files in one folder. Try record in a new folder. • You may have formatted the player with incorrect file system (e.g. NTFS or MAC format). Refer to section "Erasing files and bookmarks" and format the player again. Incorrect recording date and time during playback • You may have not set the date and time before recording. Refer to section "Setting date and time". No sound from speaker during playback • Make sure volume is not set to 0. • Headphones should not be connected. Cannot edit • Make sure PLAY ALL function is not activated. Cannot activate the player after pressing on keys • Remove the batteries to reset the player. Recordable time becomes shorter • You may have set the recording quality to 'High Quality', refer to section 'Setting Recording Quality'. • Delete the Digital Voice Manager setup software from the player to free up more memory space. Cannot perform playback • This player does not play mp3 format. • Make sure you have selected folder with recorded messages. • Make sure LOCK function is not activated. • Make sure the file is playable, which must be of 8-bit PCM or designated RCA format. Other formats (e.g. mp3, wma) cannot be shown in the player for playback. Cannot erase recorded file(s) • Make sure you follow each step under section "Erasing files and bookmarks" carefully. Cannot stop recording when AVR ON • If AVR ON sensitivity is set to HIGH, recording may not be stopped in noisy environment. Try setting the sensitivity to LOW. Cannot keep the saved setting • If the batteries are removed, saved settings may be removed. Cannot open recorded files in the computer. • You must use the provided DVM software to open the files. • To download the software, go to www.rcaaudiovideo.com • On a Mac computer, only .WAV file on the player can be played directly via application such as Quicktime. 12 Month Limited Warranty Applies to RCA Voice Recorders AUDIOVOX ACCESSORIES CORP. (the Company) warrants to the original retail purchaser of this product that should this product or any part thereof, under normal use and conditions, be proven defective in material or workmanship within 12 months from the date of original purchase, such defect(s) will be repaired or replaced with reconditioned product (at the Company's option) without charge for parts and repair labor. To obtain repair or replacement within the terms of this Warranty, the product is to be delivered with proof of warranty coverage (e.g. dated bill of sale), specification of defect(s), transportation prepaid, to the Company at the address shown below. This Warranty does not extend to the elimination of externally generated static or noise, to correction of antenna problems, loss/interruptions of broadcast or internet service, to costs incurred for installation, removal or reinstallation of product, to corruptions caused by computer viruses, spyware or other malware, to loss of media, files, data or content, or to damage to tapes, discs, removable memory devices or cards, speakers, accessories, computers, computer peripherals, other media players, home networks or vehicle electrical systems. This Warranty does not apply to any product or part thereof which, in the opinion of the Company, has suffered or been damaged through alteration, improper installation, mishandling, misuse, neglect, accident, or by removal or defacement of the factory serial number/bar code label(s). THE EXTENT OF THE COMPANY'S LIABILITY UNDER THIS WARRANTY IS LIMITED TO THE REPAIR OR REPLACEMENT PROVIDED ABOVE AND, IN NO EVENT, SHALL THE COMPANY'S LIABILITY EXCEED THE PURCHASE PRICE PAID BY PURCHASER FOR THE PRODUCT. This Warranty is in lieu of all other express warranties or liabilities. ANY IMPLIED WARRANTIES, INCLUDING ANY IMPLIED WARRANTY OF MERCHANTABILITY, SHALL BE LIMITED TO THE DURATION OF THIS WRITTEN WARRANTY. ANY ACTION FOR BREACH OF ANY WARRANTY HEREUNDER INCLUDING ANY IMPLIED WARRANTY OF MERCHANTABILITY MUST BE BROUGHT WITHIN A PERIOD OF 24 MONTHS FROM DATE OF ORIGINAL PURCHASE. IN NO CASE SHALL THE COMPANY BE LIABLE FOR ANY CONSEQUENTIAL OR INCIDENTAL DAMAGES FOR BREACH OF THIS OR ANY OTHER WARRANTY. No person or representative is authorized to assume for the Company any liability other than expressed herein in connection with the sale of this product. Some states do not allow limitations on how long an implied warranty lasts or the exclusion or limitation of incidental or consequential damage so the above limitations or exclusions may not apply to you. This Warranty gives you specific legal rights and you may also have other rights which vary from state to state. Recommendations before returning your product for a warranty claim: • If your product is capable of storing content (such as an mp3 player, voice recorder, camcorder, digital photo frame, etc), it is recommended to make periodic backup copies of content stored on the product. If applicable, before shipping a product, make a back up copy of content or data stored on the device. Also, it is advisable to remove any personal content which you would not want exposed to others. IT IS LIKELY THAT CONTENTS AND DATA ON THE DEVICE WILL BE LOST DURING SERVICE AND REFORMATTING. AUDIOVOX ACCEPTS NO LIABILITY FOR LOST CONTENT OR DATA, OR FOR THE SECURITY OF ANY PERSONAL CONTENT OR DATA ON THE RETURNED DEVICE. Product will be returned with factory default settings, and without any pre-loaded content which may have been installed in the originally purchased products. Consumer will be responsible for reloading data and content. Consumer will be responsible to restore any personal preference settings. • Properly pack your unit. Include any remotes, memory cards, cables, etc. which were originally provided with the product. However DO NOT return any removable batteries, even if batteries were included with the original purchase. We recommend using the original carton and packing materials. Ship to Audiovox Electronics Corp. Attn: Service Department. 150 Marcus Blvd. Hauppauge N.Y. 11788 1-800-645-4994 For Canada Customers, please ship to: Audiovox Return Centre c/o Genco 6685 Kennedy Road, Unit#3, Door 16, Mississuaga, Ontario L5T 3A5 Creating and playing selfexecutable file You can play the created file independently without the Digital Voice Management software. 1. Highlight a recorded file, click . 2. Select the destination folder from the pop up window and click Save. 3. Go to the destination folder and double-click the created file. Creating wave file Self-executable file may be blocked by some e-mail filters. When recordings are made in LP or SP quality, you may select to create wave file if you want to send your recorded messages by e-mail. 1. Highlight a recorded file, click . 2. Select the destination folder from the pop up window and click Save. 3. The created file could be found in the destination folder. 4. Click Play to start playback. Adjust the volume on the right. Illustrations contained within this publication are for representation only and subject to change. The descriptions and characteristics given in this document are given as a general indication and not as a guarantee. In order to provide the highest quality product possible, we reserve the right to make any improvement or modification without prior notice. Visit http://store.audiovox.com to find the best accessories for your products. © 2010 Audiovox Accessories Corporation 111 Congressional Blvd., Suite 350 Carmel, IN 46032 Trademark(s) © Registered Printed in China
-
 1
1
 |
 |
