Radio Shack 14-1128 Owners Manual - Page 8
Tape Tips
 |
UPC - 040293153236
View all Radio Shack 14-1128 manuals
Add to My Manuals
Save this manual to your list of manuals |
Page 8 highlights
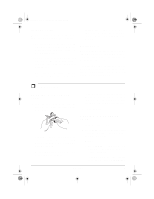
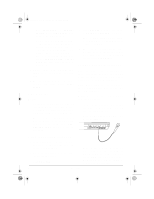
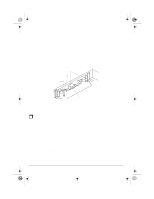
14-1128.fm Page 8 Thursday, April 6, 2000 3:24 PM At the beginning of a tape, press TAPE COUNTER to reset the tape counter to 000. Then note the counter's reading at the beginning of each selection. To return to a selection, fast-forward or rewind the tape until the counter shows the noted reading. TAPE TIPS Recommended Tapes Tape quality greatly affects the quality of the recording. We recommend extendedrange or low noise Type 1 regular length (60- or 90-minute) normal-bias cassette tapes. We do not recommend long-play cassette tapes such as C-120s because they are thin and can easily tangle. Restoring Tape Tension and Sound Quality After you play a cassette tape several times, the tape might become tightly wound on the reels. This can cause playback sound quality to deteriorate. To restore the sound quality, fastforward the tape from the beginning to the end of one side, then completely rewind it. Then loosen the tape reels by gently tapping each edge of the cassette on a flat surface. Caution: Be careful not to damage the cassette when tapping it. Do not touch the exposed tape or allow any sharp objects near the cassette. Erasing Tapes To record over a cassette tape, simply record as usual. The cassette deck records over the previous recording. You can quickly erase both sides of a cassette tape using a RadioShack bulk tape eraser. Note: If you use metal or high-bias type tape, the recorded sound might not be erased properly. Preventing Accidental Erasure Cassette tapes have two eraseprotection tabs - one for each side. When a tab is in place, you can record on that side. To prevent accidental erasure of a tape recording, use a screwdriver to remove one or both of the cassette tape's eraseprotection tabs. This prevents RECORD from being pressed. If you later decide to record on a tape side after you have removed the eraseprotection tab, place a piece of strong plastic tape over that side's eraseprotection hole. Be sure you cover only the hole originally covered by the eraseprotection tab. Caution: Removing the erase-protection tabs does not prevent a bulk eraser from erasing a cassette tape. 8 Operation
-
 1
1 -
2
-
 3
3 -
 4
4 -
 5
5 -
 6
6 -
 7
7 -
 8
8 -
 9
9 -
 10
10 -
 11
11 -
 12
12
 |
 |