Reebok Rtx455 Treadmill English Manual - Page 7
Right Foam Grip 75 is under the Console Base 82
 |
View all Reebok Rtx455 Treadmill manuals
Add to My Manuals
Save this manual to your list of manuals |
Page 7 highlights
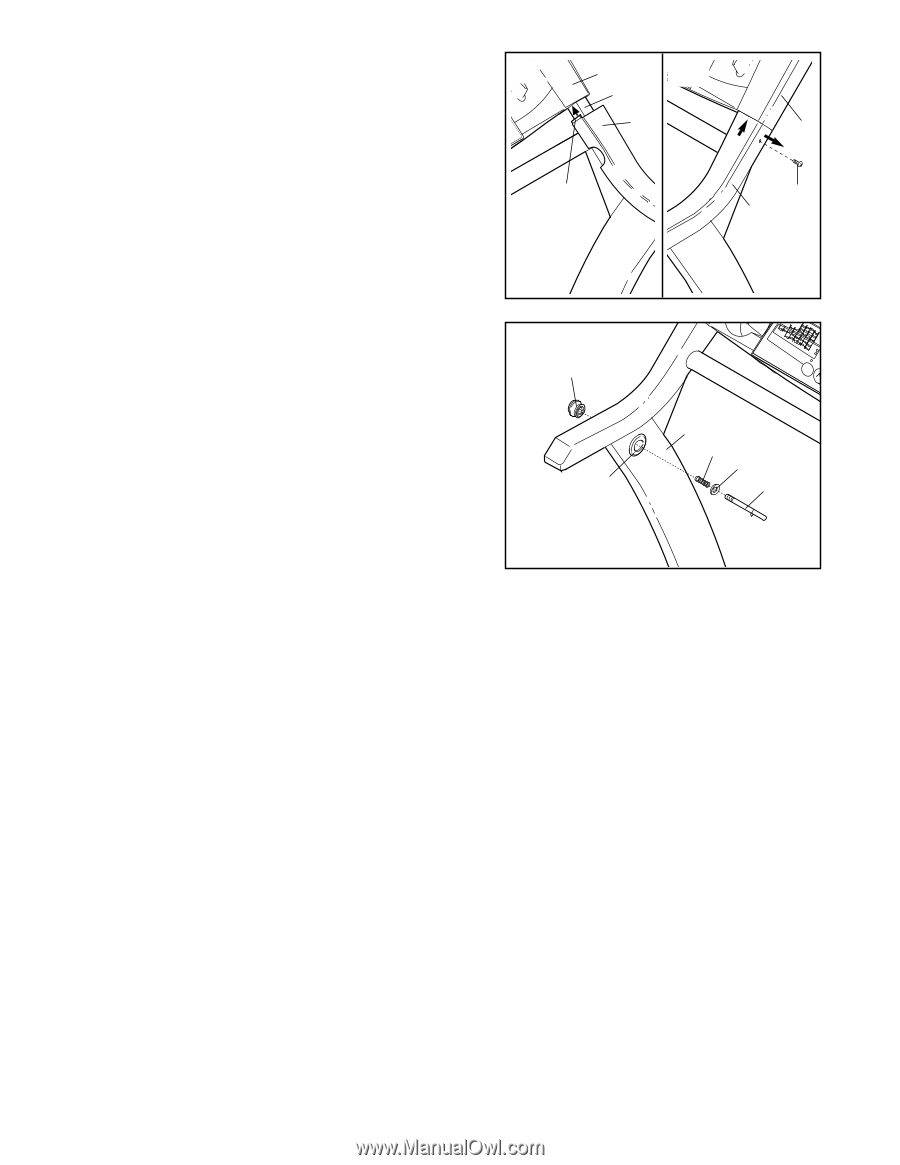
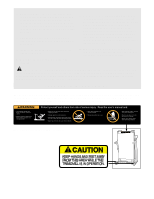
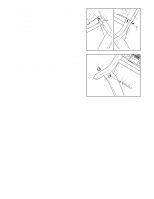
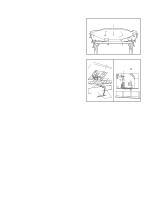
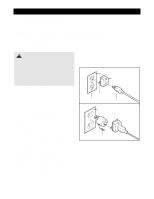
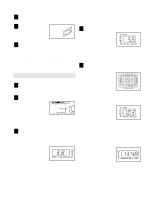
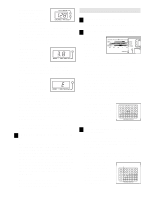
4. Refer to drawing 4a. Be sure the tab on the Right Foam Grip (75) is inserted in the slot between the post and Console Base (82). Refer to drawing 4b. Make sure that the front edge of the Right Foam Grip (75) is under the Console Base (82) as shown. Tighten a 3/4" Screws (100) into the side of the Right Foam Grip as shown. Note: It may be necessary to pull the Foam Grip out (see arrow A) to align the Screw with the hole in the post. Attach the other Handrail Extension and Left Foam Grip (not shown) as described in step 3 and this step. 4a 82 4b Post 75 Tab A 82 100 75 5. Press the Lock Knob Sleeve (70) into the left Upright (69). Make sure that the Lock Pin Collar (72) and the Spring (71) are on the Lock Pin (74). Insert the Lock Pin into the left Upright (69) and tighten the Lock Knob (68) onto the Lock Pin. 5 68 70 69 71 72 74 6. Make sure that all parts are properly tightened before you use the treadmill. Keep the included allen wrench in a secure place. The allen wrench is used to adjust the walking belt (see page 23). To protect the floor or carpet from damage, place a mat under the treadmill.
-
 1
1 -
 2
2 -
 3
3 -
 4
4 -
 5
5 -
 6
6 -
 7
7 -
 8
8 -
 9
9 -
 10
10 -
 11
11 -
 12
12 -
13
-
14
-
15
-
16
-
17
-
18
-
19
-
20
-
21
-
22
-
23
-
24
-
25
-
26
-
27
-
28
-
29
-
30
-
31
-
32
-
33
-
34
 |
 |