Rheem M5350ti Installation Instructions - Page 14
Troubleshooting, Maintenance - model
 |
View all Rheem M5350ti manuals
Add to My Manuals
Save this manual to your list of manuals |
Page 14 highlights
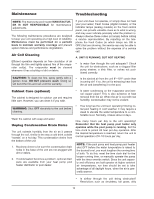
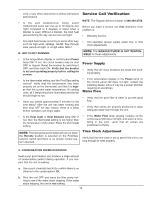
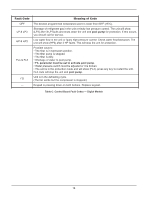
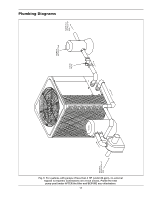
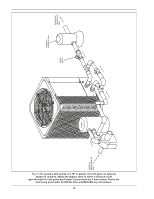
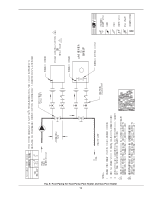
Maintenance Troubleshooting NOTE: The heat pump pool heater MANUFACTURER IS NOT RESPONSIBLE for maintenance adjustments. The following maintenance procedures are designed to keep your unit operating at a high level of reliability. Maintenance must be performed on a periodic basis to maintain warranty coverage and prevent system failures and performance degradation. Air Coil Cleaning Efficient operation depends on free circulation of air through the thin and tightly-spaced fins of the evaporator coil(s). The evaporator must be cleaned whenever it has a buildup of dirt or debris. If your unit does not operate, or simply does not heat your pool water, Fault Codes (digital models), or the indicator lamps (analog models) on the front control panel, can provide valuable clues as to what is wrong, and may even indicate precisely what the problem is. Always observe these codes (or lamps) before calling a service representative. By reporting on the telephone the Fault Codes (or which lamps are ON or OFF) that are showing, the service rep may be able to solve the problem without the expense of a service call. A. UNIT IS RUNNING, BUT NOT HEATING • Is water flow through the unit adequate? Check the unit for obstructions, such as a clogged filter pump strainer, a dirty filter, or valves not positioned correctly. CAUTION: To clean the fins, spray gently with a garden hose. DO NOT pressure wash. Doing so will bend the fins and can void the warranty. • Is the ejected air from the unit 8°-10°F cooler than incoming air? If so, the unit is extracting heat from the air and transferring it to the pool. Cabinet Care (optional) The cabinet is designed for outdoor use and requires little care. However, you can clean it if you wish. WARNING: Shut OFF electricity to the unit before cleaning. Wash the cabinet with soap and water. Unplug Condensation Drain Holes The unit extracts humidity from the air as it passes through the coil, similar to the way a cold drink outside "sweats" on a hot day. This condensation drains from the bottom of the unit. 1. Routinely check to be sure the condensation drain holes in the base of the unit are not plugged with dirt or debris. 2. If condensation becomes a problem, optional drain pans are available from your heat pump pool heater distributor or pool dealer. • Is water condensing on the evaporator and internal copper pipes? This is also evidence of heat removal from the air. When the air is cool with low humidity, condensation may not be evident. • How long has the unit been operating? During initial pool heating in cold weather, it may require a week to elevate the water temperature to a comfortable level. Normally, it takes about 4 days. How many hours per day is the unit operating? Remember that the heat pump pool heater only operates while the pool pump is running. Set the time clock to permit 24 hour per day operation. After the desired temperature is reached, return the unit to normal operation of 8-10 hours per day. NOTE: If the pool pump and heat pump pool heater shut OFF before the water temperature is raised to the desired level, you must lengthen the running time of both. To do this, reset the time clock dial for the longer running time, or manually operate the pump with the timer override switch. Since the unit capacity and efficiency are both greater at higher ambient air temperatures, run time should be set to take advantage of all daylight hours, when the air is generally warmer. • Is airflow through the unit being obstructed? Restrictions such as shrubbery, tall grass, dirty 14
-
 1
1 -
2
-
3
-
4
-
5
-
6
-
7
-
8
-
 9
9 -
 10
10 -
 11
11 -
 12
12 -
 13
13 -
 14
14 -
 15
15 -
 16
16 -
 17
17 -
 18
18 -
 19
19 -
20
-
21
-
22
-
23
-
24
-
25
-
26
-
27
-
28
 |
 |