Ricoh 3300DN User Guide - Page 97
TCP/IP printing, Bonjour printer, Printer & Fax
 |
UPC - 026649062032
View all Ricoh 3300DN manuals
Add to My Manuals
Save this manual to your list of manuals |
Page 97 highlights
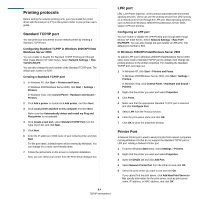
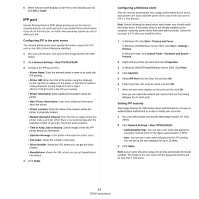
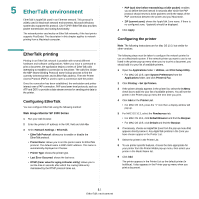
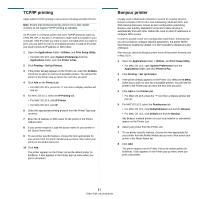
TCP/IP printing Apple added TCP/IP printing to all versions including and after OS 8.6. Note: Ensure that the Macintosh has version 8.6 or later. Earlier versions do not support TCP/IP printing as standard. An IP printer is a network printer that uses TCP/IP protocols (such as LPD/LPR, IPP, or Socket or Jet Direct) to make itself accessible to your computer. If the IP printer you want to use is not listed when you want to print, you can add it to your list of available printers. To add an IP printer, you need to know its IP address or DNS name. 1 Open the Applications folder > Utilities, and Print Setup Utility. • For MAC OS 10.5, open System Preferences from the Applications folder, and click Printer & Fax. 2 Click Printing > Set Up Printers. 3 If the printer already appears on the Printer List, select the In Menu check box to add it to your list of available printers. You will see the printer in the Printer pop-up menu the next time you print. 4 Click Add on the Printer List. • For MAC OS 10.5, press the "+" icon then a display window will pop up. 5 For MAC OS 10.3, select the IP Printing tab. • For MAC OS 10.4, click IP Printer. • For MAC OS 10.5, click IP. 6 Select the appropriate printing protocol from the Printer Type popup menu. 7 Enter the IP address or DNS name for the printer in the Printer Address field. 8 If your printer requires it, type the queue name for your printer in the Queue Name field. 9 To use printer-specific features, choose the item appropriate for your printer from the Printer Model pop-up menu, then select your printer in the Model Name list. 10 Click Add. The printer appears on the Printer List as the default printer (in boldface). It also appears in the Printer pop-up menu when you print a document. Bonjour printer Usually used in Macintosh networks to search for network devices, Bonjour consists of IPv4 Link-Local Addressing, Multicast DNS, and DNS Service Discovery. Known as zero configuration networking, Bonjour uses industry standard IP protocols to allow devices to automatically find each other without the need to enter IP addresses or configure DNS servers. In order to provide a true zero configuration experience, meaning that you do not need to configure network parameters, the printer MUST have Bonjour enabled by default. It is NOT possible to disable any part of Bonjour. After boot up, check the Bonjour printer name of this printer network card in Mac OS X. 1 Open the Applications folder > Utilities, and Print Setup Utility. • For MAC OS 10.5, open System Preferences from the Applications folder, and click Printer & Fax. 2 Click Printing > Set Up Printers. 3 If the printer already appears on the Printer List, select the In Menu check box to add it to your list of available printers. You will see the printer in the Printer pop-up menu the next time you print. 4 Click Add on the Printer List. • For MAC OS 10.5, press the "+" icon then a display window will pop up. 5 For MAC OS 10.3, select the Rendezvous tab. • For MAC OS 10.4, click Default Browser and find the Bonjour. • For MAC OS 10.5, click Default and find the Bonjour. Any Bonjour-enabled printers on your local network or subnetwork appear on the Printer List. 6 Select your printer from the Printer List. 7 To use printer-specific features, choose the item appropriate for your printer from the Printer Model pop-up menu, then select your printer in the Model Name list. 8 Click Add. The printer appears on the Printer List as the default printer (in boldface). It also appears in the Printer pop-up menu when you print a document. 5.2 EtherTalk environment
-
 1
1 -
2
-
3
-
4
-
5
-
6
-
7
-
8
-
9
-
10
-
11
-
12
-
13
-
14
-
15
-
16
-
17
-
18
-
19
-
20
-
21
-
22
-
23
-
24
-
25
-
26
-
27
-
28
-
29
-
30
-
31
-
32
-
33
-
34
-
35
-
36
-
37
-
38
-
39
-
40
-
41
-
42
-
43
-
44
-
45
-
46
-
47
-
48
-
49
-
50
-
51
-
52
-
53
-
54
-
55
-
56
-
57
-
58
-
59
-
60
-
61
-
62
-
63
-
64
-
65
-
66
-
67
-
68
-
69
-
70
-
71
-
72
-
73
-
74
-
75
-
76
-
77
-
78
-
79
-
80
-
81
-
82
-
83
-
84
-
85
-
86
-
87
-
88
-
89
-
90
-
91
-
 92
92 -
 93
93 -
 94
94 -
 95
95 -
 96
96 -
 97
97 -
 98
98 -
 99
99 -
 100
100 -
 101
101
 |
 |
