Rocketfish RF-HD3025 Quick Setup Guide (English) - Page 1
Rocketfish RF-HD3025 Manual
 |
View all Rocketfish RF-HD3025 manuals
Add to My Manuals
Save this manual to your list of manuals |
Page 1 highlights
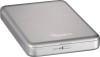
RF-HD3025_10-1086_QSG_V1.eps 1 11/3/2010 1:17:09 PM V1 FINAL FOR PRINT USB 3.0 2.5" SATA Hard Disk Drive Enclosure Boîtier pour disque dur SATA 2,5 po USB 3.0 Caja para disco duro SATA DE 2.5" USB 3.0 Package contents • USB 3.0 2.5" SATA hard drive enclosure • USB 3.0 Y cable (A to Micro-B) • Utility CD that contains Roxio BackOnTrack backup software and User Guide • Carrying pouch • Screws (4) • Screwdriver • Quick Setup Guide System requirements • One formatted 2.5" SATA hard drive • At least one USB 3.0 port (You can connect to a USB 2.0 port, but it will only run at USB 2.0 speeds). • Windows® 7, Windows Vista®, Windows® XP, or Mac OS X version 10.4 or higher. Installing your hard drive in the enclosure 1 Slide the lock switch to the left to open the enclosure. 2 Remove the four screws from the printed circuit board, then remove the printed circuit board. 3 Connect the hard drive to the SATA connector on the printed circuit board. SATA connector 4 Secure the hard drive to the printed circuit board with the screws (4) provided. 5 Place the printed circuit board/hard drive assembly into the enclosure with the hard drive face down, then secure it into the enclosure with the screws (4) you previously removed. RF-HD3025 QUICK SETUP GUIDE • GUIDE D'INSTALLATION RAPIDE • GUÍA DE INSTALACIÓN RÁPIDA 6 Replace the top cover and slide the lock switch to the right to lock the enclosure. Connecting the enclosure to a computer Notes: • Make sure that you have already installed a hard drive into the enclosure before you connect your enclosure to your computer. • For optimal performance, make sure that your laptop or PC has USB 3.0 ports. 1 Plug the smaller USB 3.0 (Micro B type) connector into the USB port on enclosure, then plug the other end of the cable into USB ports on your computer. For additional power, connect the extra USB connector to the computer, especially for large capacity hard drives. The operating system automatically detects and sets up the new drive. The enclosure/hard drive turns on and the LED on the BACKUP button turns on. USB 3.0 A type connector Extra USB power connector USB 3.0 Micro B connector 2 If the drive is new and is not formatted, follow the steps below to format the drive. Otherwise, continue to"Installing the backup software". For Macintosh users: 1 Start the Disk Utility tool (under Applications) 2 Select the new hard drive you are trying to install. 3 Click the Erase tab. 4 Choose a volume format and assign a name to the new drive, then click Erase. For Windows users: 1 Click Start, then Control Panel. 2 Click Performance and Maintenance (in Windows 7 click System and Security), then Administrative Tools. 3 Click Computer Management, then click Disk Management from the menu on the left side of the screen. 4 Click on the new drive, then click on the Action tab at the top of the screen. 5 Go to All Tasks, then click on Format from the menu. 6 Select the file system and other choices you want, then click OK. Installing the backup software Notes: • The Roxio BackOnTrack software only runs on Windows 7, Windows Vista, or Windows XP, computers. • Connect the hard drive enclosure to your computer before installing the software. • Before installing the backup software, make sure that your Windows operating system has been updated to the latest service pack. 1 Save all files and close all programs. 2 Insert the included CD into the computer. The introductory screen appears automatically. If the screen does not appear, double-click the Run.exe file on the CD. 3 Click Install Backup Software. The Welcome screen opens. 4 Click Next. The Roxio End-User License Agreement screen opens. 5 Read the license agreement, then click NEXT to agree. The Choose Setup Type screen opens. 6 Choose the setup type, then click Install to start installation. It may take several minutes to install the software. 7 When installation is complete, the Setup Wizard Completed screen opens. 8 Click Finish to complete the installation. 9 See the User Guide located on the CD for information on using the software. Using one-touch backup To use one-touch backup if you have set up a backup project: • Press the One-Touch button on the back of the HDD enclosure. The backup process begins. To use one-touch backup if you have NOT set up a backup project: 1 Press the One-Touch button on the HDD enclosure. The Roxio BackOnTrack software opens with the Backup Files page displayed. 2 Follow the on-screen instructions to set up a backup project. 3 After a backup project is set up, push the One-Touch button to backup your data. 4 To modify One-Touch backups in the future, follow the instructions for setting up backup projects. Disconnecting the enclosure from your computer For Windows users: 1 Right-click the Safely Remove Hardware icon (located near the clock on the taskbar). 2 Select the device you want to unplug, then click STOP. 3 When Windows notifies you that it is safe to do so, unplug the enclosure from your computer. For Macintosh users: 1 Drag the USB icon into the TRASH. 2 Unplug the enclosure. FCC statement This device complies with part 15 of the FCC Rules. Operation is subject to the following two conditions: (1) This device may not cause harmful interference, and (2) this device must accept any interference received, including interference that may cause undesired operation. ICES-003 This Class B digital apparatus complies with Canadian ICES-003. Cet appareil numérique de la classe B est conforme à la norme NMB-003 du Canada. One-year limited warranty Visit www.rocketfishproducts.com for details. Contact Rocketfish: For customer service please call 1-800-620-2790 www.rocketfishproducts.com Distributed by Best Buy Purchasing, LLC 7601 Penn Avenue South, Richfi eld, Minnesota, U.S.A. 55423-3645 © 2010 BBY Solutions, Inc. All rights reserved. ROCKETFISH is a trademark of BBY Solutions, Inc. Registered in some countries. All other products and brand names are trademarks of their respective owners. Contenu de l'emballage • Boîtier pour disque dur SATA 2,5 po USB 3.0 • Câble USB 3.0 en Y (A à micro B) • CD d'utilitaires avec l'application de sauvegarde Roxio BackOnTrack et le Guide de l'utilisateur • Étui de transport • Vis (4) • Tournevis • Guide d'installation rapide Configuration système requise • Un disque dur SATA 2,5 po formaté • Au moins un port USB 3.0 (le boîtier peut être connecté à un port USB 2.0, mais il ne fonctionnera qu'à des débits USB 2.0). • WindowsMD 7, Windows VistaMD, WindowsMD XP ou Mac OS 10.4 ou supérieur Installation du disque dur dans le boîtier 1 Faire glisser le bouton de verrouillage vers la gauche pour ouvrir le boîtier. 2 Retirer les quatre vis du circuit imprimé et l'extraire du boîtier. 3 Connecter le disque dur au connecteur SATA du circuit imprimé. Connecteur SATA 4 Fixer le disque dur sur le circuit imprimé avec les quatre vis fournies. 5 Placer l'ensemble circuit imprimé/disque dur dans le boîtier avec le disque dur tourné vers le bas, puis le fixer au boîtier avec les quatre vis retirées précédemment. 6 Replacer le couvercle du dessus et faire glisser le bouton de verrouillage vers la droite pour verrouiller le boîtier. Connexion du boîtier à l'ordinateur Remarques : • Vérifier que le disque dur a bien été installé dans le boîtier avant de connecter celui-ci à l'ordinateur. • Pour une performance optimale, vérifier que l'ordinateur portatif ou le PC dispose de ports USB 3.0. 1 Brancher le plus petit connecteur USB 3.0 (type micro B) sur le port USB du boîtier, puis l'autre extrémité du câble sur les ports USB de l'ordinateur. Pour une alimentation complémentaire, brancher le connecteur USB supplémentaire sur l'ordinateur, surtout pour les disques durs de
-
 1
1 -
 2
2
 |
 |
