Rocketfish RF-RBWS02 Quick Setup Guide (English) - Page 1
Rocketfish RF-RBWS02 Manual
 |
View all Rocketfish RF-RBWS02 manuals
Add to My Manuals
Save this manual to your list of manuals |
Page 1 highlights
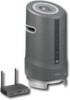
RF-RBWS02 Wireless Outdoor Speaker Package contents Sender/Receiver AC power adapter for sender/receiver 3.5 mm audio cable AC power adapter for wireless speaker Wireless speaker Remote control 3.5 mm to RCA adapter (6 inches/15.25 cm) User Guide Quick Setup Guide Initial setup 1 Unpack the package contents 2 Adjust the antennas For best results, raise the antennas of the sender/receiver to the vertical position. Tip: In some cases, you may improve range by rotating both antennas 45° to create a 90° angle similar to a wide "V". 3 Enable the remote control battery Remove the tab from the bottom of the remote control. Installing batteries in the wireless speaker (skip this if you are not using batteries) 1 Unscrew the bottom cover (three screws). 2 Insert eight alkaline or rechargeable NiMH C batteries matching the +/- symbols as indicated. Note: This product will only recharge NiMH batteries. Do not try to charge any other batteries such as NiCad batteries in this product. 3 Replace the cover and fasten the three screws. 4 Turn on the wireless speaker using the power switch on the top panel. Wireless speaker Eight alkaline or rechargeable NiMH C batteries (not included) × 8 QUICK SETUP GUIDE Connecting the DC adapter to the wireless speaker (if you are not using batteries, or if you want to charge the batteries) 1 Connect the AC power adapter to the wireless speaker and plug into an AC power outlet. 2 Turn on the wireless speaker using the power switch on the top panel. Note: If you are using NiMH rechargeable batteries, your batteries will recharge whenever the speaker is connected BASS 15V DC to a power outlet with the DC adapter. If batteries are not fully charged, you should charge them for 16 hours before using the wireless speaker. 15V DC Connecting audio source and power to sender/receiver 1 Connect one end of the audio cable (supplied) to the AUDIO IN jack on the sender/receiver and the other end to the audio output jack of your device (such as an A/V receiver, PC, or iPod). Included OR 3.5 mm cable Included 3.5 mm cable and 3.5 mm to RCA adatper To audio output jack To audio output jack 2 Remember to turn the volume up on the source device to at least 80% of its maximum volume if connected to a headphone output. 3 Connect the AC power adapter to the sender/receiver and plug into an AC power outlet. The sender/receiver automatically turns on and the power indicator turns green. Establishing communication The sender/receiver and wireless speaker were pre-joined so they will communicate with each other right out of the box. So if this is your first Rocketboost enabled product you can skip this step and go to the next section, Listening to music step. If you need to rejoin the sender/receiver to the wireless speaker, and this is your only Rocketboost enabled product, then use the following steps. 1 Set the HUB STATUS switch on the sender/receiver to ENABLE if this is your first Rocketboost product set. • The power indicator turns green when the HUB STATUS switch is set to ENABLE. • The power indicator turns blue when the HUB STATUS switch is set to DISABLE. 2 Press and hold on the sender/receiver for more than three seconds to put it into joining mode. The power indicator starts blinking rapidly and the unit will stay in joining mode for 30 seconds. 3 Press and hold the power/join button on the wireless speaker for more than three seconds so the sender/receiver and wireless speaker enter connection mode. • The power indicator lights steadily if the joining was successful. • The power indicator blinks slowly if the joining was not successful. 4 After the link is established, if the Source indicator on the wireless speaker is still not illuminated, make sure that your source is turned on. For more instructions, see your User Guide. If you already have other Rocketboost devices you need to join both the sender/receiver and the wireless speaker Lights when speaker is receiving audio from sender to your existing hub device. See the User Guide for detailed instructions on how to do this. Listening to music 1 Turn on the wireless sender/receiver and wireless speaker. The power indicator LEDs should light steadily. If they are blinking you need to rejoin the sender/receiver and wireless speaker. See the Establishing communication step above. 2 Play music from the audio device connected to your sender/receiver and listen to it from the wireless speaker. 3 Adjust the volume level on your wireless speaker. If you have multiple audio sources in your Rocketboost network, press the Source button on the wireless speaker to hear the next audio source. Press the Source button again to cycle through all available audio sources. Rocketboost network notes: Every Rocketboost network must contain one hub device, which helps devices join the network. The network can have only one hub, which you can enable using the hub switch on the back of all Rocketboost senders and sender/receivers. If this is your first Rocketboost product, you should make this device the hub, if you already have Rocketboost products, you should disable hub mode on this device. Important: Hub devices must always have power for your network to operate. The hub device can be in standby (powersaving) mode, but must stay plugged in. © 2010 BBY Solutions, Inc., All Rights Reserved. Distributed by Best Buy Purchasing, LLC, 7601 Penn Avenue South, Richfield, MN USA 55423-3645 ENGLISH 10-0969
-
 1
1
 |
 |
