Ryobi AG403G User Manual 2 - Page 1
Ryobi AG403G Manual
 |
View all Ryobi AG403G manuals
Add to My Manuals
Save this manual to your list of manuals |
Page 1 highlights
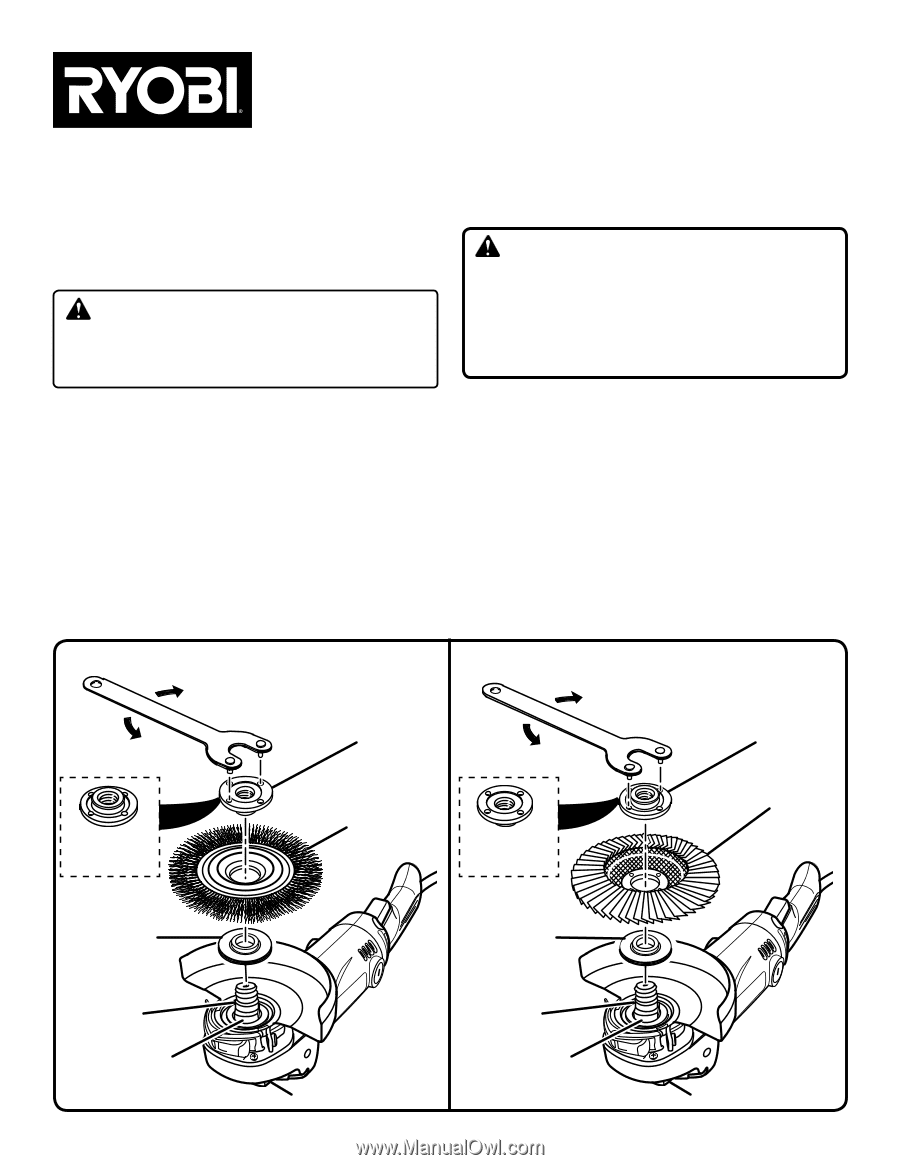
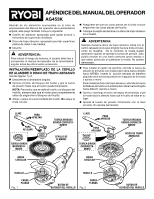
OPERATOR'S MANUAL addendum AG453K In addition to the items listed in the Packing List of the Angle Grinder Operator's Manual, this kit also includes: n Wire Wheel Brush: Suitable for removing paint or rust from metal surfaces n Abrasive Mop Disc: Suitable for sanding flat metal or wood surfaces n Case WARNING: To reduce the risk of injury, user must read and understand the operator's manual for the angle grinder before using these accessories. INSTALLING/replacing wire wheel or abrasive mop disc See Figures 1 - 2. Unplug the angle grinder. Depress and hold the spindle lock button and rotate nut with provided wrench until spindle locks. NOTE: To prevent damage to the spindle or spindle lock, always allow motor to come to a complete stop before engaging spindle lock. Loosen and remove flange nut from spindle. Do not remove disc flange. Make sure flats on the bottom of disc flange are engaged with flats on spindle. Place the wire wheel or abrasive mop disc over the spindle. WARNING: Always install abrasive mop disc with the depressed center against the disc flange as shown. Failure to do so will cause the disc to crack when tightening the nut. This could result in serious personal injury because of loose particles breaking off and being thrown from the angle grinder. Do not overtighten. If installing wire wheel brush, thread the nut on the spindle with the flat side of flange nut facing UP. Fit raised, small diameter portion of the nut into the hole in the wheel and finger tighten. If installing abrasive mop disc, thread the flange nut on the spindle with the flat side of nut facing DOWN. Finger tighten. Depress and hold the spindle lock button and rotate the wheel clockwise until the spindle locks in position. Securely tighten the flange nut with the wrench provided. Do not overtighten. Wrench to tighten to loosen NuT TURNED INCORRECTLY flange NuT TURNED CORRECTLY WIRE Wheel BRUSH Wrench to tighten to loosen NuT TURNED INCORRECTLY flange NuT TURNED CORRECTLY ABRASIVE MOP DISC Disc Flange Disc Flange Spindle Flat(s) Fig. 1 Spindle Lock Spindle Flat(s) Fig. 2 Spindle Lock
-
 1
1 -
 2
2 -
 3
3 -
 4
4
 |
 |