Ryobi D42K English Manual - Page 11
Removing Bits, Warning
 |
View all Ryobi D42K manuals
Add to My Manuals
Save this manual to your list of manuals |
Page 11 highlights
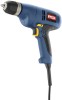
OPERATION REMOVING BITS See Figure 3. Unplug the drill. Rotate the chuck sleeve clockwise to open the chuck jaws. Note: Rotate the chuck body in the direction of the arrow marked UNLOCK to loosen the chuck jaws. Do not use a wrench to tighten or loosen the chuck jaws. Remove the drill bit. lock-on button See Figure 5. This drill is equipped with a lock-on feature, which is convenient for continuous drilling for extended periods of time. To lock-on: Depress the switch trigger. Push in and hold the lock-on button, located on the side of the handle. Release the switch trigger. Release the lock-on button and the drill will continue running. To release the lock, depress and release the switch trig- ger. If the lock-on feature is engaged during use and the drill becomes disconnected from the power supply, disengage the lock-on feature immediately. WARNING: Before connecting the drill to a power supply source, always check to be sure it is not in lock-on position (depress and release the switch trigger). Failure to ensure that it is not locked-on could result in accidental starting of the drill resulting in possible serious injury. Do not lock the switch trigger in applications where the drill may need to be suddenly stopped. UNLOCK (RELEASE) DRILL BIT CHUCK BODY CHUCK JAWS LOCK (TIGHTEN) RIGHT CHUCK COLLAR Fig. 3 WRONG Fig. 4 11 − English LOCK-ON BUTTON Fig. 5
-
 1
1 -
2
-
3
-
4
-
5
-
 6
6 -
 7
7 -
 8
8 -
 9
9 -
 10
10 -
 11
11 -
 12
12 -
 13
13 -
 14
14 -
 15
15 -
 16
16
 |
 |
