Ryobi HJP002 Operation Manual - Page 8
Warning, Mag Tray, Screw Holder, Installing Bits, Removing Bits, Adjustable Torque Clutch, Drilling - parts
 |
View all Ryobi HJP002 manuals
Add to My Manuals
Save this manual to your list of manuals |
Page 8 highlights
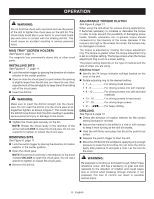
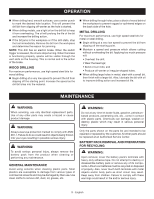
OPERATION WARNING: Do not hold the chuck with one hand and use the power of the drill to tighten the chuck jaws on the drill bit. The chuck body could slip in your hand, or your hand could slip and come in contact with the rotating drill bit. This could cause an accident resulting in serious personal injury. MAG TRAY™ (SCREW HOLDER) See Figure 5, page 11. The magnetic tray conveniently stores bits or other small parts. INSTALLING BITS See Figures 6 - 7, page 11. Lock the switch trigger by placing the direction of rotation selector in the center position. Open or close the chuck jaws to a point where the opening is slightly larger than the bit size you intend to use. Also, raise the front of the drill slightly to keep the bit from falling out of the chuck jaws. Insert the drill bit. WARNING: Make sure to insert the drill bit straight into the chuck jaws. Do not insert the drill bit into the chuck jaws at an angle then tighten, as shown in figure 7. This could cause the drill bit to be thrown from the drill, resulting in possible serious personal injury or damage to the chuck. Tighten the chuck jaws securely on the bit. Note: Rotate the chuck body in the direction of the arrow marked LOCK to close the chuck jaws. Do not use a wrench to tighten or loosen the chuck jaws. removing BITS See Figure 6, page 11. Lock the switch trigger by placing the direction of rotation selector in the center position. Open the chuck jaws. Note: Rotate the chuck body in the direction of the arrow marked UNLOCK to open the chuck jaws. Do not use a wrench to tighten or loosen the chuck jaws. Remove the drill bit. ADJUSTABLE TORQUE CLUTCH See Figure 8, page 11. When using the drill-driver for various driving applications, it becomes necessary to increase or decrease the torque in order to help prevent the possibility of damaging screw heads, threads, workpiece, etc. In general, torque should correspond to the intensity of the screw diameter. If the torque is too high or the screws too small, the screws may be damaged or broken. The torque is adjusted by rotating the torque adjustment ring. The torque is greater when the torque adjustment ring is set on a higher setting. The torque is less when the torque adjustment ring is set on a lower setting. The proper setting depends on the type of material and the size of screw you are using. Adjusting torque: Identify the 24 torque indicator settings located on the front of the drill. Rotate adjusting ring to the desired setting. • 1 - 4 For driving small screws • 5 - 8 For driving screws into soft material • 9 - 12 For driving screws into soft and hard materials • 13 - 16 For driving screws in hard wood • 17 - 20 For driving large screws • 21 For heavy drilling DRILLING See Figure 9, page 12. Check the direction of rotation selector for the correct setting (forward or reverse). Secure the material to be drilled in a vise or with clamps to keep it from turning as the drill bit rotates. Hold the drill firmly and place the bit at the point to be drilled. Depress the switch trigger to start the drill. Move the drill bit into the workpiece, applying only enough pressure to keep the bit cutting. Do not force the drill or apply side pressure to elongate a hole. Let the tool do the work. WARNING: Be prepared for binding at bit breakthrough. When these situations occur, drill has a tendency to grab and kick opposite to the direction of rotation and could cause loss of control when breaking through material. If not prepared, this loss of control can result in possible serious injury. 8 - English
-
 1
1 -
2
-
 3
3 -
 4
4 -
 5
5 -
 6
6 -
 7
7 -
 8
8 -
 9
9 -
 10
10 -
 11
11 -
 12
12 -
 13
13 -
14
-
15
-
16
-
17
-
18
-
19
-
20
-
21
-
22
-
23
-
24
-
25
-
26
-
27
-
28
-
29
-
30
-
31
-
32
 |
 |