Ryobi P1812 User Manual - Page 6
Operation
 |
View all Ryobi P1812 manuals
Add to My Manuals
Save this manual to your list of manuals |
Page 6 highlights
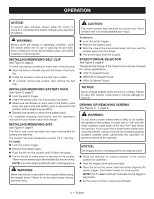
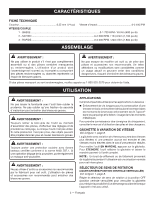
OPERATION NOTICE: To prevent gear damage, always allow the chuck to come to a complete stop before changing the direction of rotation. WARNING: Battery tools are always in operating condition. Lock the switch when not in use or carrying at your side, when installing or removing the battery pack, and when installing or removing bits. INSTALLING/REMOVING BELT CLIP See Figure 2, page 8. The belt clip may be installed on either side of the housing. Align the holes in the belt clip with the holes in the hous- ing. Install the screws to secure the belt clip in place. To uninstall, remove the screws, then remove the belt clip. INSTALLING/REMOVING BATTERY PACK See Figure 3, page 8. Lock the switch trigger. Insert the battery pack into the product as shown. Make sure the latches on each side of the battery pack snap into place and that battery pack is secured in the product before beginning operation. Depress the latches to remove the battery pack. For complete charging instructions, see the operator's manuals for your battery pack and charger. INSTALLING/REMOVING BITS See Figure 4, page 9. The Auto-Load chuck provides fast, easy one-handed bit loading and ejecting. The coupler has been designed to accept 1/4 in. hex bits. To install: Lock the switch trigger. Remove the battery pack. Push the bit into the coupler until it clicks into place. Pull on the bit to make sure it is secured in the coupler. There may be some play in the installed bit; this is normal. NOTE: Use only impact quality bits with a locking groove. WARNING: Make sure the bit is secured in the coupler before using the impact driver. Failure to do so could cause serious personal injury. CAUTION: The metal surface may become hot during use. Avoid contact with it to avoid possible burn injury. To remove: Lock the switch trigger. Remove the battery pack. With the nose of the tool pointed away from you, pull the coupler away from the driver. The bit will eject from the coupler. SPEED/TORQUE SELECTOR See Figure 5, page 9. The speed and torque of the impact driver can be changed for various applications. LOW (1) Speed/Torque MEDIUM (2) Speed/Torque HIGH (3) Speed/Torque NOTICE: Never change speeds while the tool is running. Failure to obey this caution could result in serious damage to the tool. DRIVING OR REMOVING SCREWS See Figures 6 - 7, page 9. WARNING: Do not drive a screw where there is likely to be hidden wiring behind the surface. Contact with a "live" wire will make exposed metal parts of the tool "live" and shock the operator. If you must drive a screw where hidden wire could be present, always hold tool by insulated gripping surfaces (handle) when performing the operation to prevent a shock to the operator. NOTICE: The impact driver is not designed to be used as a drill. Place the direction of rotation selector in the correct position for operation. Hold the impact driver with one hand. Place the bit on the screw head and slowly depress the switch trigger. Start the bit slowly for more control. NOTE: The Tri-Beam LED will illuminate as the trigger is depressed. As the screw is driven, impacting will begin. 6 - English
-
 1
1 -
 2
2 -
 3
3 -
 4
4 -
 5
5 -
 6
6 -
 7
7 -
 8
8 -
 9
9 -
 10
10 -
 11
11 -
 12
12 -
13
-
14
-
15
-
16
-
17
-
18
-
19
-
20
-
21
-
22
-
23
-
24
 |
 |