Ryobi P440 Operation Manual 2
Ryobi P440 Manual
 |
View all Ryobi P440 manuals
Add to My Manuals
Save this manual to your list of manuals |
Ryobi P440 manual content summary:
- Ryobi P440 | Operation Manual 2 - Page 1
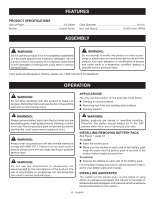
P440/P440VN TABLE OF CONTENTS General Power Tool Safety Warnings 2-3 Sander Safety Warnings 4 Symbols 5 Features 6 Assembly 6 Operation 6-8 Maintenance 9 Accessories 9 Illustrations 10-11 Parts Ordering / Service understand the operator's manual before using this - Ryobi P440 | Operation Manual 2 - Page 2
injury. Save all warnings and instructions for future reference. The term . A wrench or a key left attached to a rotating part of the power tool may result in personal injury. air vents. Do not use on a ladder or unstable support. Stable footing on a solid surface enables better control of the - Ryobi P440 | Operation Manual 2 - Page 3
. A charger that is suitable for one type of battery pack may create a service providers. When servicing a power tool, use only identical replacement parts. Follow instructions in the Maintenance section of this manual. Use of unauthorized parts or failure to follow Maintenance instructions - Ryobi P440 | Operation Manual 2 - Page 4
metal parts of the power tool "live" and could give the operator an electric shock. Know your power tool. Read operator's manual carefully. the risk of serious personal injury. Save these instructions. Refer to them frequently and use them to instruct others who may use this tool. If you loan - Ryobi P440 | Operation Manual 2 - Page 5
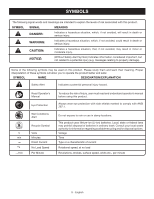
Conditions Alert Recycle Symbol Volts Minutes Direct Current No Load Speed Per Minute To reduce the risk of injury, user must read and understand operator's manual before using this product. Always wear eye protection with side shields marked to comply with ANSI Z87.1. Do not expose to rain or use - Ryobi P440 | Operation Manual 2 - Page 6
condition leading to possible serious personal injury. If any parts are damaged or missing, please call 1-800-525- instructions, see the operator's manuals for your battery pack and charger. INSTALLING SANDPAPER The cushion on the sander gives you the option of using either non-adhesive sandpaper - Ryobi P440 | Operation Manual 2 - Page 7
grit and finer grit used for finishing of the surface. Always continue sanding with each grit until surface is uniform. NOTE: DO NOT use sander without sandpaper. Doing so will damage the cushion. SANDING See Figures 4 - 5, page 11. Clamp or otherwise secure the work to prevent it from moving under - Ryobi P440 | Operation Manual 2 - Page 8
get caught in moving parts causing serious injury. Keep head away from sander and sanding area. Hair could be drawn into sander causing serious injury. USING THE DUST BAG The dust bag provides a dust collection system for the sander. Dust is drawn up through holes in the sandpaper and cushion and - Ryobi P440 | Operation Manual 2 - Page 9
MAINTENANCE WARNING: When servicing, use only identical replacement parts. Use of any other parts may create a hazard or cause product damage. GENERAL MAINTENANCE Avoid using solvents when cleaning plastic parts. Most plastics are susceptible to damage from various types of commercial solvents and - Ryobi P440 | Operation Manual 2 - Page 10
ci-dessous peut entraîner un choc électrique, un incendie et/ou des blessures graves. Conserver les avertissements et les instructions à des fins de référence ultérieure. Le terme « outil motorisé », utilisé dans tous les avertissements ci-dessous désigne tout outil fonctionnant sur secteur - Ryobi P440 | Operation Manual 2 - Page 11
Ne pas utiliser l'outil sur une échelle ou un support instable. Une bonne tenue et un bon équilibre service autorisés doivent effectuer la réparation ou l'entretien des blocspiles. Utiliser exclusivement des pièces identiques à celles d'origine pour les réparations. Se conformer aux instructions - Ryobi P440 | Operation Manual 2 - Page 12
moins 10 minutes, puis contacter immédiatement un médecin. Le respect de cette règle réduira les risques de blessures graves. Conserver ces instructions. Les consulter fréquemment et les utiliser pour instruire les autres utilisateurs éventuels. Si cet outil est prêté, il doit être accompagné de - Ryobi P440 | Operation Manual 2 - Page 13
SYMBOLES Les termes de mise en garde suivants et leur signification ont pour but d'expliquer le degré de risques associé à l'utilisation de ce produit. SYMBOLE SIGNAL SIGNIFICATION DANGER : Indique une situation dangereuse qui, si elle n'est pas évitée, aura pour conséquences des blessures - Ryobi P440 | Operation Manual 2 - Page 14
CARACTÉRISTIQUES FICHE TECHNIQUE Taille de papier de verre 1/4 de feuille Mouvement Orbital Diamètre de l'orbite 1,6 mm (1/16 po) Vitesse à vide 12 000 r/min (RPM) ASSEMBLAGE AVERTISSEMENT : Ne pas utiliser le produit s'il n'est pas complètement assemblé ou si des pièces semblent manquantes - Ryobi P440 | Operation Manual 2 - Page 15
UTILISATION INSTALLATION DE PAPIER DE VERRE NON ADHÉSIF Voir la figure 2, page 10. Retirer le bloc-pile. Inspecter le papier de verre avant de le mettre en place; ne pas l'utiliser s'il est déchiré ou défectueux. Si le papier de verre doit être remplacé, retirer la feuille usée. Pour retirer - Ryobi P440 | Operation Manual 2 - Page 16
UTILISATION AVIS : Pour éviter d'endommager le moteur par surchauffe, veiller à ne pas laisser la main couvrir les ouïes d'aération. Tenir la ponceuse devant soi, loin du corps, sans la laisser toucher la pièce à poncer. Mettre la ponceuse en « MARCHE » à l'aide du commutateur et laisser le - Ryobi P440 | Operation Manual 2 - Page 17
UTILISATION BRANCHEMENT DE LA PONCEUSE SUR UN ASPIRATEUR (ADAPTATEUR NON INCLUSE) Voir la figure 9, page 11. Le sac à sciure peut être retiré et remplacé par un tuyau d'aspiration de 1 1/4 po. Retirer le bloc-pile. Retirer le sac à poussière. Installer l'adaptateur « non incluse» d' - Ryobi P440 | Operation Manual 2 - Page 18
ADVERTENCIAS DE SEGURIDAD PARA HERRAMIENTAS ELÉCTRICAS ADVERTENCIA: exterior. Usando un cordón adecuado para el exterior se disminuye el riesgo de descargas eléctricas. Consulte todas las advertencias de seguridad, ilustraciones y especificaciones suministradas con esta herramienta eléctrica. No - Ryobi P440 | Operation Manual 2 - Page 19
a una herramienta eléctrica, sólo utilice piezas de repuesto idénticas. Siga las instrucciones señaladas en la sección Mantenimiento de este manual. El empleo de piezas no autorizadas o el incumplimiento de las instrucciones de mantenimiento puede significar un riesgo de descarga eléctrica o de - Ryobi P440 | Operation Manual 2 - Page 20
metálicas expuestas de la herramienta y da una descarga eléctrica al operador. Familiarícese con su herramienta eléctrica. Lea cuidadosamente el manual del operador. Aprenda sus usos y limitaciones, así como los posibles peligros específicos de esta herramienta eléctrica. Con el cumplimiento de - Ryobi P440 | Operation Manual 2 - Page 21
Alerta de seguridad Indica un peligro posible de lesiones personales. V min no .../min Lea el manual del operador Para reducir el riesgo de lesiones, el usuario debe leer y comprender el manual del operador antes de usar este producto. Protección ocular Siempre póngase protección ocular con - Ryobi P440 | Operation Manual 2 - Page 22
retire el paquete de baterías de la herramienta cuando esté ensamblando partes, realizando ajustes, limpiando o cuando ésta no esté en uso paquete de baterías. Para obtener instrucciones específicas de carga, lea el manual del operador que se incluye con el cargador y la batería. COLOCACIÓN DEL - Ryobi P440 | Operation Manual 2 - Page 23
es aproximadamente 6,4 mm (1/4 pulg.) más pequeño que las hojas precortadas de papel de lija adhesivo. Si lo desea, puede recortar la parte saliente del papel de lija por la parte de atrás del cojín. El cojín es más pequeño para permitir colocar varias hojas de papel de lija no adhesivo. correcta - Ryobi P440 | Operation Manual 2 - Page 24
durante el lijado de capas de acabado como poliuretano, aceite de linaza, etc., puede inflamarse por sí solo en el saco captapolvo o en otra parte, y puede causar un incendio. Para reducir el riesgo de incendio siempre vacíe con frecuencia el saco captapolvo (cada 10 ó 15 minutos) mientras est - Ryobi P440 | Operation Manual 2 - Page 25
FUNCIONAMIENTO CONEXIÓN DE LA LIJADORA A UNA ASPIRADORA (ADAPTADOR NO INCLUIDA) Vea la figura 9, page 11. El saco captapolvo puede desmontarse para fijar una manguera de aspiradora de 1-1/4 pulg. en la abertura de salida de aserrín. Retire el paquete de baterías. Retire el saco captapolvo. - Ryobi P440 | Operation Manual 2 - Page 26
P440/P440VN I J B D H G F E A - Dust bag (sac à poussière, saco captapolvo) B - Lever (levier, palanca) C - Paper B - Lever (levier, palanca) C - Non-adhesive sandpaper (papier de verre non adhésif, papel de lija no adhesivo) D - Adhesive sandpaper (papier de verre adhésif, papel de lija adhesivo) - Ryobi P440 | Operation Manual 2 - Page 27
Fig. 4 Fig. 5 Fig. 6 Fig. 8 ORBITAL MOTION / MOUVEMENT ORBITAL / MOVIMIENTO ORBITAL Fig. 7 A B A - Dust bag (sac à poussière, saco captapolvo) B -Zipper (ermeture à glissière, cremallera) Fig. 9 A A - Dust bag a ssembly (sac à poussière, conjunto del saco captapolvo) A B A - Dust vacuum - Ryobi P440 | Operation Manual 2 - Page 28
/18 VOLT 1/4 SHEET SANDER MANUEL D'UTILISATION/PONCEUSE 1/4 DE FEUILLE DE 18V DE MANUAL DEL OPERADOR/LIJADORA DE 1/4 DE HOJA DE DE 18V DE P440/P440VN To request service, purchase replacement parts, locate an Authorized Service Center and obtain Customer or Technical Support: Visit www.ryobitools
-
 1
1 -
 2
2 -
 3
3 -
 4
4 -
 5
5 -
 6
6 -
 7
7 -
8
-
9
-
10
-
11
-
12
-
13
-
14
-
15
-
16
-
17
-
18
-
19
-
20
-
21
-
22
-
23
-
24
-
25
-
26
-
27
-
28
 |
 |
OPERATOR’S MANUAL
MANUEL D’UTILISATION
MANUAL DEL OPERADOR
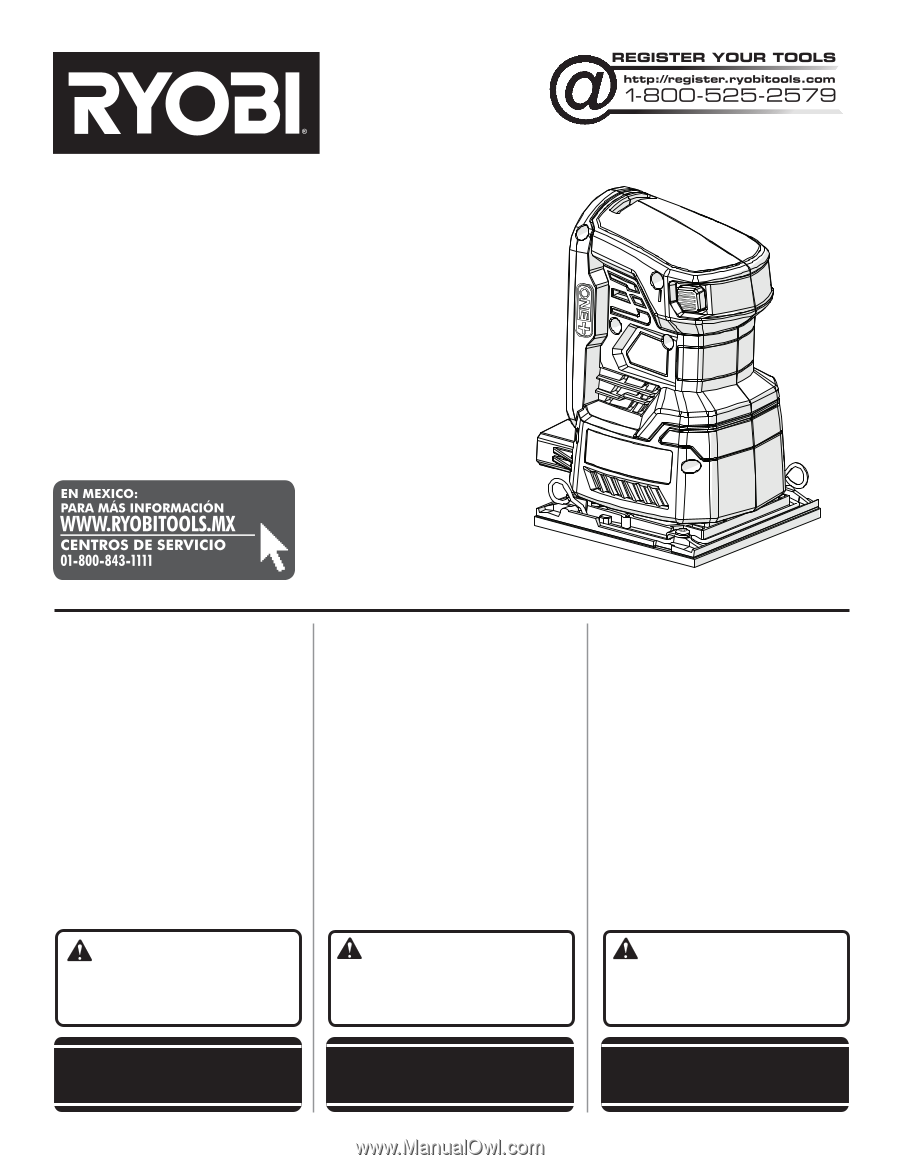
18 VOLT 1/4 SHEET SANDER
PONCEUSE 1/4 DE FEUILLE
LIJADORA DE 1/4 DE HOJA
P440/P440VN
WARNING:
To reduce the
risk of injury, the user must read and
understand the operator’s manual
before using this product.
SAVE THIS MANUAL FOR
FUTURE REFERENCE
ADVERTENCIA:
Para reducir
el riesgo de lesiones, el usuario debe leer
y comprender el manual del operador
antes de usar este producto.
AVERTISSEMENT :
Pour
réduire les risques de blessures,
l’utilisateur doit lire et veiller à bien
comprendre le manuel d’utilisation avant
d’employer ce produit.
GUARDE ESTE MANUAL
PARA FUTURAS CONSULTAS
CONSERVER CE MANUEL
POUR FUTURE RÉFÉRENCE
TABLE OF CONTENTS
****************
General Power Tool Safety
Warnings
.........................................
2-3
Sander Safety Warnings
.....................
4
Symbols
..............................................
5
Features
..............................................
6
Assembly
............................................
6
Operation
.........................................
6-8
Maintenance
.......................................
9
Accessories
........................................
9
Illustrations
..................................
10-11
Parts Ordering / Service
.....
Back Page
TABLE DES MATIÈRES
****************
Avertissements de sécurité relatives
aux outils électriques
......................
2-3
Avertissements de sécurité relatifs
au ponceuse
......................................
4
Symboles
............................................
5
Caractéristiques
.................................
6
Assemblage
........................................
6
Utilisation
.........................................
6-8
Entretien
.............................................
9
Accessoires
........................................
9
Illustrations
..................................
10-11
Commande de pièces /
réparation
..........................
Page arrière
ÍNDICE DE CONTENIDO
****************
Advertencias de seguridad
para herramientas eléctricas
...........
2-3
Advertencias de seguridad
lijadora
...............................................
4
Símbolos
............................................
5
Características
...................................
6
Armado
...............................................
6
Funcionamiento
...............................
6-8
Mantenimiento
....................................
9
Accesorios
.........................................
9
Ilustraciones
................................
10-11
Pedidos de piezas /
servicio
..........................
Pág. posterior