Ryobi P561 Operator's Manual - Page 10
Operation
 |
View all Ryobi P561 manuals
Add to My Manuals
Save this manual to your list of manuals |
Page 10 highlights
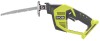
OPERATION WARNING: Do not allow familiarity with products to make you careless. Remember that a careless fraction of a second is sufficient to inflict serious injury. WARNING: Always wear eye protection with side shields marked to comply with ANSI Z87.1. Failure to do so could result in objects being thrown into your eyes resulting in possible serious injury. WARNING: Do not use any attachments or accessories not recommended by the manufacturer of this product. The use of attachments or accessories not recommended can result in serious personal injury. APPLICATIONS You may use this product for the purpose listed below: n Pruning branches on trees and shrubs This product will accept Ryobi One+ 18 V lithium-ion battery packs and Ryobi One+ 18 V nickel-cadmium battery packs. For complete charging instructions, refer to the Operator's Manual and safety rules for the battery packs and chargers for your models. BATTERY PROTECTION FEATURES Ryobi lithium-ion batteries are designed with features that protect the lithium-ion cells and maximize battery life. If the tool stops during use, release the trigger to reset and resume operation. If the tool still does not work, the battery needs to be recharged. WARNING: Always remove battery pack from your tool when you are assembling parts, making adjustments, transporting, cleaning, or when not in use. Removing battery pack will prevent accidental starting that could cause serious personal injury. TO INSTALL/REMOVE BATTERY PACK See Figure 2. To install: Insert the battery pack into the product as shown. Make sure the latches on each side of the battery pack snap into place and the battery pack is secured before beginning operation. To remove: Depress the latches on each side of the battery pack. Remove the battery pack from the tool. WARNING: Battery products are always in operating condition. Therefore, the switch should always be locked when not in use or carrying at your side. TO INSTALL/REMOVE BLADE See Figure 3. Remove the battery pack from the pruner. Rotate the blade clamp counterclockwise before installing or removing blade and hold to open. Insert blade until it is fully seated. Release the blade clamp to secure. To remove the blade, rotate the blade clamp counter clockwise and hold. LOCK-OUT BUTTON See Figure 4. The pruner is equipped with a lock-out button which reduces the possibility of accidental starting. The lock-out button is located on the handle above the switch trigger. You must depress the lock-out button in order to pull the switch trigger. The lock-out button resets each time the trigger is released. You can depress the lock-out button from either the left or right side. 8 - English
-
 1
1 -
2
-
3
-
4
-
 5
5 -
 6
6 -
 7
7 -
 8
8 -
 9
9 -
 10
10 -
 11
11 -
 12
12 -
 13
13 -
 14
14 -
 15
15 -
16
-
17
-
18
-
19
-
20
-
21
-
22
-
23
-
24
-
25
-
26
-
27
-
28
-
29
-
30
-
31
-
32
-
33
-
34
 |
 |
