Ryobi P848 User Manual - Page 5
Operation
 |
View all Ryobi P848 manuals
Add to My Manuals
Save this manual to your list of manuals |
Page 5 highlights
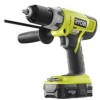
OPERATION CHARGING BATTERIES See Figure 5, page 7. Battery packs are shipped in a low charge condition to prevent possible problems. Therefore, you should charge them before first use. If the charger does not charge your battery pack under normal circumstances, return both the battery pack and charger to your nearest repair center for electrical check. Charge time is approximately 5 hours and is dependent upon the type of battery pack. Make sure the power supply is normal household voltage, 120 volts, AC only, 60 Hz. Connect the charger to a power supply. With the battery installed, place the tool in the wallmounted charger by aligning the raised ribs on the tool housing with the grooves in the charger's cradle. Slide the tool down until it is fully seated in the cradle. Once the tool is seated, the charger will provide charge for approximately 5 hours. The battery pack may become slightly warm to the touch while charging. This is normal and does not indicate a problem. After charging is complete, the charger will enter into Energy Save mode. Charger will periodically wake from Energy Save mode to ensure the battery pack remains in a fully charged state. To remove the tool from the charger, lift the tool up and away from the charger. CHARGING A HOT BATTERY PACK When using a tool continuously, the battery pack may become hot. A tool with a hot battery pack may be placed directly onto the charger but charging will not begin until the battery temperature cools to within acceptable temperature range. When the battery pack cools, the charger will automatically begin charging. CHARGING A COLD BATTERY PACK A tool with a cold battery pack may be placed directly onto the charger but charging will not begin until the battery temperature warms to within acceptable temperature range When the battery pack warms, the charger will automatically begin charging. NOTE: MAINTENANCE INFORMATION BEGINS ON PAGE 6 AFTER FRENCH AND SPANISH LANGUAGE SECTIONS. ILLUSTRATIONS START ON PAGE 7. 5
-
 1
1 -
 2
2 -
 3
3 -
 4
4 -
 5
5 -
 6
6 -
 7
7 -
 8
8 -
 9
9 -
 10
10 -
 11
11 -
12
-
13
-
14
-
15
-
16
-
17
-
18
-
19
-
20
 |
 |
