Ryobi RS290G User Manual - Page 5
Assembly, Operation - tools
 |
View all Ryobi RS290G manuals
Add to My Manuals
Save this manual to your list of manuals |
Page 5 highlights
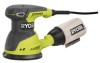
ASSEMBLY WARNING: Do not use this product if it is not completely assembled or if any parts appear to be missing or damaged. Use of a product that is not properly and completely assembled or with damaged or missing parts could result in serious personal injury. WARNING: Do not attempt to modify this product or create accessories not recommended for use with this product. Any such alteration or modification is misuse and could result in a hazardous condition leading to possible serious personal injury. If any parts are damaged or missing, please call 1-800-525-2579 for assistance. OPERATION WARNING: Do not allow familiarity with products to make you careless. Remember that a careless fraction of a second is sufficient to inflict severe injury. WARNING: Always remove battery pack from the tool when you are assembling parts, making adjustments, cleaning, or when not in use. Removing battery pack will prevent accidental starting that could cause serious personal injury. WARNING: Always wear eye protection with side shields marked to comply with ANSI Z87.1. Failure to do so could result in objects being thrown into your eyes, resulting in possible serious injury. APPLICATIONS You may use this tool for the purposes listed below: Polishing and buffing cars, boats, RVs, personal watercraft, motorcycles, hardwood floors, and large furniture WARNING: Battery tools are always in operating condition. Therefore, switch should always be in the OFF ( O ) position when not in use or carrying at your side, when installing or removing the battery pack, and when installing or removing accessories. TO INSTALL / REMOVE BATTERY PACK See Figure 1, page 8. To install: Make sure the power switch is in the OFF ( O ) position. Place the battery pack in the tool. Make sure the latches on each side of the battery pack snap into place and the battery pack is secured in the tool before beginning operation. To remove: Put the power switch in the OFF ( O ) position and depress the latches. TURNING THE BUFFER / POLISHER ON/OFF See Figure 2, page 8. To start the buffer/polisher, place the power switch in the ON ( l ) position. To stop the buffer/polisher, place the power switch in the OFF ( O ) position. The tool's rotating base moves in random orbital motion. The orbit diameter is 1/2 in. PREPARE THE SURFACE For best results, the surface should be clean and dry. Most high-gloss surfaces can be cleaned with a mild soap and water solution. For removal of stubborn dirt such as road tar, grease, and bug stains, you can use a mild ammonia solution such as that used in glass cleaners. Before using any cleaning product, check the label for recommended applications and follow the directions for use. Never apply cleaner directly onto surface to be polished. Apply to a clean cloth then use the cloth to clean the surface. Do not use any type of abrasive cleanser as it may damage or scratch the surface. 5 - English
-
 1
1 -
 2
2 -
 3
3 -
 4
4 -
 5
5 -
 6
6 -
 7
7 -
 8
8 -
 9
9 -
 10
10 -
 11
11 -
12
-
13
-
14
-
15
-
16
-
17
-
18
-
19
-
20
-
21
-
22
-
23
-
24
 |
 |
