Ryobi RY13050 Operator's Manual - Page 12
Operation
 |
View all Ryobi RY13050 manuals
Add to My Manuals
Save this manual to your list of manuals |
Page 12 highlights
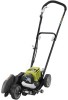
OPERATION WARNING: Do not allow familiarity with this product to make you careless. Remember that a careless fraction of a second is sufficient to inflict serious injury. WARNING: Always wear eye protection with side shields marked to comply with ANSI Z87.1. Failure to do so could result in objects being thrown into your eyes, resulting in possible serious injury. WARNING: Do not use any attachments or accessories not recommended by the manufacturer of this product. The use of attachments or accessories not recommended can result in serious personal injury. APPLICATIONS You may use this product for the purpose listed below: Edging around walkways, curbing, flower beds and other similar areas. FUELING AND REFUELING THE EDGER Clean surface around fuel cap to prevent contamination. Loosen fuel cap slowly. Rest the cap on a clean surface. Carefully pour fuel into the tank. Avoid spillage. Prior to replacing the fuel cap, clean and inspect the gasket. Immediately replace fuel cap and hand tighten. Wipe up any fuel spillage. NOTE: It is normal for smoke to be emitted from a new engine after first use. WARNING: Always shut off engine before fueling. Never add fuel to a machine with a running or hot engine. Move at least 30 ft. from refueling site before starting engine. Do not smoke and stay away from open flames and sparks. Failure to safely handle fuel could result in serious personal injury. OXYGENATED FUELS DO NOT USE E85 FUEL. IT WILL VOID YOUR WARRANTY. NOTE: Fuel system damage or performance problems resulting from the use of an oxygenated fuel containing more than the percentages of oxygenates stated below are not covered under warranty. Ethanol. Gasoline containing up to 10% ethanol by volume (commonly referred to as E10) or 15% ethanol by volume (commonly referred to as E15) are acceptable. E85 is not. CAUTION: Attempting to start the engine before it has been properly filled with lubricant will result in equipment failure. ADDING/CHECKING ENGINE LUBRICANT See Figure 5. Engine lubricant has a major influence on engine performance and service life. This unit is shipped with a 20W50 engine lubricant to assist in the break-in period. For best operating performance, continuing to use 20W50 engine lubricant is recommended, however, SAE 30, 10W30, or 10W40 are all acceptable lubricants to use in this product. Always use a 4-stroke engine lubricant that meets or exceeds the requirements for API service classification SJ. Check lubricant level before each use. NOTE: Non-detergent or 2-stroke engine lubricants will damage the engine and should not be used. To add engine lubricant: Remove the cap and seal from lubricant bottle pro- vided. Unscrew the oil cap/dipstick and remove. Using the funnel provided, add entire bottle of engine lubricant through oil fill hole. Reinstall the oil cap/dipstick and secure. To check engine lubricant level: Place unit on a flat surface. Wipe dipstick clean and re-seat in hole; do not rethread. Remove dipstick again and check lubricant level. Lubricant level should fall within the hatched area on the dipstick. If level is low, add engine lubricant until the fluid level rises to the upper portion of the hatched area on the dipstick. Replace and secure the oil cap/dipstick. CAUTION: Do not overfill. Overfilling the crankcase may cause excessive smoke, oil loss, and engine damage. 8 - English
-
 1
1 -
2
-
3
-
4
-
5
-
6
-
 7
7 -
 8
8 -
 9
9 -
 10
10 -
 11
11 -
 12
12 -
 13
13 -
 14
14 -
 15
15 -
 16
16 -
 17
17 -
18
-
19
-
20
-
21
-
22
-
23
-
24
-
25
-
26
-
27
-
28
-
29
-
30
-
31
-
32
-
33
-
34
-
35
-
36
-
37
-
38
-
39
-
40
-
41
-
42
-
43
-
44
-
45
-
46
-
47
-
48
-
49
-
50
-
51
-
52
 |
 |
