Ryobi RY42WB User Manual - Page 10
Operation
 |
View all Ryobi RY42WB manuals
Add to My Manuals
Save this manual to your list of manuals |
Page 10 highlights
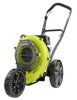
OPERATION APPLICATIONS You may use this product for the purposes listed below: Clearing leaves and other debris from your lawn Keeping decks and driveways free from leaves and pine needles ETHANOL-BLENDED FUELS NOTICE: Do not use E15 or E85 fuel in this product. It is a violation of federal law and will damage the unit and void your warranty. Only use unleaded gasoline containing up to 10% ethanol. FUELING AND REFUELING WARNING: Gasoline and its vapors are highly flammable and explosive. To prevent serious personal injury and property damage, handle it with care. Keep away from ignition sources and open flames, handle outdoors only, do not smoke and wipe up spills immediately. FUEL MIXTURE This product is powered by a 2-cycle engine and requires pre-mixing gasoline and 2-cycle lubricant. Pre-mix unleaded gasoline and 2-cycle engine lubricant in a clean container approved for gasoline. DO NOT mix quantities larger than usable in a 30-day period. Recommended fuel: This engine is certified to operate on unleaded gasoline intended for automotive use. NOTE: We recommend you use Ethanol Shield 2-cycle lubricant or an equivalent high-quality synthetic 2-cycle lubricant in this product. Mix at 2.6 oz. per gallon (US). Do not use automotive lubricant or 2-cycle outboard lubricant. HIGH QUALITY 2-CYCLE ENGINE LUBRICANT GASOLINE LUBRICANT 1.0 gal. (US) (3.8 liter) 2.5 gal. (US) (9.5 liter) 2.6 oz. (76 ml) 6.4 oz. (189 ml) FILLING TANK Clean surface around fuel cap to prevent contamination. Loosen fuel cap slowly. Rest the cap on a clean surface. Carefully pour fuel mixture into the tank. Avoid spillage. Prior to replacing the fuel cap, clean and inspect the gasket. Immediately replace fuel cap and hand tighten. Wipe up any fuel spillage. NOTE: It is normal for smoke to be emitted from a new engine after first use. WARNING: Always shut off engine before fueling. Never remove fuel cap or add fuel to a machine with a running or hot engine. Make sure the unit is sitting on a flat, level surface and only add fuel outdoors. If the engine is hot, let the unit cool for at least five minutes before adding fuel. After fueling, immediately replace fuel cap and tighten securely. Move at least 30 ft. from refueling site before starting engine. Do not smoke and stay away from open flames and sparks! Failure to follow these instructions could result in a fire and cause serious personal injury. STARTING AND STOPPING See Figures 4 - 6 Blower should be placed on a flat, bare surface for starting. Slowly press the primer bulb 10 times. NOTE: After the 7th press, fuel should be visible in the primer bulb. If it is not, continue to press the primer until you see fuel in the bulb. Set the choke lever to the FULL CHOKE position. Squeeze the throttle trigger or set the cruise control lever to the full throttle position. Pull the starter grip and rope sharply until engine attempts to run (no more than 4 pulls). Set the choke lever to the HALF CHOKE position. Pull the starter grip and rope until the engine runs. Do not pull the starter grip and rope more than six (6) times. NOTE: If the engine does not start, return to the FULL CHOKE position and repeat the steps that follow. Allow the engine to run for 15 seconds, then set the choke lever to the RUN position. TO STOP THE ENGINE: To stop the engine, depress the STOP switch to the stop position " ". HOT RESTART OF THE ENGINE: Set the choke lever to the RUN position. Squeeze the throttle trigger or set the cruise control lever to the full throttle position to start a hot engine. Pull the starter grip and rope until the engine runs. IF ASSISTANCE IS REQUIRED FOR THIS PRODUCT: Do not return this product to the retail store where it was purchased. Please call our Customer Service Department for any issues you may have. For Help Call: 1-800-860-4050 8 - English
-
 1
1 -
2
-
3
-
4
-
 5
5 -
 6
6 -
 7
7 -
 8
8 -
 9
9 -
 10
10 -
 11
11 -
 12
12 -
 13
13 -
 14
14 -
 15
15 -
16
-
17
-
18
-
19
-
20
-
21
-
22
-
23
-
24
-
25
-
26
-
27
-
28
-
29
-
30
-
31
-
32
-
33
-
34
-
35
-
36
-
37
-
38
-
39
-
40
-
41
-
42
 |
 |
