Ryobi RY43161 Operation Manual - Page 12
Connecting To Power Supply, Starting And Stopping, Adjusting Telescoping Pole
 |
View all Ryobi RY43161 manuals
Add to My Manuals
Save this manual to your list of manuals |
Page 12 highlights
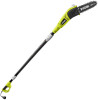
OPERATION CONNECTING TO POWER SUPPLY See Figure 5. This product is designed with a cord retainer that prevents the extension cord from being pulled loose while using. n Form a loop with the end of the extension cord. n Insert loop portion of extension cord through opening in the bottom of the rear handle and place over cord retainer. n Slowly pull loop against cord retainer until the slack is removed. n Plug product into extension cord. NOTE: Failure to remove all excess cord slack from extension cord retainer could result in plug loosening from receptacle. NOTICE: Before each use, check to make sure that the chain is properly tensioned. A cold chain is correctly tensioned when there is no slack on the underside of the guide bar, the chain is snug, and it can be turned by hand without binding. During normal saw operation, the temperature of the chain increases. The drive links of a correctly tensioned warm chain will hang approximately .050 in. out of the bar groove. See the Chain Tension instructions in the Maintenance section of this manual to properly adjust the chain tension. STARTING AND STOPPING See Figure 5. To start the motor: n Connect the pole saw to power supply. n Place your thumb on the lock-out button and pull it completely towards you. n Fully depress the switch trigger. To stop the motor: n Release the switch trigger. LOCK-OUT BUTTON SWITCH TRIGGER CORD RETAINER COLLAR Fig. 5 Fig. 6 ADJUSTING TELESCOPING POLE See Figure 6. n Disconnect the pole saw from the power sup- ply. n Rotate the collar counterclockwise to loosen. n Push poles towards each other to shorten the pole or pull away from each other to lengthen the pole. NOTE: Extend the pole only to the length required to reach the limb being cut. Do not extend the handle above waist height. n When the desired length is achieved, rotate the collar clockwise to secure. NOTE: Adjust hand placement on the shaft of the pole saw to keep proper balance. Do not attempt to use the pole saw at a length which does not allow you to achieve proper footing and balance at all times. Page 12 - English
-
 1
1 -
2
-
3
-
4
-
5
-
6
-
 7
7 -
 8
8 -
 9
9 -
 10
10 -
 11
11 -
 12
12 -
 13
13 -
 14
14 -
 15
15 -
 16
16 -
 17
17 -
18
-
19
-
20
-
21
-
22
-
23
-
24
-
25
-
26
-
27
-
28
-
29
-
30
-
31
-
32
-
33
-
34
-
35
-
36
-
37
-
38
-
39
-
40
-
41
-
42
-
43
-
44
-
45
-
46
-
47
-
48
-
49
-
50
-
51
-
52
-
53
-
54
-
55
-
56
-
57
-
58
-
59
-
60
-
61
-
62
-
63
-
64
 |
 |
