Samsung 1200NF User Manual (user Manual) (ver.1.0) (English) - Page 10
Adjusting Your Monitor - resolution
 |
View all Samsung 1200NF manuals
Add to My Manuals
Save this manual to your list of manuals |
Page 10 highlights
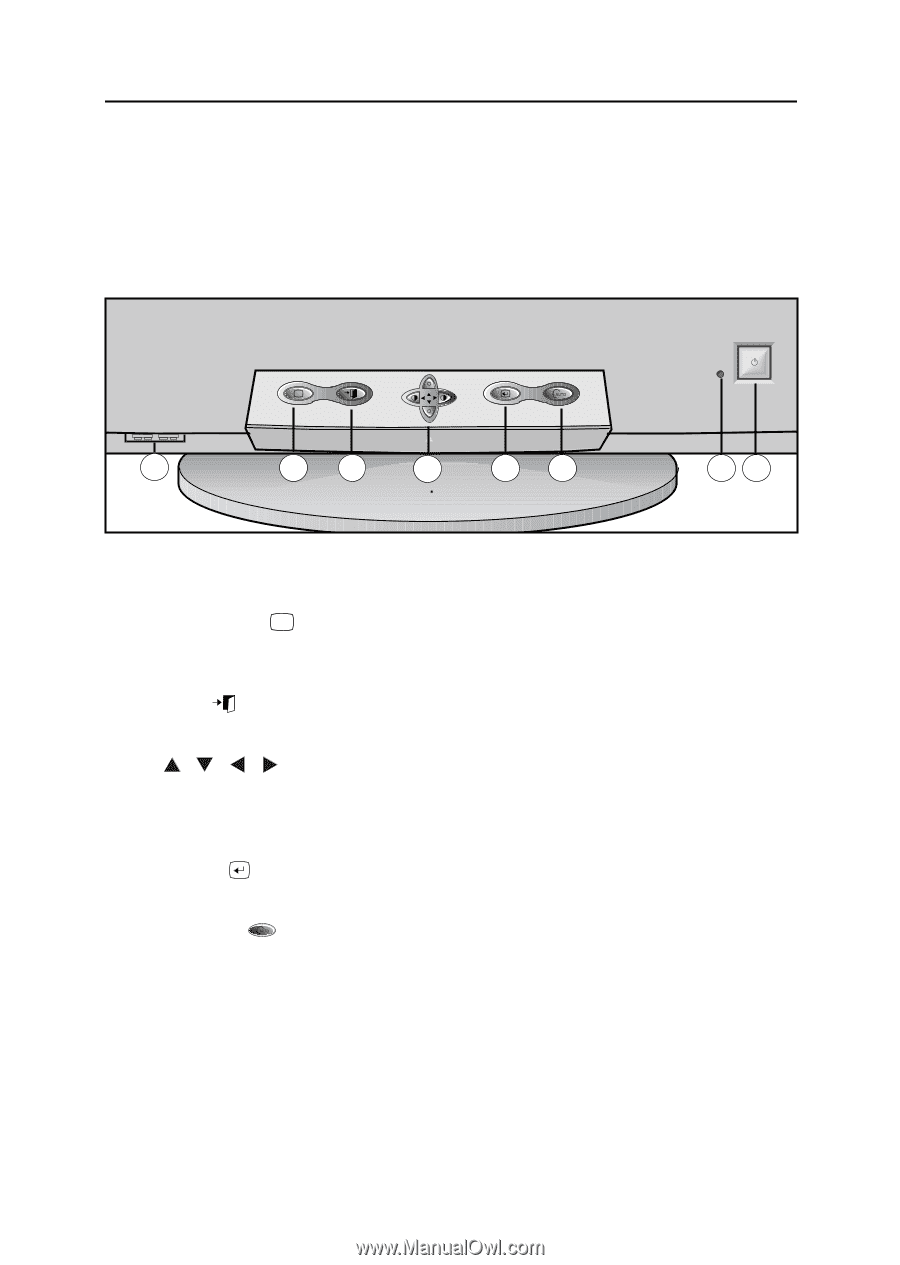
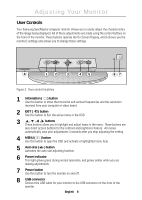
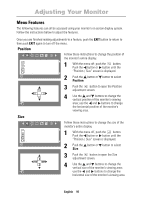
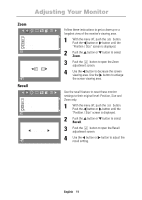
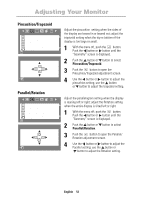
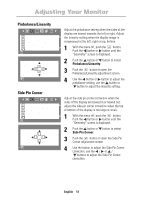
Adjusting Your Monitor User Controls Your Samsung SyncMaster computer monitor allows you to easily adjust the characteristics of the image being displayed. All of these adjustments are made using the control buttons on the front of the monitor. These buttons operate the On Screen Display, which shows you the monitor's settings and allows you to change those settings. i 8 12 3 45 67 Figure 3. User control locations 1 Information ( i ) button Use this button to show the horizontal and vertical frequencies and the resolution received from your computer or video board. 2 EXIT ( ) button Use this button to Exit the active menu or the OSD. 3 , , , buttons These buttons allow you to highlight and adjust items in the menu. These buttons are also direct access buttons for the contrast and brightness feature. All menus automatically save your adjustments 3 seconds after you stop adjusting the setting. 4 MENU ( ) button Use this button to open the OSD and activate a highlighted menu item. 5 Auto size ( ) button Activates the auto size adjusting function. 6 Power indicator This light glows green during normal operation, and grows amber when you are making adjustments. 7 Power button Use this button to turn the monitor on and off. 8 USB connector Connect the USB cable for your monitor to the USB connector on the front of the monitor. English 8
-
 1
1 -
2
-
3
-
4
-
 5
5 -
 6
6 -
 7
7 -
 8
8 -
 9
9 -
 10
10 -
 11
11 -
 12
12 -
 13
13 -
 14
14 -
 15
15 -
16
-
17
-
18
-
19
-
20
-
21
-
22
-
23
-
24
-
25
-
26
-
27
-
28
-
29
-
30
-
31
-
32
-
33
 |
 |