Samsung 2253LW Quick Guide (ENGLISH) - Page 4
Setup, tomized Key - monitor
 |
UPC - 729507802992
View all Samsung 2253LW manuals
Add to My Manuals
Save this manual to your list of manuals |
Page 4 highlights
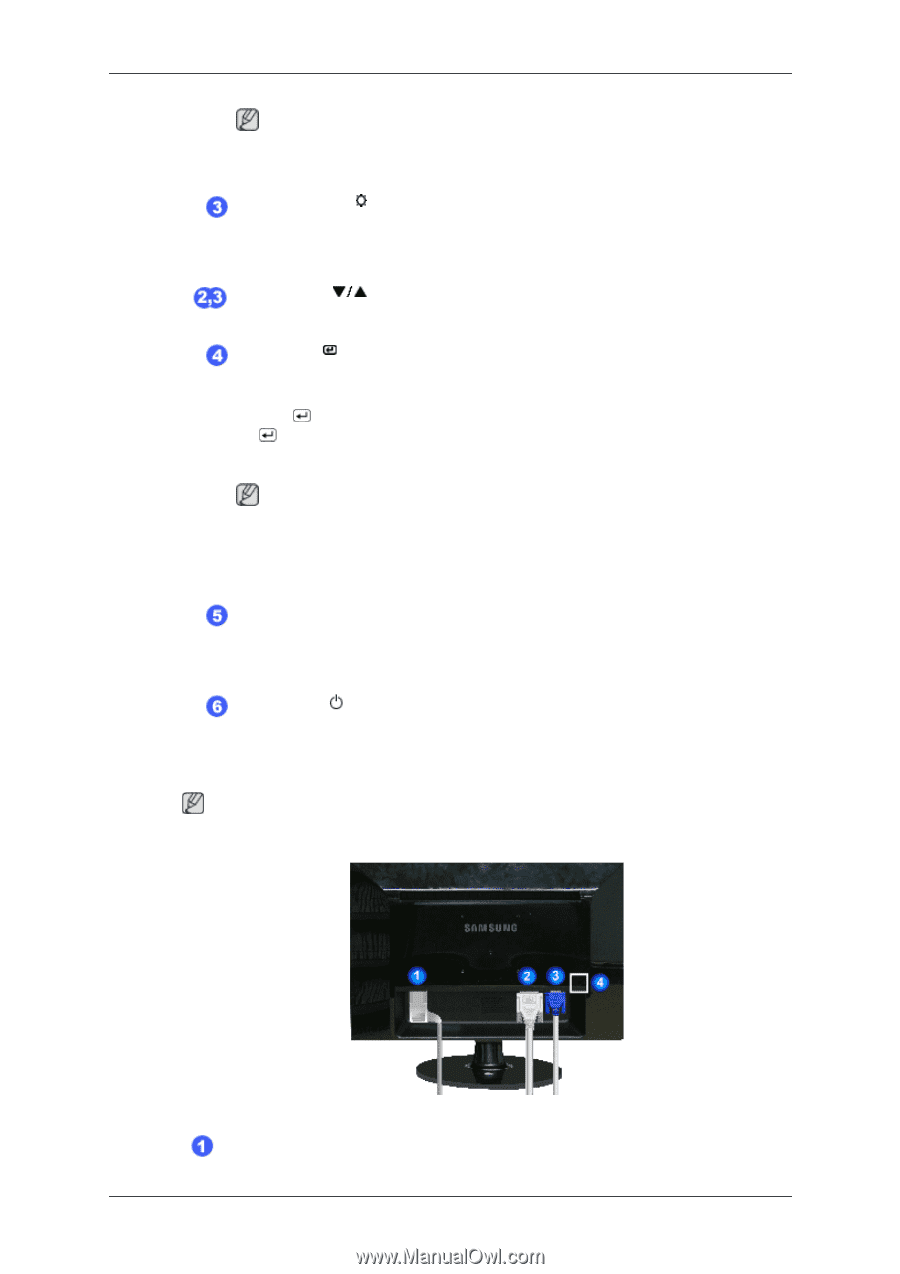
Introduction Rear Note You can configure the customized key for a required function via Setup > Customized Key. Brightness button [ ] When OSD is not on the screen, push the button to adjust brightness. >> Click here to see an animation clip Adjust buttons [ ] These buttons allow you to adjust items in the menu. Enter button [ ] / SOURCE button Activates a highlighted menu item. Push the ' /SOURCE', then selects the video signal while the OSD is off. (When the /SOURCE button is pressed to change the input mode, a message appears in the upper left of the screen displaying the current mode -- analog or digital input signal.) Note If you select the digital mode, you must connect your monitor to the graphic card's DVI port using the DVI cable. >> Click here to see an animation clip AUTO button Use this button for auto adjustment. >> Click here to see an animation clip Power button [ ] Use this button for turning the monitor on and off. Note The configuration at the back of the monitor may vary from product to product. POWER port 10
-
 1
1 -
 2
2 -
 3
3 -
 4
4 -
 5
5 -
 6
6 -
 7
7 -
 8
8 -
 9
9 -
 10
10 -
11
-
12
-
13
 |
 |