Samsung 733N User Manual (user Manual) (ver.1.0) (English)
Samsung 733N Manual
 |
View all Samsung 733N manuals
Add to My Manuals
Save this manual to your list of manuals |
Samsung 733N manual content summary:
- Samsung 733N | User Manual (user Manual) (ver.1.0) (English) - Page 1
SyncMaster 733N LCD Monitor User Manual - Samsung 733N | User Manual (user Manual) (ver.1.0) (English) - Page 2
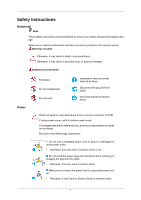
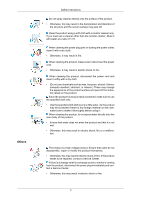
screen mode. The images here are for reference only, and are not applicable in all cases (or countries). Shortcut to Anti-Afterimage Instructions Do not use a damaged power cord or plug or a damaged or loose power outlet. • Otherwise, this may result in electric shock or fire. Do not touch the - Samsung 733N | User Manual (user Manual) (ver.1.0) (English) - Page 3
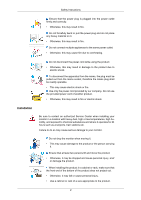
Safety Instructions Ensure that the power plug is plugged into the power outlet firmly and this may result in fire or electric shock. Installation Be sure to contact an authorized Service Center when installing your monitor in a location with heavy dust, high or low temperatures, high humidity, and - Samsung 733N | User Manual (user Manual) (ver.1.0) (English) - Page 4
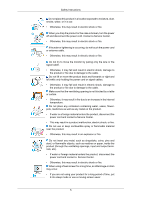
Instructions monitor carefully. • Failing to do so may damage the monitor. Do not place the front of the product on the floor. • Otherwise, this may result in damage to the screen display ) if children play with it. If the height of your monitor is adjustable, do not place any object or part of your - Samsung 733N | User Manual (user Manual) (ver.1.0) (English) - Page 5
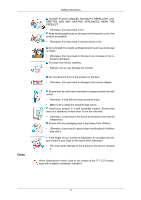
Instructions Do not spray cleaner directly onto the surface of the product. • Otherwise, this may result in the discoloration and distortion of the structure and the screen surface may peel off. Clean the product using a soft cloth with a monitor to be repaired, contact a Service Center. If there is - Samsung 733N | User Manual (user Manual) (ver.1.0) (English) - Page 6
do not touch the power cord or antenna cable. • Otherwise, this may result in electric shock or fire. Do not try to move the monitor by pulling the power cord and contact a Service Center. • Otherwise, this may result in electric shock or fire. When using a fixed screen for a long time, an - Samsung 733N | User Manual (user Manual) (ver.1.0) (English) - Page 7
Safety Instructions Set a resolution and frequency appropriate to the product. • Otherwise, your eyesight may be damaged. If you continually move closer to the product screen, your eyesight may be failing. To ease eye strain, take at least a five-minute break after every hour of using the monitor. - Samsung 733N | User Manual (user Manual) (ver.1.0) (English) - Page 8
on for a long time, the display panel becomes hot. Do not touch it. • Keep the small accessories the product. Good Postures When Using the Monitor When using the product, use it in screen should be between 45 to 50 cm. Look at the screen from a slightly higher location than the height of the screen - Samsung 733N | User Manual (user Manual) (ver.1.0) (English) - Page 9
Safety Instructions • Adjust the angle so that light is not reflected on the screen. • Place your arms perpendicular to your sides and allow your arms to be level with the back of the hand. • Keep your elbow at 90 - Samsung 733N | User Manual (user Manual) (ver.1.0) (English) - Page 10
Package Contents Note Please make sure the following items are included with your monitor. If any items are missing, contact your dealer. Contact a local dealer to buy optional items. Unpacking Manuals Monitor Quick Setup Guide Warranty Card (Not available in all locations) Cables User - Samsung 733N | User Manual (user Manual) (ver.1.0) (English) - Page 11
off and on. It will be displayed again. It can be displayed up to three (3) times. Make sure to adjust the resolution of your PC before reaching the maximum count. Note The resolution displayed on the screen is the optimal resolution for this product. Adjust your PC resolution so that it is the same - Samsung 733N | User Manual (user Manual) (ver.1.0) (English) - Page 12
glows blue during normal operation, and blinking blue once as the monitor saves your adjustments. Note See PowerSaver described in the manual for further information regarding power saving functions. For energy conservation, turn your monitor OFF when it is not needed or when leaving it unattended - Samsung 733N | User Manual (user Manual) (ver.1.0) (English) - Page 13
Lock may be different depending on its model. Using the Anti-Theft Kensington Lock 1. Insert the locking device into the Kensington slot on the Monitor and turn it in the locking direction . 2. Connect the Kensington Lock cable. 3. Fix the Kensington Lock to a desk or a heavy stationary object. Note - Samsung 733N | User Manual (user Manual) (ver.1.0) (English) - Page 14
Introduction Cable holding ring • Fix the cables using the holding ring, as shown in the figure. 13 - Samsung 733N | User Manual (user Manual) (ver.1.0) (English) - Page 15
card. • Connect the signal cable to the 15-pin, D-sub port on the back of your monitor. [RGB IN] Connected to a Macintosh. • Connect the monitor to the Macintosh computer using the D-sub con- nection cable. Note If the monitor and the computer are connected, you can turn them on and use them. 14 - Samsung 733N | User Manual (user Manual) (ver.1.0) (English) - Page 16
interface pad (Sold separately) 1. Turn off your monitor and unplug its power cord. 2. Lay the LCD monitor face-down on a flat surface with a cushion beneath it to protect the screen. 3. Remove four screws and then remove the stand from the LCD monitor. 4. Align the mounting interface pad with the - Samsung 733N | User Manual (user Manual) (ver.1.0) (English) - Page 17
follow the product installation instructions. • To mount the monitor on a wall, you should purchase the wall mounting kit that allows you to mount the monitor at least 10 cm away from the wall surface. • Contact the nearest Samsung Service Center for more information. Samsung Electronics will not be - Samsung 733N | User Manual (user Manual) (ver.1.0) (English) - Page 18
program file at the Internet web site shown here. Internet web site : http://www.samsung.com/ (Worldwide) Installing the Monitor Driver (Automatic) 1. Insert CD into the CD-ROM drive. 2. Click "Windows". 3. Choose your monitor model in the model list, then click the "OK" button. 4. If you can see - Samsung 733N | User Manual (user Manual) (ver.1.0) (English) - Page 19
www.samsung.com/ Installing the Monitor Driver (Manual) Microsoft® Windows Vista™, Operating System 1. Insert your Manual CD into your CD-ROM drive. 2. Click (Start) and "Control Panel". Then, double-click on "Appearance and Personal- ization". 3. Click "Personalization" and then "Display Settings - Samsung 733N | User Manual (user Manual) (ver.1.0) (English) - Page 20
If the message "Windows needs..." is displayed, as shown in the figure below, click "Continue". Note This monitor driver is under certifying MS logo, and this installation doesn't damage your system. The certified driver will be posted on Samsung Monitor homepage. 6. Click "Update Driver..." in the - Samsung 733N | User Manual (user Manual) (ver.1.0) (English) - Page 21
Using the Software 9. Select the model that matches your monitor from the list of monitor models on the screen, and click "Next". 10. Click "Close" → "Close" → "OK" → "OK" on the following screens displayed in sequence. Microsoft® Windows® XP Operating System 20 - Samsung 733N | User Manual (user Manual) (ver.1.0) (English) - Page 22
Panel" then click the "Appearance and Themes" icon. 3. Click "Display" icon and choose the "Settings" tab then click "Advanced...". 4. Click the "Properties" button on the "Monitor" tab and select "Driver" tab. 5. Click "Update Driver..." and select "Install from a list or..." then click "Next - Samsung 733N | User Manual (user Manual) (ver.1.0) (English) - Page 23
see following message window, then click the "Continue Anyway" button. Then click "OK" button. Note This monitor driver is under certifying MS logo, and this installation doesn't damage your system. The certified driver will be posted on Samsung Monitor homepage. http://www.samsung.com/ 9. Click the - Samsung 733N | User Manual (user Manual) (ver.1.0) (English) - Page 24
" button. 6. Choose "Display a list of the known drivers for this device so that I can choose a specific driver" then click "Next" and then click "Have disk". 7. Click the "Browse" button then choose A:(D:\Driver). 8. Click the "Open" button, then click "OK" button. 9. Choose your monitor model and - Samsung 733N | User Manual (user Manual) (ver.1.0) (English) - Page 25
screen is not normal, change to a different mode (lower mode of resolution, colors or frequency). Note If there is no Mode at All Display Modes, select the level of resolution and vertical frequency by referring to the Preset Timing Modes in the user guide. Linux Operating System To execute X-Window - Samsung 733N | User Manual (user Manual) (ver.1.0) (English) - Page 26
will be executed. Click Natural Color on the initial screen to install the Natural Color software. To install the program manually, insert the CD included with the Samsung monitor into the CD-ROM Drive, click the [Start] button of Windows and then select [Run...]. Enter D:\color \NCProSetup.exe and - Samsung 733N | User Manual (user Manual) (ver.1.0) (English) - Page 27
installation file. Note If the popup window to install the software for the main screen is not displayed, proceed with the installation using the not appear depending on specification of computer system or monitor. If that happens, press F5 Key. Installation Problems The installation of MagicTune™ - Samsung 733N | User Manual (user Manual) (ver.1.0) (English) - Page 28
Windows 2000 • Windows XP Home Edition • Windows XP Professional • Windows Vista™ It is recommended using MagicTune™ in Windows® 2000 or later. Hardware • 32 MB Memory the "Add or Remove Programs" screen, scroll down to find "MagicTune™." support for MagicTune™, FAQs (questions and answers) and software - Samsung 733N | User Manual (user Manual) (ver.1.0) (English) - Page 29
Direct Functions AUTO When the 'AUTO' button is pressed, the auto adjustment screen appears as shown in the animated screen on the center. Auto adjustment allows the monitor to self-adjust to the incoming Analog signal. The values of Fine, Coarse and Position are adjusted automatically. If auto - Samsung 733N | User Manual (user Manual) (ver.1.0) (English) - Page 30
Adjusting the Monitor This is the function that locks the OSD in order to keep You can customize key assignment for the Custom button according to your preferences. To view the operating screen displayed when pressing the [ ] button after configuring the customized key for a function, click the name - Samsung 733N | User Manual (user Manual) (ver.1.0) (English) - Page 31
Brightness Adjusting the Monitor When OSD is not on the screen, push the Brightness ( OSD Function ) button to adjust brightness Customized Key Display Time Off Timer Picture Brightness (Not available in MagicBright mode of Dynamic Contrast.) You can use the on-screen menus to change - Samsung 733N | User Manual (user Manual) (ver.1.0) (English) - Page 32
Adjusting the Monitor Contrast (Not available in MagicBright mode of Dynamic Contrast.) You can use the on-screen menus to change the contrast according to personal preference. ( Not available in MagicColor mode of Full and Intelligent. ) MENU MENU MagicBright Push the button to - Samsung 733N | User Manual (user Manual) (ver.1.0) (English) - Page 33
Adjusting the Monitor For is a new technology that Samsung has exclusively developed to improve digital image and to display natural color more clearly without The screen before applying MagicColor appears on the right and the screen after applying MagicColor appears on the left. • Full - Displays - Samsung 733N | User Manual (user Manual) (ver.1.0) (English) - Page 34
Color Tone Adjusting the Monitor The tone of the color can be changed and one of four modes can be selected. • Cool - Makes whites bluish. • Normal - Keeps whites white. • Warm - - Samsung 733N | User Manual (user Manual) (ver.1.0) (English) - Page 35
Aqua • Sepia • Off - This applies an achromatic color to the screen to adjust the screen effects. • Grayscale - The default colors of black and white are displayed. • Green - This applies the green color effect to a black and white screen. • Aqua - This applies the aqua color effect to a black - Samsung 733N | User Manual (user Manual) (ver.1.0) (English) - Page 36
Image Coarse Adjusting the Monitor Fine Removes noise such as vertical stripes. Coarse adjustment may move the screen image area. You may relocate it to the center using the horizontal control menu. MENU MENU Removes noise such as horizontal stripes. If the noise - Samsung 733N | User Manual (user Manual) (ver.1.0) (English) - Page 37
Adjusting the Monitor Changes the clearance of image. ( Not available in MagicColor mode of Full and Intelligent. ) MENU MENU H-Position Changes the horizontal position of the monitor's entire display. MENU MENU V-Position Changes the vertical position of the monitor's entire display. MENU MENU - Samsung 733N | User Manual (user Manual) (ver.1.0) (English) - Page 38
OSD Language Adjusting the Monitor You can choose one of nine languages. Note The language chosen affects only the language of the OSD. It has no effect on any software - Samsung 733N | User Manual (user Manual) (ver.1.0) (English) - Page 39
Display Time Adjusting the Monitor The menu will be automatically turned off if no adjustments are made for a certain time period. You can set the amount of time the menu - Samsung 733N | User Manual (user Manual) (ver.1.0) (English) - Page 40
the Monitor You can specify a function which will be activated when the Customized Key ( )is pressed. MENU MENU Off Timer The monitors will turn off automatically at the specified time. • Off • On MENU → , → MENU Information Shows a video source, display mode on the OSD screen. 39 - Samsung 733N | User Manual (user Manual) (ver.1.0) (English) - Page 41
Adjusting the Monitor MENU → , →MENU 40 - Samsung 733N | User Manual (user Manual) (ver.1.0) (English) - Page 42
and reconnect the video cable; then turn on both your computer and the monitor. If your monitor screen remains blank after using the previous procedure, check your video controller and computer system; your monitor is functioning properly. Warning Messages If there is something wrong with the input - Samsung 733N | User Manual (user Manual) (ver.1.0) (English) - Page 43
poor coloring, become noisy, and video mode not supported, etc. In this case, first check the source of the problem, and then contact the Service Center or your dealer. Judging the monitor's working condition If there is no image on the screen or a "Not Optimum Mode", "Recommended Mode 1280 x 1024 - Samsung 733N | User Manual (user Manual) (ver.1.0) (English) - Page 44
to the video card manual. The screen suddenly has become unbalanced. Q: Have you changed the video card or the driver? A: Adjust screen image position and size using the OSD. Q: Have you adjusted the resolution or frequency to the monitor? A: Adjust the resolution and frequency at the video - Samsung 733N | User Manual (user Manual) (ver.1.0) (English) - Page 45
video card manual to see if the Plug & Play (VESA DDC) function can be supported. A: Install the monitor driver according to the Driver Installation Instructions. Check when MagicTune™ does not function properly. Q: MagicTune™ feature is found only on PC (VGA) with Window OS that supports Plug and - Samsung 733N | User Manual (user Manual) (ver.1.0) (English) - Page 46
that video card support can vary, depending on the version of the driver used. (Refer to the computer or the video card manual for details.) Q: How can I adjusts the resolution? A: Windows XP: Set the resolution in the Control Panel → Appearance and Themes → Display → Settings. A: Windows ME/2000 - Samsung 733N | User Manual (user Manual) (ver.1.0) (English) - Page 47
ME/2000: Set the resolution at the Control Panel → Display → Screen Saver. Set the function in the BIOS-SETUP of the computer. (Refer to the Windows / Computer Manual). Q: How can I clean the outer case/LCD Panel? A: Disconnect the power cord and then clean the monitor with a soft cloth, using - Samsung 733N | User Manual (user Manual) (ver.1.0) (English) - Page 48
Specifications General General Model Name SyncMaster 733N LCD Panel Size Display area Pixel Pitch 17 inch (43 cm) 337.920 mm (H) x 270.336 mm (V) 0.264 mm (H) x 0.264 mm (V) Synchronization Horizontal Vertical 30 ~ 81 kHz 56 ~ 75 Hz Display Color 16.7M Resolution Optimum resolution 1280 x - Samsung 733N | User Manual (user Manual) (ver.1.0) (English) - Page 49
any problems. For example, the number of TFT-LCD sub pixels contained in this product are 3,932,160. Note Design and specifications are of time. The monitor automatically returns to normal operation when you press a key on the keyboard. For energy conservation, turn your monitor OFF when it is - Samsung 733N | User Manual (user Manual) (ver.1.0) (English) - Page 50
is the same as the following Preset Timing Modes, the screen will be adjusted automatically. However, if the signal differs, the screen may go blank while the power LED is on. Refer to the video card manual and adjusts the screen as follows. Display Mode IBM, 640 x 350 IBM, 640 x 480 IBM, 720 x 400 - Samsung 733N | User Manual (user Manual) (ver.1.0) (English) - Page 51
of time. PRODUCT INFORMATION (Image Retention Free) LCD Monitors and TVs may have image retention when switching from one image to another especially after displaying a stationary image for a long time. This guide is to demonstrate correct usage of LCD products in order to protect them from Image - Samsung 733N | User Manual (user Manual) (ver.1.0) (English) - Page 52
for 2 hours after 12 hours in use • Use a Screen saver if possible • Screen saver in one color or a moving image is recommended. • Set the Monitor to power off with the PC Display Properties Power Scheme. Suggestions for specific applications Ex) Airports, Transit Stations, Stock Markets, Banks, and - Samsung 733N | User Manual (user Manual) (ver.1.0) (English) - Page 53
the characters with movement. Ex) The best way to protect your monitor from Image retention is to set your PC or System to operate a Screen Saver program when you are not using it. Image retention may not occur when a LCD panel is operated under normal conditions. Normal conditions are defined as - Samsung 733N | User Manual (user Manual) (ver.1.0) (English) - Page 54
Information Our LCD Monitor satisfies ISO13406-2 Pixel fault Class II 53 - Samsung 733N | User Manual (user Manual) (ver.1.0) (English) - Page 55
MEXICO North America 1-800-SAMSUNG(726-7864) http://www.samsung.com 1-800-SAMSUNG(726-7864) http://www.samsung.com/ca 01-800-SAMSUNG (726-7864) http://www.samsung.com ARGENTINE BRAZIL Latin America 0800-333-3733 0800-124-421 http://www.samsung.com/ar http://www.samsung.com 4004-0000 CHILE - Samsung 733N | User Manual (user Manual) (ver.1.0) (English) - Page 56
8-10-800-500-55-500 8-800-502-0000 8-10-800-500-55-500 http://www.samsung.ee http://www.samsung.com/lv http://www.samsung.lt http://www.samsung.kz http://www.samsung.ru http://www.samsung.com http://www.samsung.uz AUSTRALIA CHINA HONG KONG INDIA Asia Pacific 1300 362 603 800-810-5858 010-6475 - Samsung 733N | User Manual (user Manual) (ver.1.0) (English) - Page 57
& Play Resolution The image on a monitor is composed of red, green and blue dots. The closer the dots, the higher the resolution. The distance between two dots of the same color is called the 'Dot Pitch'. Unit: mm The screen must be redrawn several times per second in order to create and display an - Samsung 733N | User Manual (user Manual) (ver.1.0) (English) - Page 58
shows the accuracy of the display. A high resolution is good for performing multiple tasks as more image information can be shown on the screen. Example: If the resolution is 1280 x 1024 , this means the screen is composed of 1280 horizontal dots (horizontal resolution) and 1024 vertical lines
-
 1
1 -
 2
2 -
 3
3 -
 4
4 -
 5
5 -
 6
6 -
 7
7 -
8
-
9
-
10
-
11
-
12
-
13
-
14
-
15
-
16
-
17
-
18
-
19
-
20
-
21
-
22
-
23
-
24
-
25
-
26
-
27
-
28
-
29
-
30
-
31
-
32
-
33
-
34
-
35
-
36
-
37
-
38
-
39
-
40
-
41
-
42
-
43
-
44
-
45
-
46
-
47
-
48
-
49
-
50
-
51
-
52
-
53
-
54
-
55
-
56
-
57
-
58
 |
 |

SyncMaster 733N
LCD Monitor
User Manual